Lambert – Responsive Restaurant / Pub / Cafe WordPress Theme
- created: 2/08/2015
- latest update: 27/5/2017
- by: Cththemes
- themeforest.net/user/cththemes
- email: cththemes@gmail.com
Theme Overview
Welcome to Lambert – Responsive Restaurant / Pub / Cafe WordPress Theme
A "Lambert – Responsive Restaurant / Pub / Cafe WordPress Theme" is perfect if you like a clean and modern design.
Lambert is a clean and professional theme, perfect for Restaurant, Bakery, any food business and personal chef web sites. More features with 6 Homepages (Video , Carousel , Slideshow) – one and multi page version for versions for each option.
Finally thanks for selecting Lambert
Get started with Lambert
This documentation is briefly describe all of sections and themes options. I wish it is help you to customize your site what you want.
Theme Information
Get an overview of versions, file modifications and potential issues in Lambert theme.
Version:
You have to use WordPress version 3.9+ .
System Check:
The system check shows you all critical files or potential problems.
File permission: Check out the WordPress documentation for more information on file permissions.
PHP Version: Checks, if your theme runs on an unsupported/deprecated PHP version.
PHP Extensions: Checks, if these necessary PHP extensions are installed (JSON, DOM XML, Multibyte String).
Installation
Setting up a Lambert theme follows the standard WordPress installation procedure and works like with any other theme.
- Download WordPress from the WordPress website.
- Setup a new WordPress install.
- Install and activate your theme.
For more information in regard to installing the WordPress platform, please see the WordPress Codex WordPress documentation.
When you are ready to install a theme, you must first upload the theme files and then activate the theme itself. The theme files can be uploaded in two ways:
- WordPress Upload: Navigate to Appearance > Add New Themes > Upload. Browse, and select the zipped theme file (lambert.zip). Click Install Now and the theme will be uploaded and installed.
- FTP Upload: Using your FTP program, upload the non-zipped theme folder (lambert) into the /wp-content/themes/ folder on your server.
We recommand using the first method to prevent file permission issue.
Once the theme is uploaded, you need to activate it. Go to Appearance > Themes and activate your chosen theme.
For more detail on install and using a WordPress Theme please read this tutorial: Codex - Using Themes
Install Required and Recommanded Plugins
After activation the theme you see a submenu in your admin Appearance > Install Plugins. Click to checkbox and select to install then install all plugins and active plugins.
Setup a Demo package
Before you can get started with your Lambert theme and have it look as the demo, you first need to add content to WordPress. There are two way to import demo data for the theme.
Method 1: - Using One Click Demo Import plugin intergrated in Appearance menu.
When installed and activated the theme you can import demo data using One Click Import Demo Data by follow these steps:
- Log into your site as an administrator.
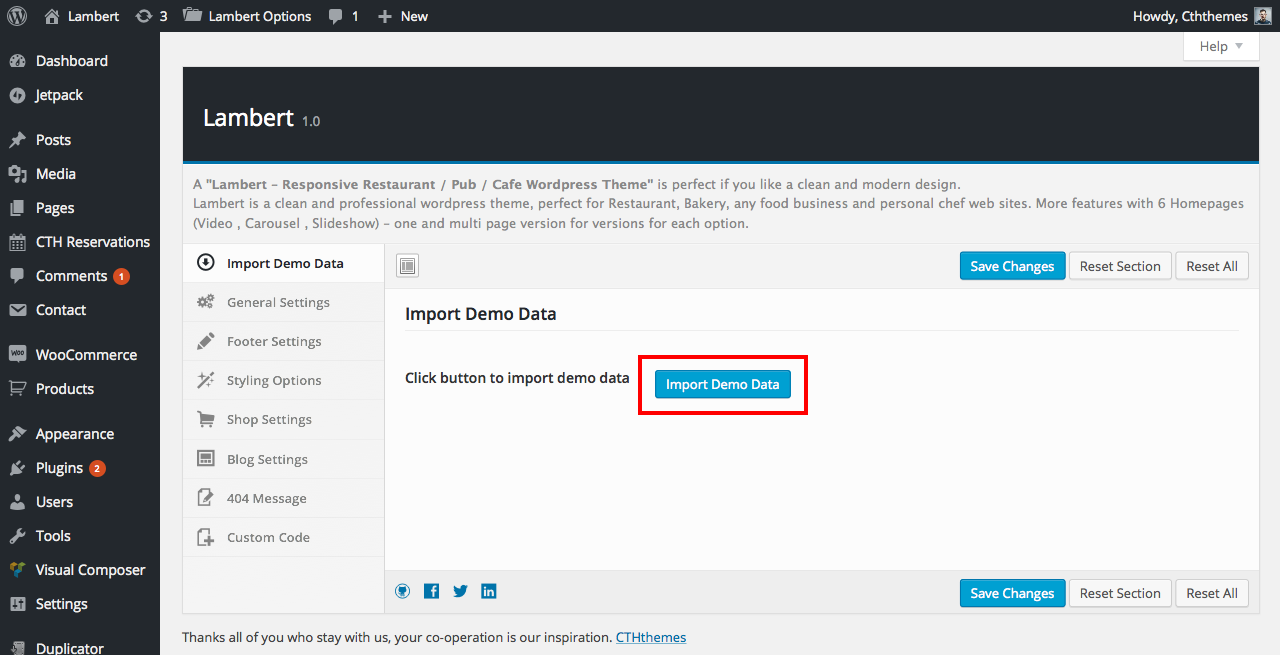
- Go to Appearance -> Import Demo Data admin menu.
- On Import Demo Data screen select data you want to import to your site then click to Import Demo Data button and wait until you get the success message.
With Full Demo Content selected you don't need follow Import Demo Widgets tutorial from Sidebars and Widgets section.
Method 2: - Using WordPress Importer plugin.
In your product folder there is a file name /Demo Content/lambert.wordpress.2015-08-02.xml, it is the demo data xml file that exported from our demo page. It will be used in WordPress Importer plugin to import demo data to your site.
To import from a WordPress export file into a WordPress blog follow these steps.
- Log into that blog as an administrator.
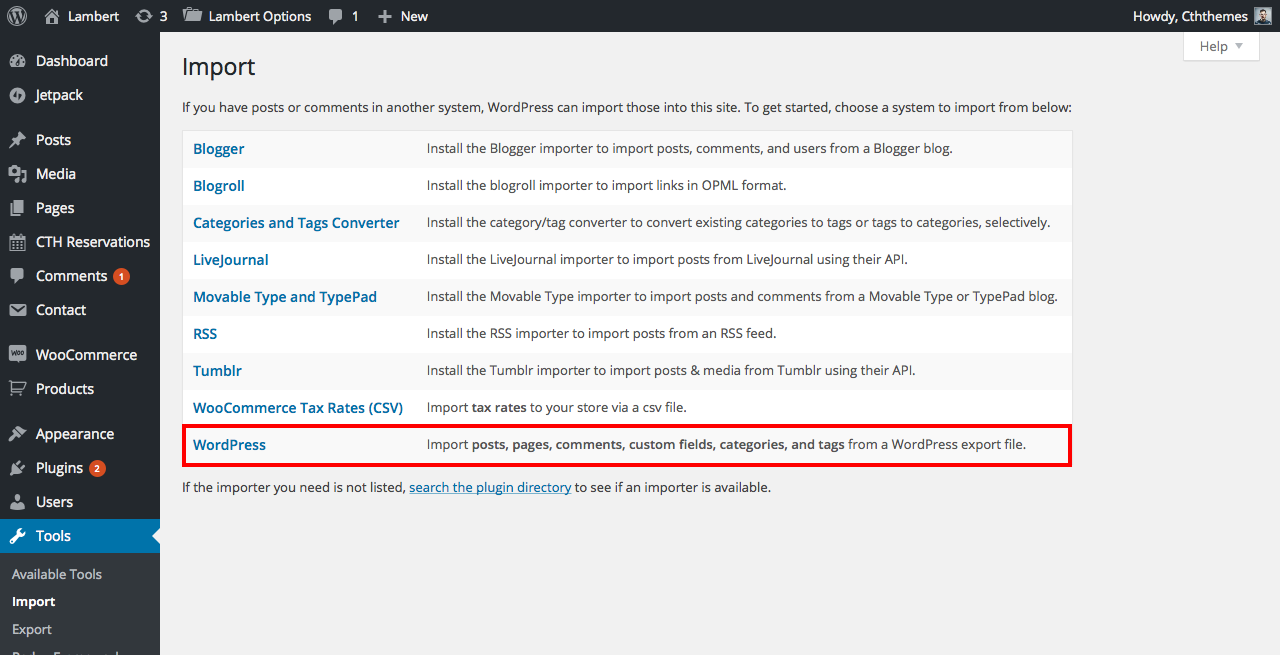
- Go to Tools > Import (or Manage > Import in 2.7 or older) in the blog's admin panels.
- Choose WordPress from the list. (You need install the plugin for the first time)
- Upload the file using the form provided on that page.
- You will first be asked to map the authors in this export file to users on the blog. For each author, you may choose to map to an existing user on the blog or to create a new user
- WordPress will then import each of the demo pages, posts, products, reservation, comments, categories and contact froms contained in this file into your blog.
After imported the demo content let setup your blog like our demo
To setting up your front page
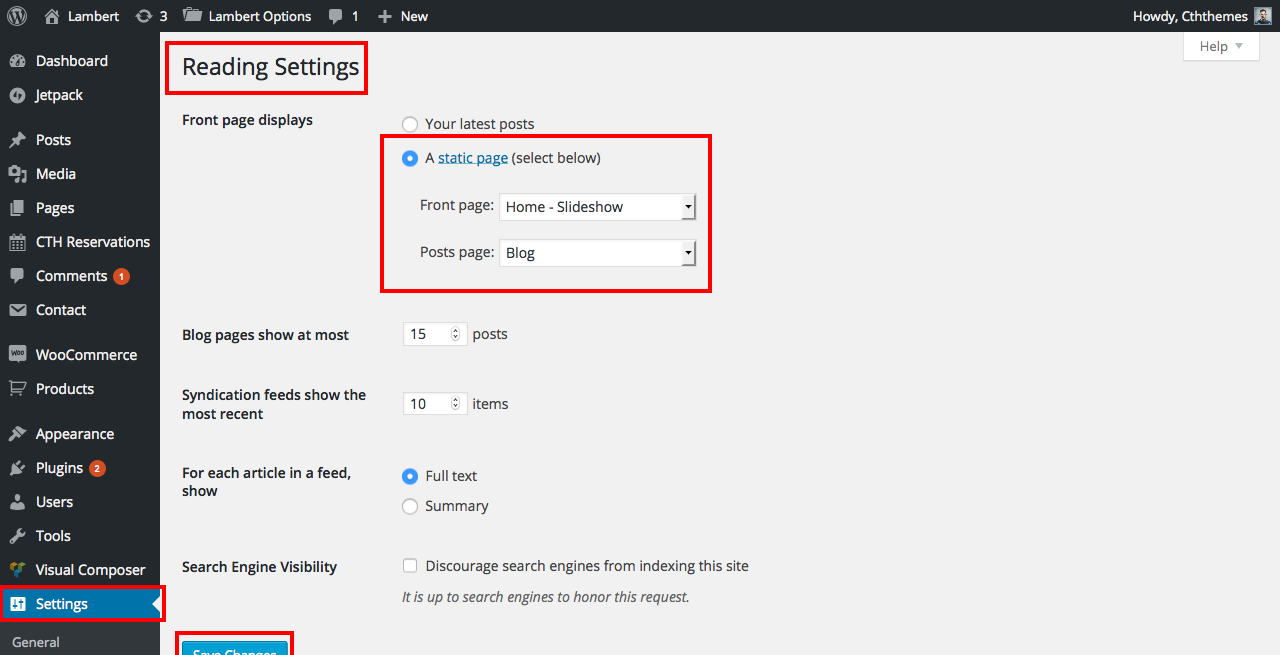
- Go to Settings > Reading in the blog's admin panels
-
In Front page displays option you will have two options
- Your latest posts - If select this your front page will look like our blog demo page (listing posts from your blog)
- A static page (select bellow) - Select one (Home - Slideshow) of our demo pages that imported to your blog before - Then your front page will look like our home demo page.
- Click Save Changes button
Domik Theme Setup Tutorial Video
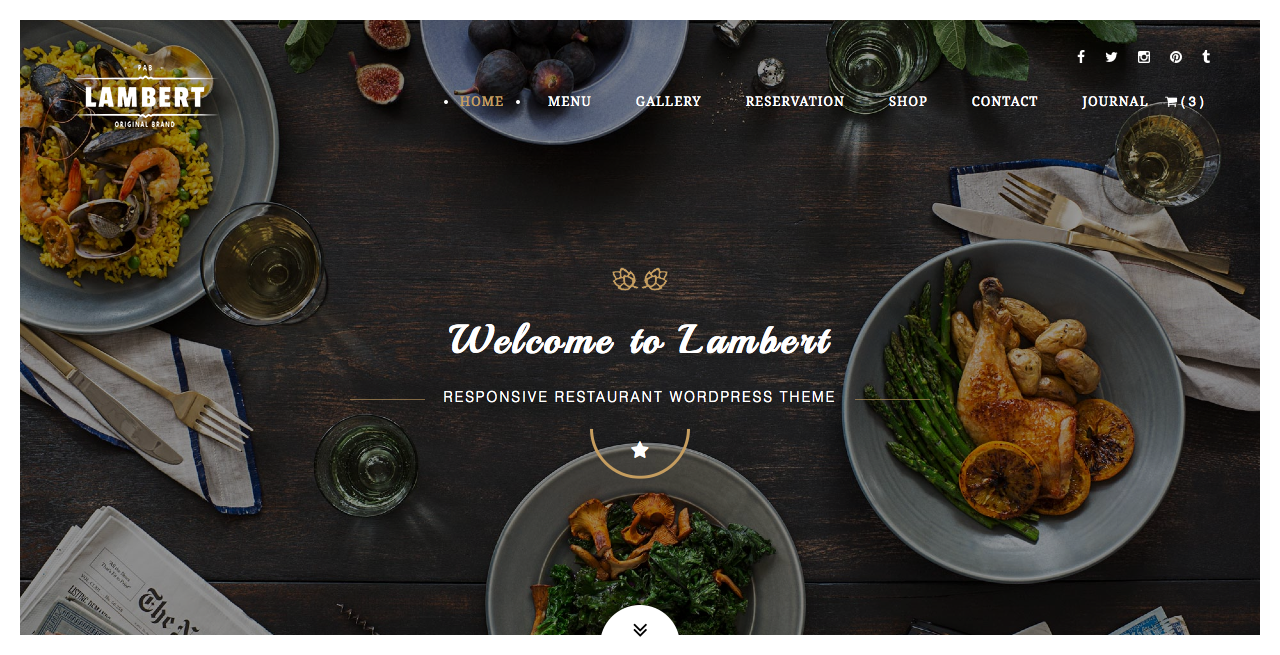
When done your font page will look like this:
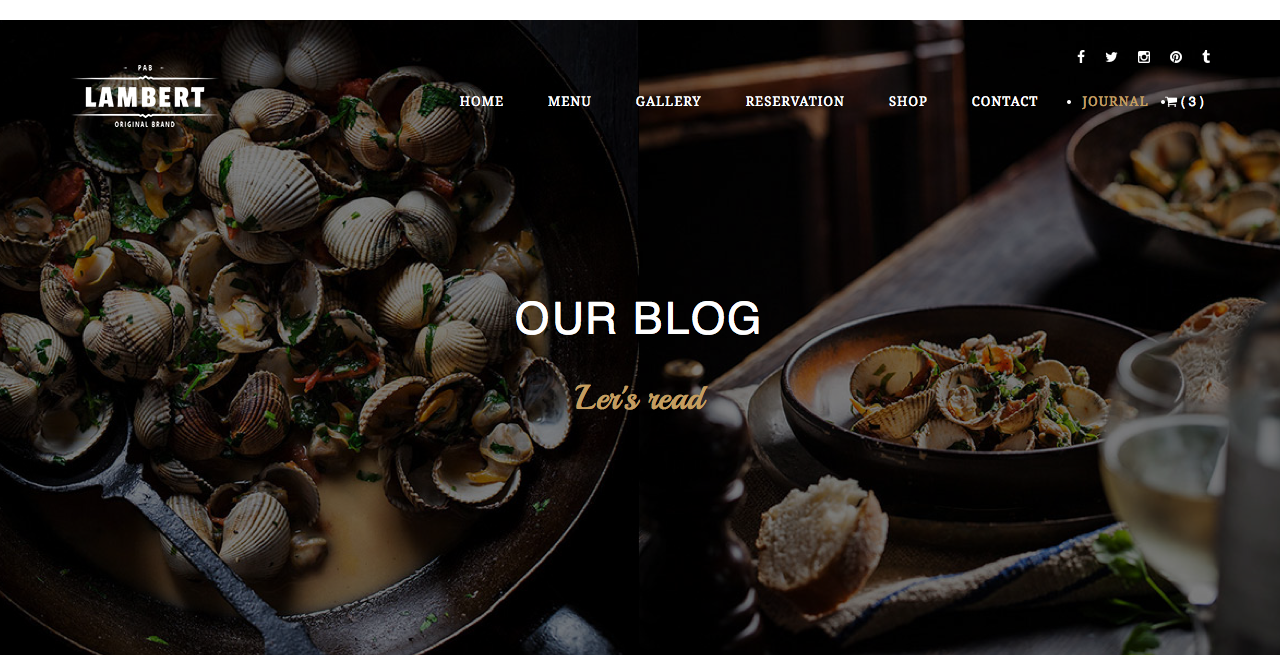
Or this for Your Latest posts option
For more details you can check this article:Creating a Static Front Page
Theme Features
Many of features has in our theme. Please see a look in total features.
- Visual Composer: Drag and Drop page builder
- Contact Form 7
- WPML Compatible
- Woocommerce Shop Ready
- Custom Reservation Manager plugin
- Sidebar and full width page
- Right or Left sidebar position
- Fully Responsive
- Retina Ready
- Bootstrap 3.3.2
- Much More ...
Setup navigation Menu
All our themes have support for Custom Navigation Menu, and here are quick instructions on how you can create a custom menu for your theme. http://codex.wordpress.org/Appearance_Menus_SubPanel
Building the menu
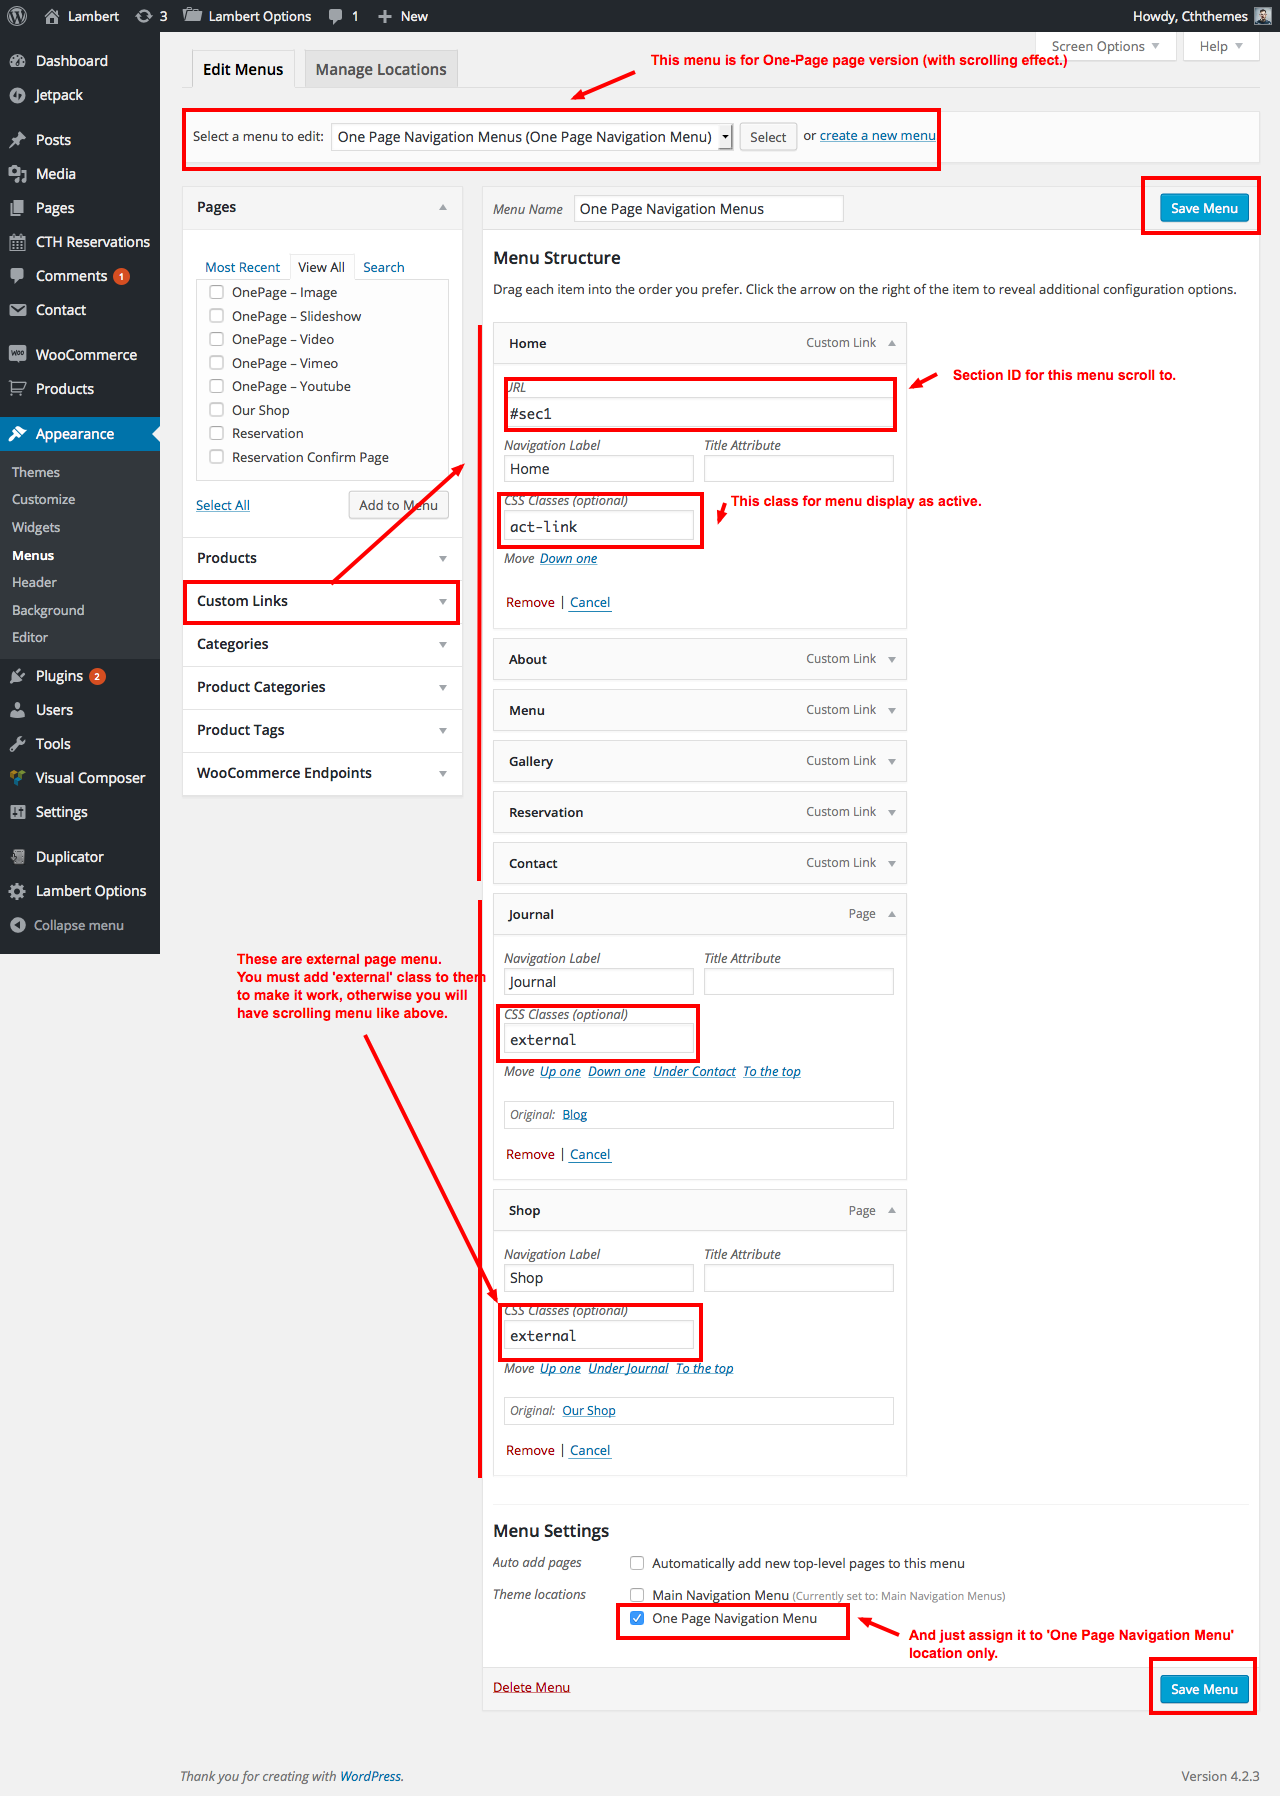
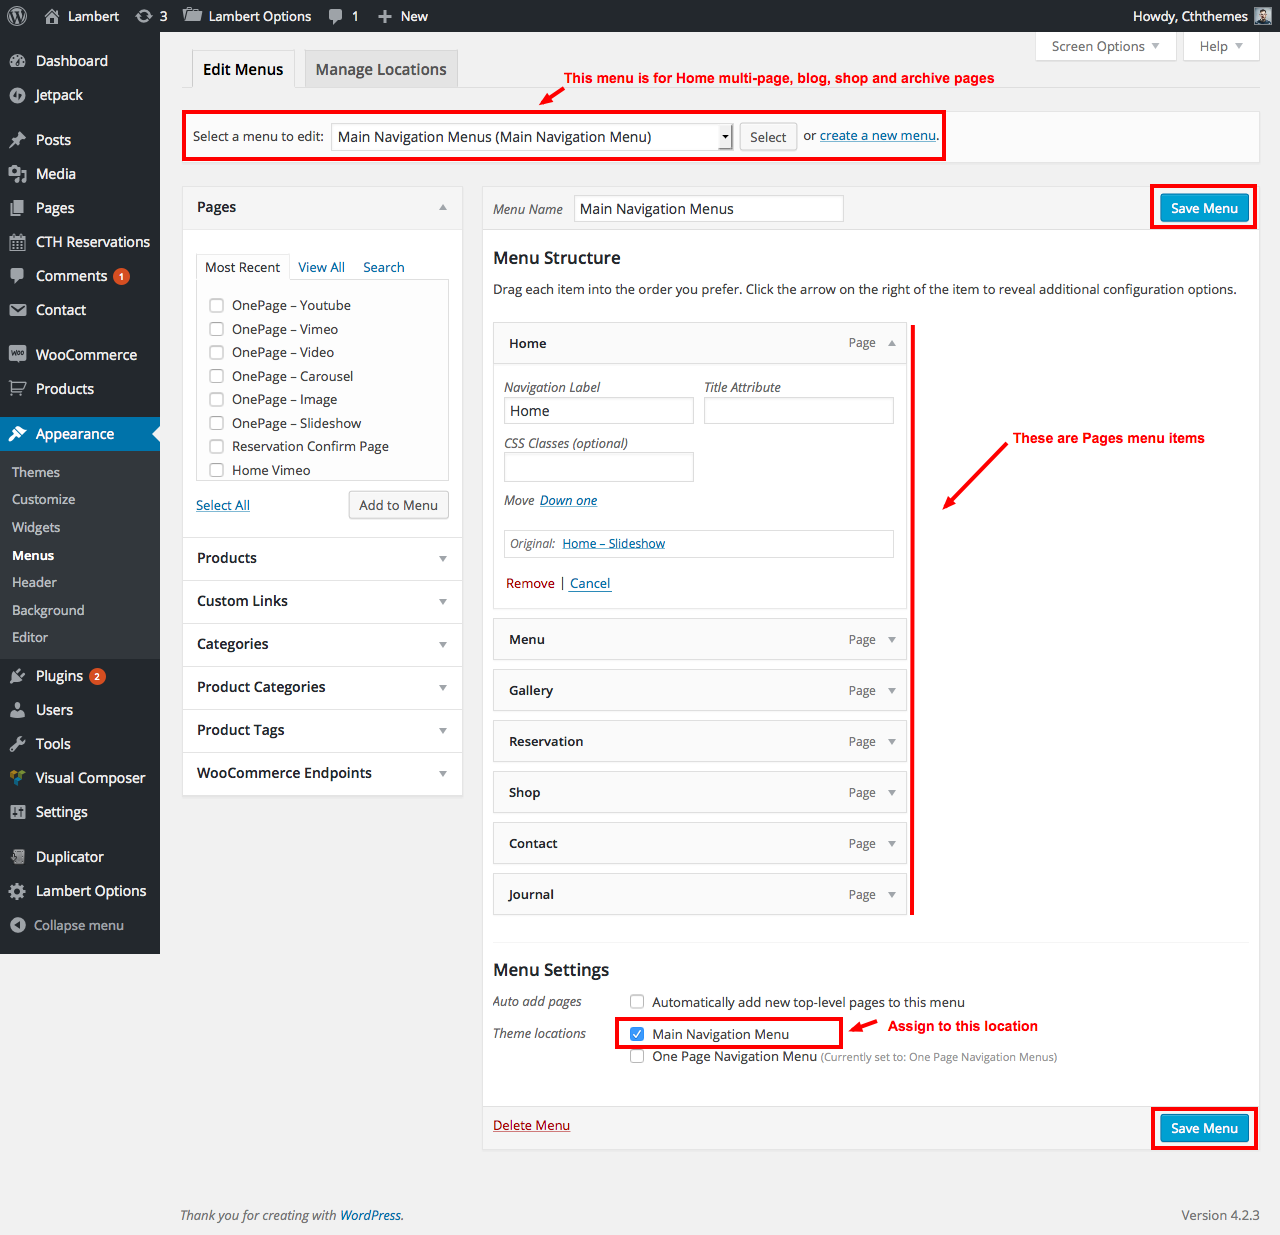
We have two menu with this theme, one is for One-Page page (with one-page scrolling effect) and the other for Multi-Page, Blog list index and shop pages. To create them just follow steps bellow.
- Go to Appearance > Menus
- Enter a name for your menu (One Page Navigation Menus, Main Navigation Menus)
- Click on Create Menu
- Now in the Theme Locations select what location you want to assign the menu to it. The theme come with two Theme Locations: One Page Navigation Menu location only on Home One Page page template (as on our one-page demo pages), Main Navigation Menu work on other pages (Home demo pages, main blog, shop and archive pages).
- Click on Save
- Now tick the Pages, Products, Custom Links, Categories ... you want to add to menu and click to Add to Menu
- When you added all pages to your menu, you can drag/drop and order pages.
- At last click Save Menu, thats it.
Screenshots
Sidebars and Widgets
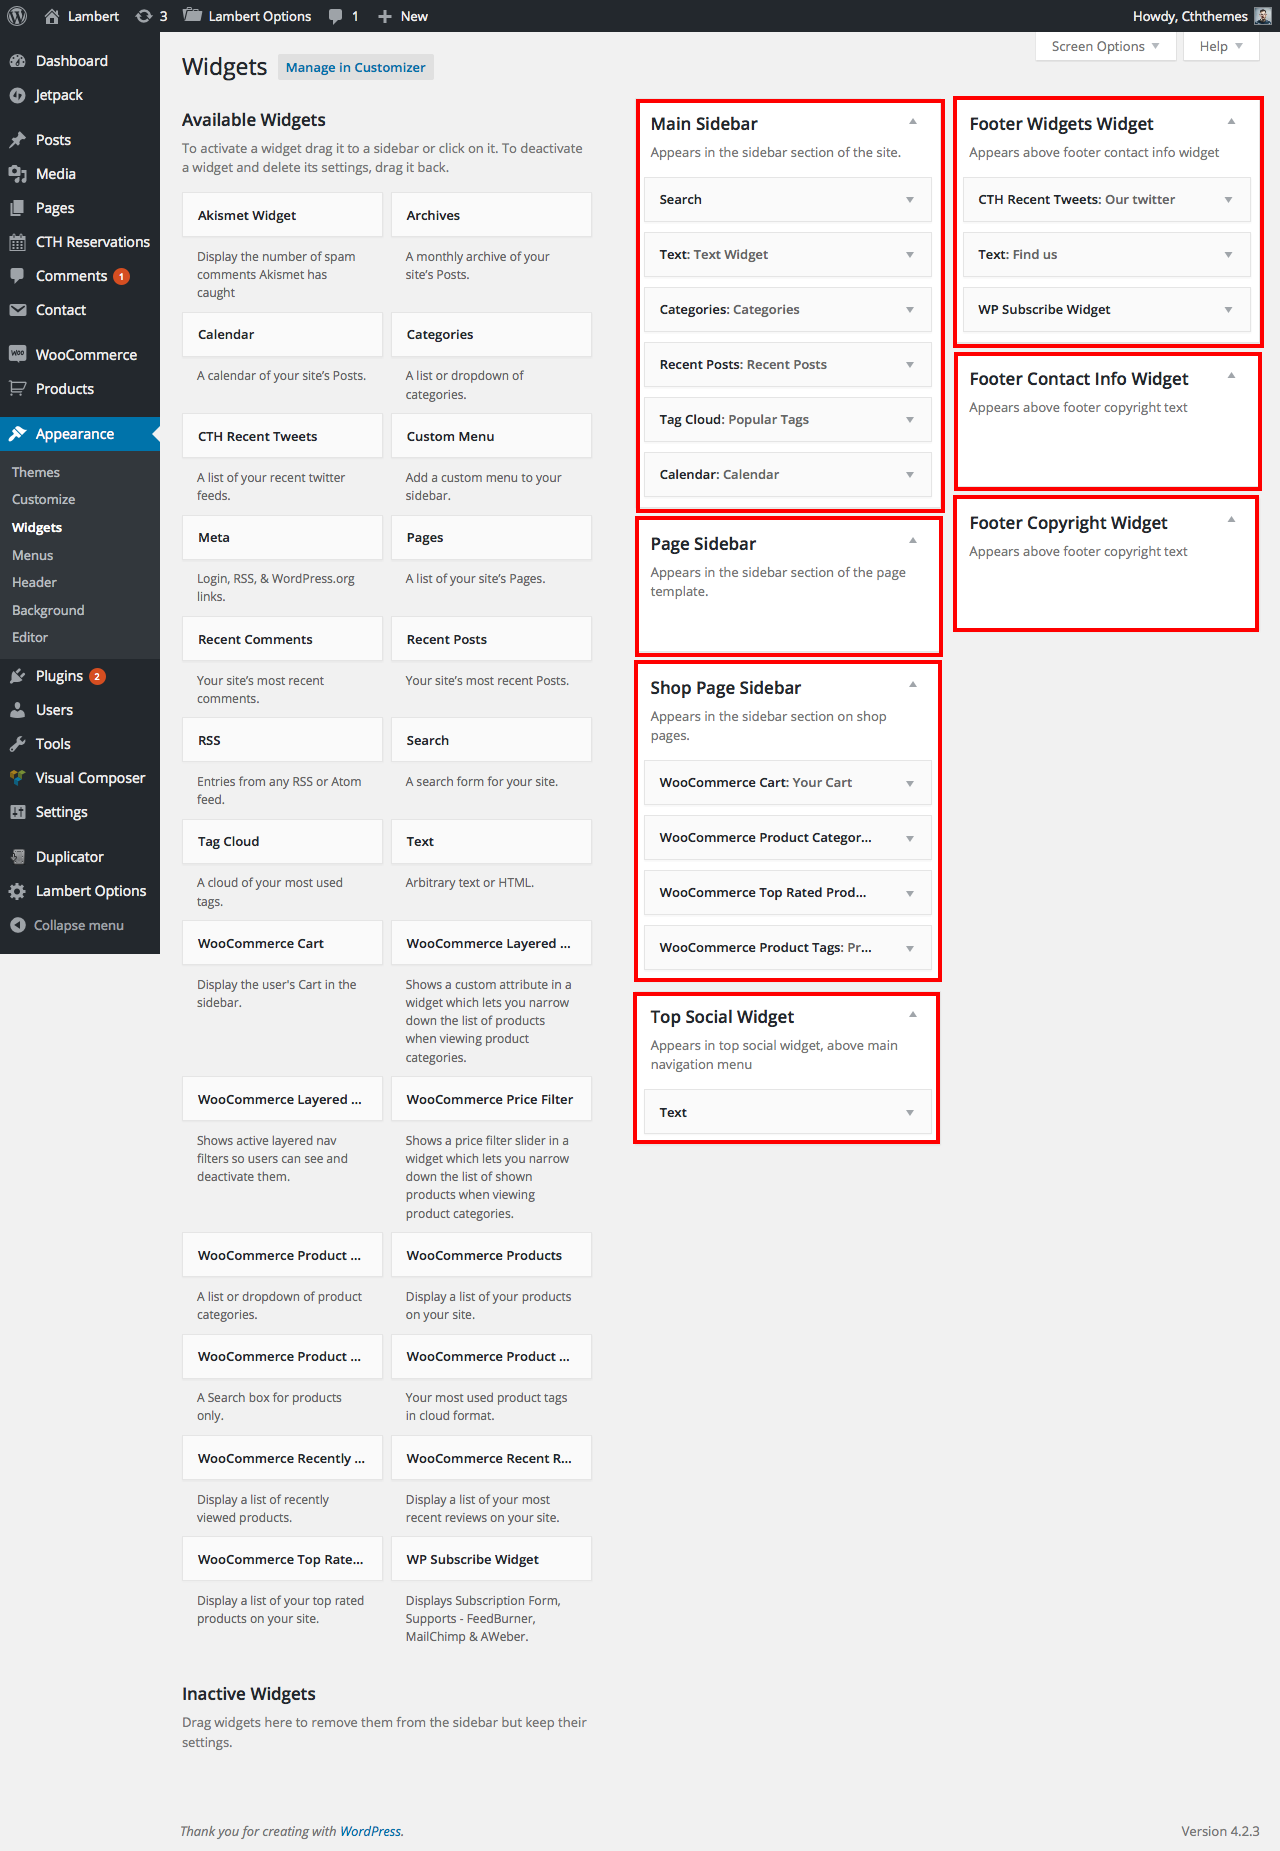
To add a widget in your theme’s Lambert, navigate to wp-admin > Appearance > Widgets. The big panel on the left side shows all available widgets. The small panels on the right are the widgetized areas. Total 6 widgets are available.
- Main Sidebar
- Page Sidebar: This sidebar only is available in page template
- Shop Sidebar: This sidebar only is available in Shop pages
- Top Social Widget: is custom widget that allow you add your additional content above Main Navigation Menu section.
- Footer Widgets Widget: is custom widget that allow you make columns layout widgets above footer social icons.
- Foote Copyright Widget: is custom widget that display above the footer copyright text.
Screenshot:
Import Demo Widgets
Search in Theme Download Package > Demo Content you will find lambert-widgets.2015-08-02.wie file, that is our demo widgets content we exported and included it in the package. To use the exported file you must install new plugin call Widget Importer & Exporter, then go to Tools > Widget Importer & Exporter submenu. Use Choose File button under Import Widgets section select the file then click to Import Widgets button. When done you will have blog sidebar and shop side like our demo.
Sidebar Widgets Configuration
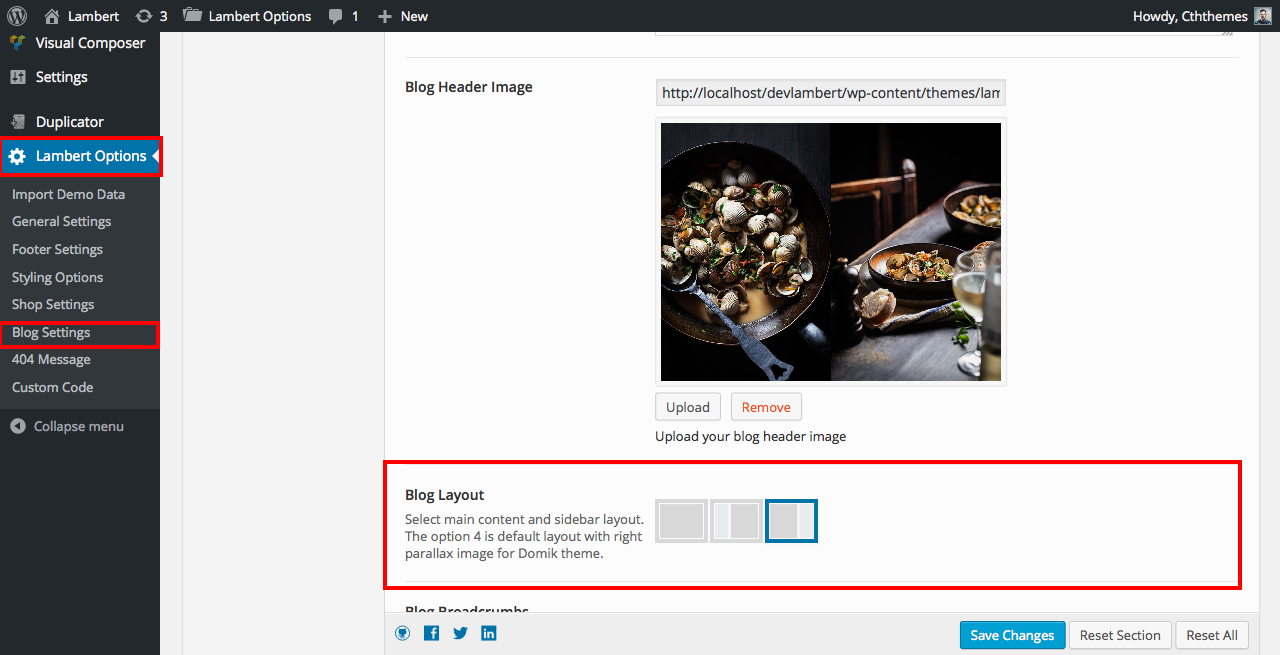
To make Main Sidebar and Page Sidebar widgets available you need change Blog Layout option in Lambert Options panel to Left or Right Sidebar. Or change layout for individual post or page using Single Layout option when editing post and page template (Page Right Sidebar, Page Left Sidebar template).
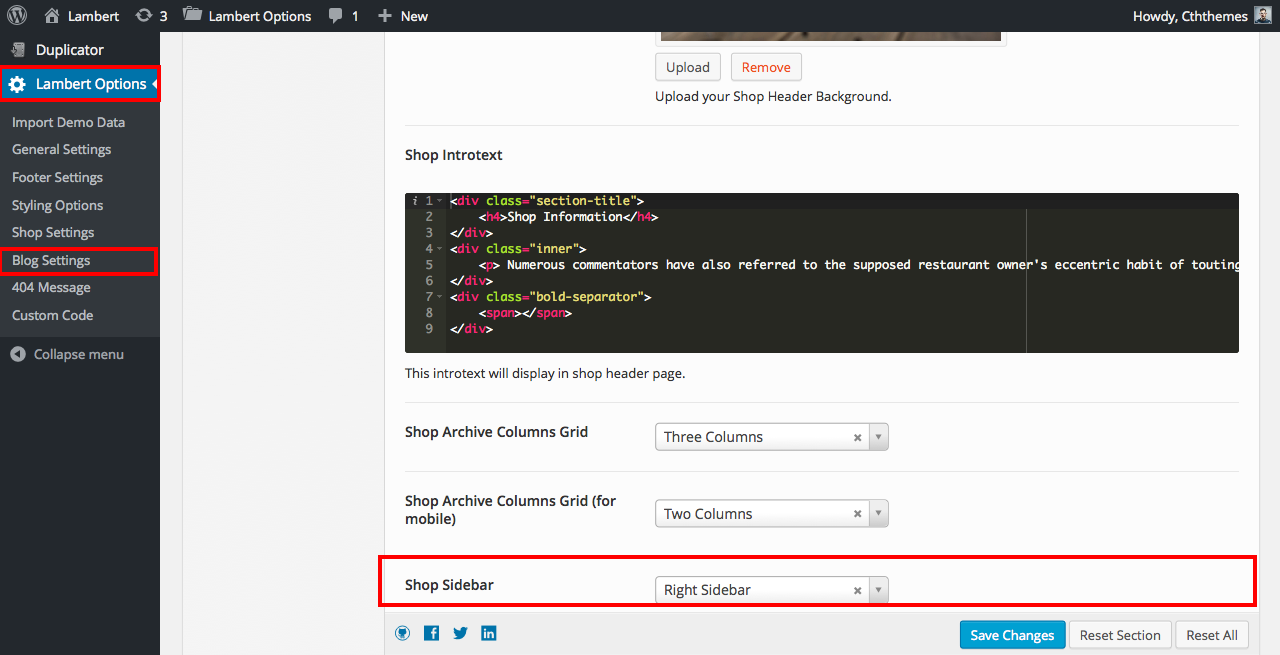
For Shop Sidebar you must change sidebar layout from Lambert Options menu screen.
Visual Composer
Visual Composer for WordPress by WP Bakery will save you tons of time working on the site content. Now you’ll be able to create complex layouts within minutes! It’s build on top of the modern technologies – get the best for your lovely website!
Have you ever noticed how much time you spend fighting with [shortcodes]? No more trial and errors with “shortcodes magic” – Visual Composer will take care of that.
Add columns/elements with single click, then use your mouse to drag elements around to re-arrange them.
“Visual Composer″ comes as a part of Lambert.
Please visit CodeCanyon and Plugin Website for more details.
Setting up Pages
Lambert come with 12 homepage variants and single menu, gallery, reservation and contact pages. They all was built in Visual Composer plugin. In this section we will help you build a page step by step.
Notice that if you use One Click Import Demo Data button or exported xml demo data file your don't need follow this section.
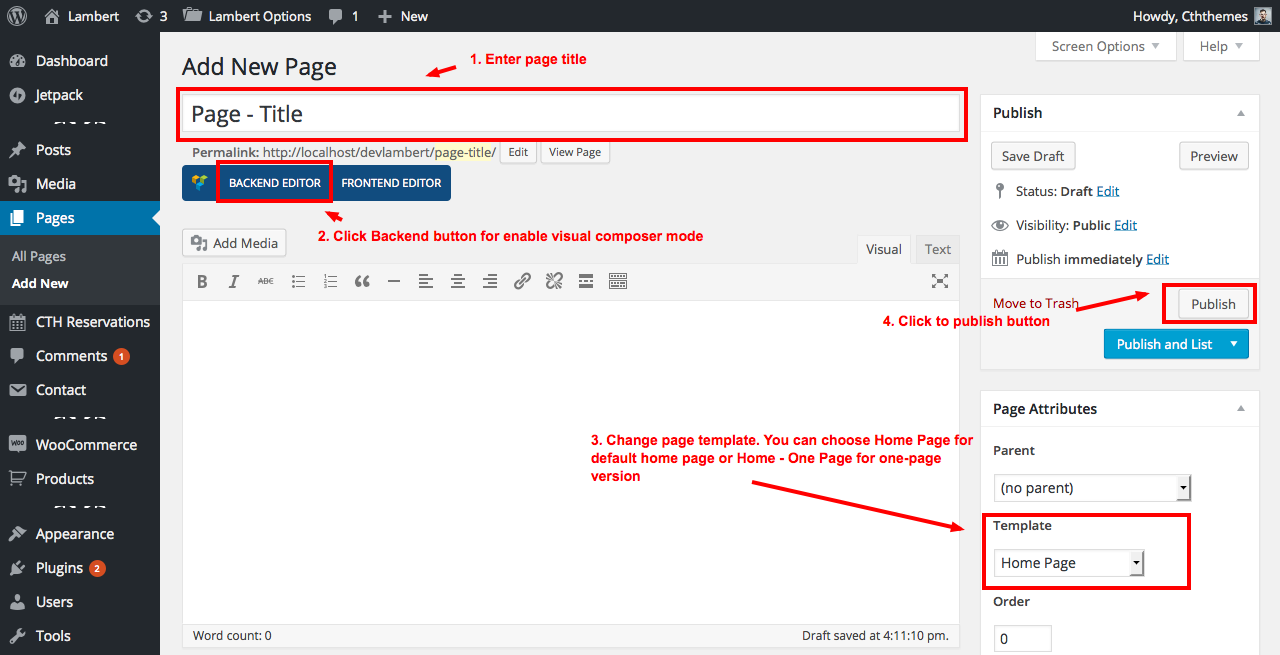
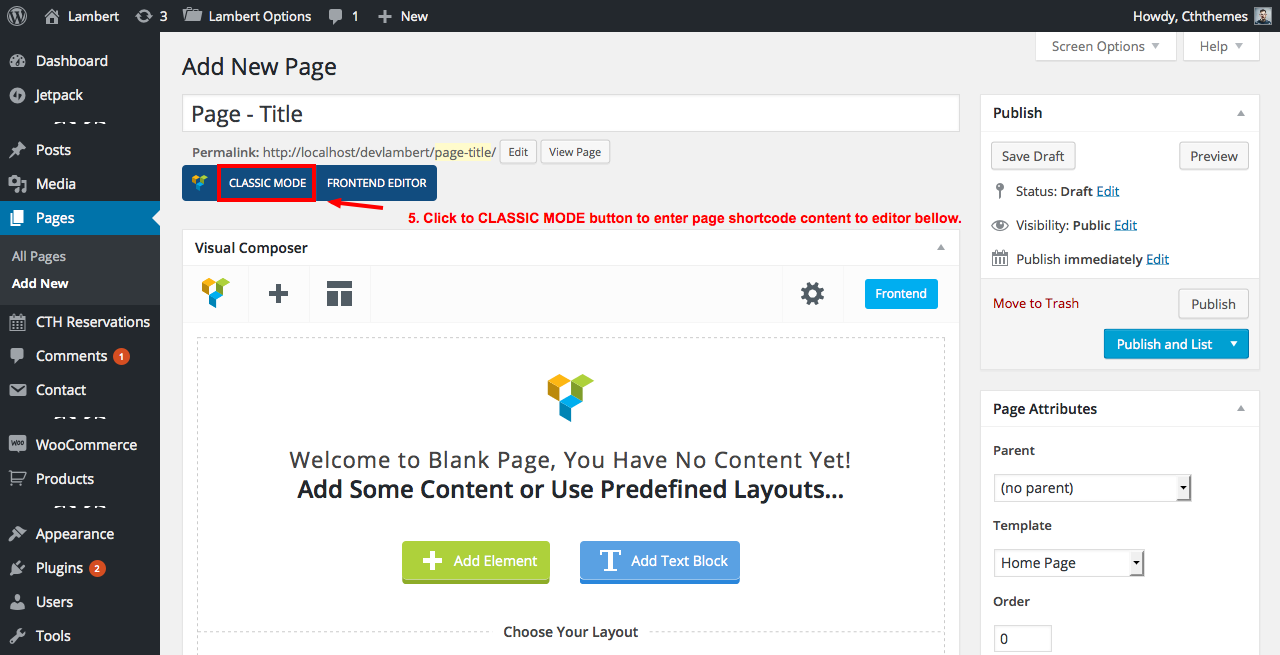
Build A New Page with Visual Composer
- Go to Pages > New Page
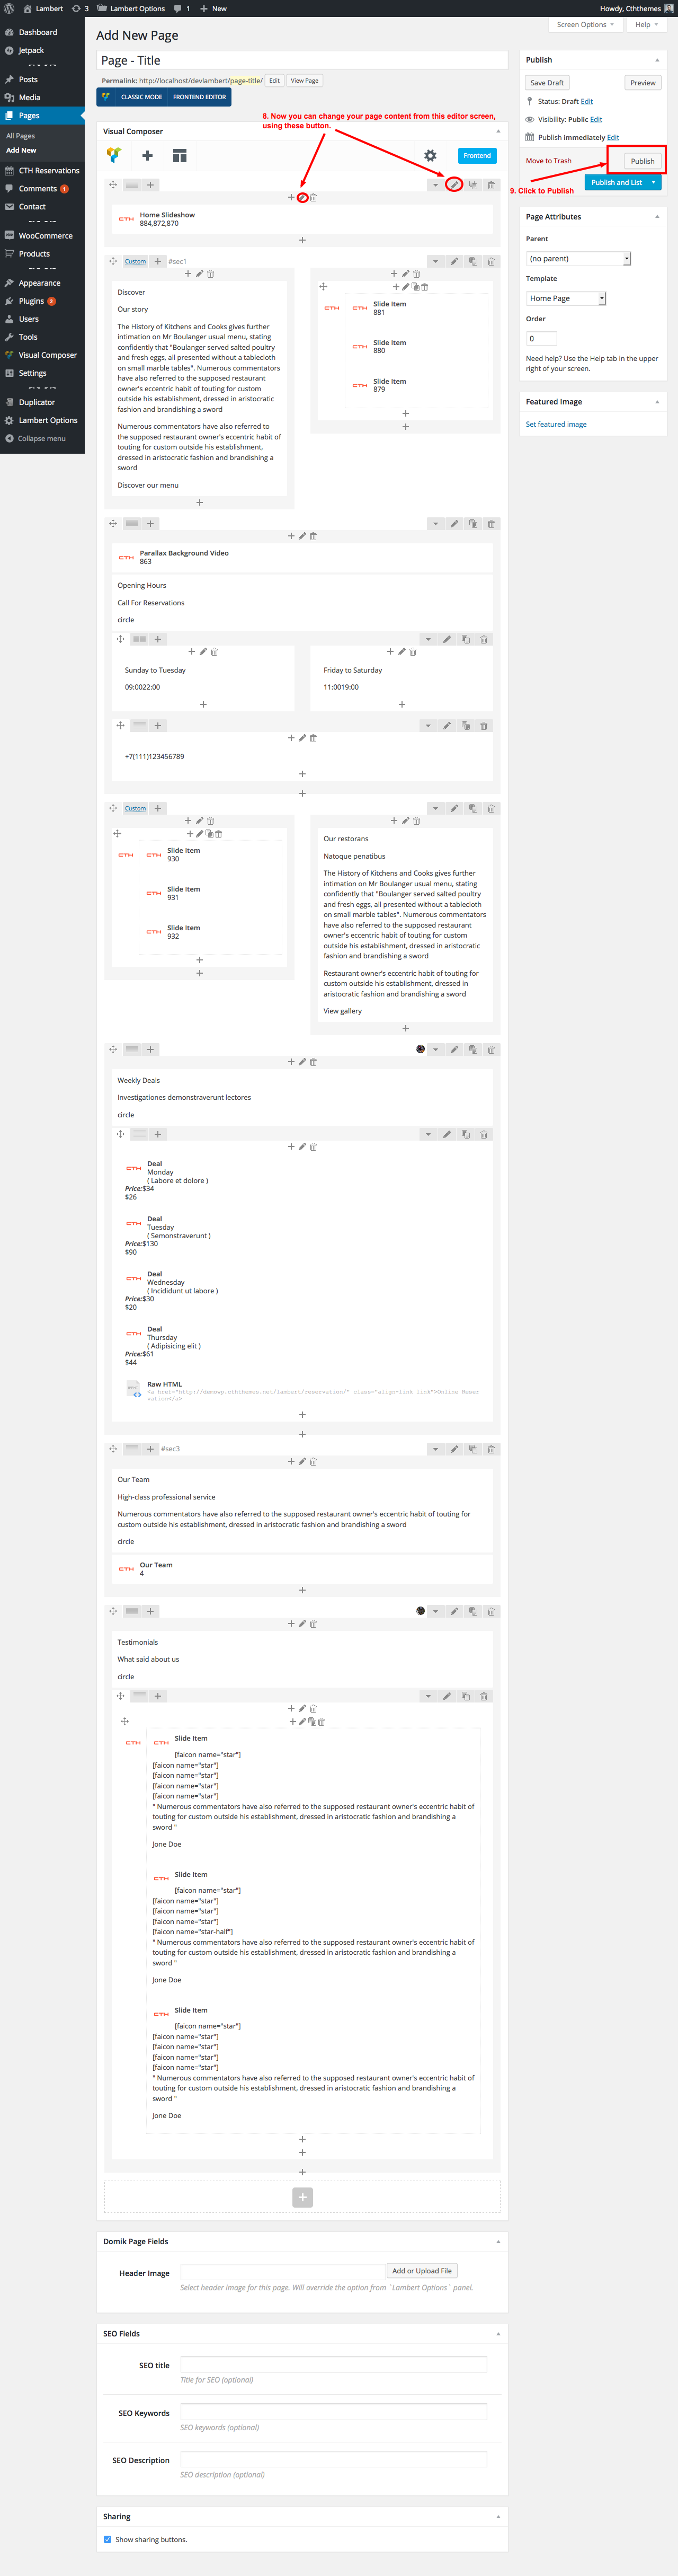
- Click on Publish
See a screenshot for add new page
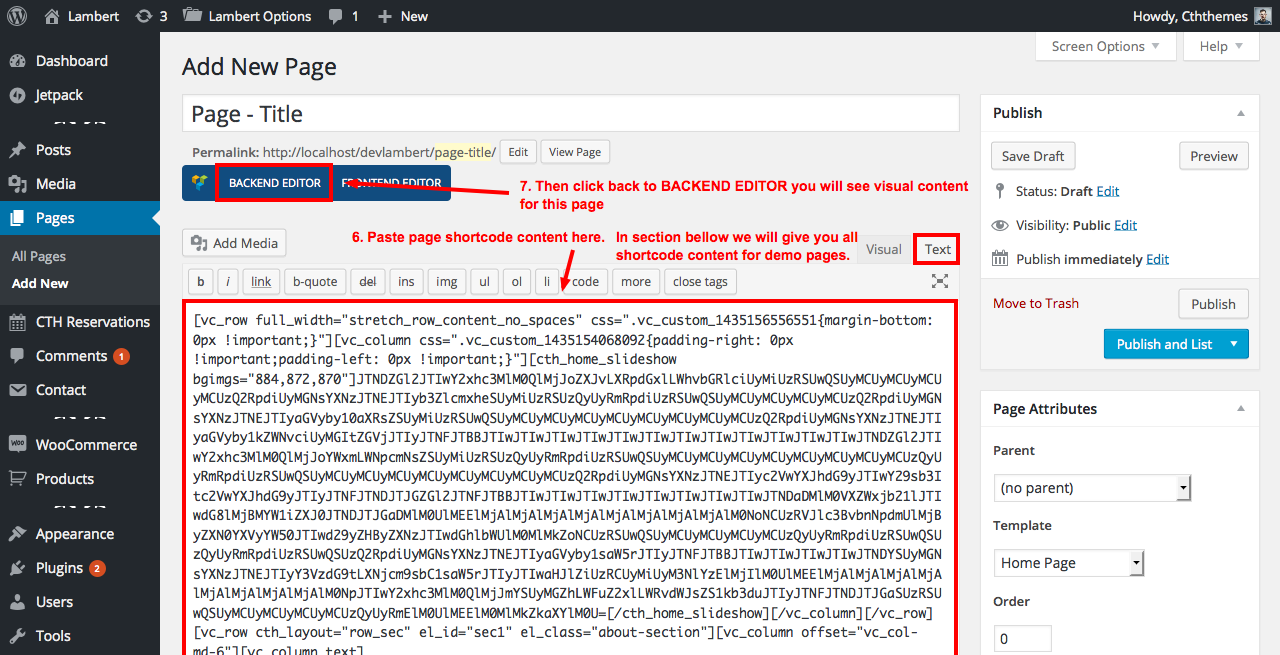
You can find shortcode content for demo pages from Demo Content > Page Shortcode Content folder.
Please open them in code or text editor the copy its content to your page editor.
Lambert Options
We are using a Redux Framework to make Advanced Options for the theme. Total 8 sections.
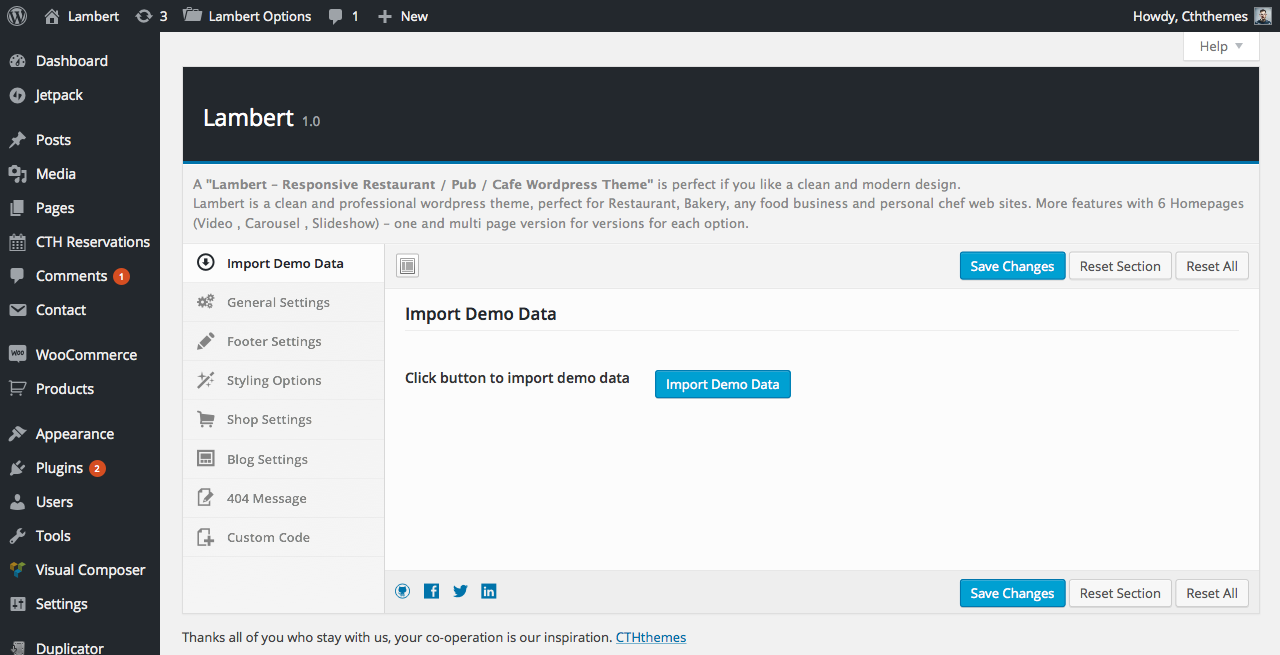
1. Import Demo Data:
When installed and activated the theme just click the button on this tab to import Demo Data (posts, page, custom posttype and media library) to your site.
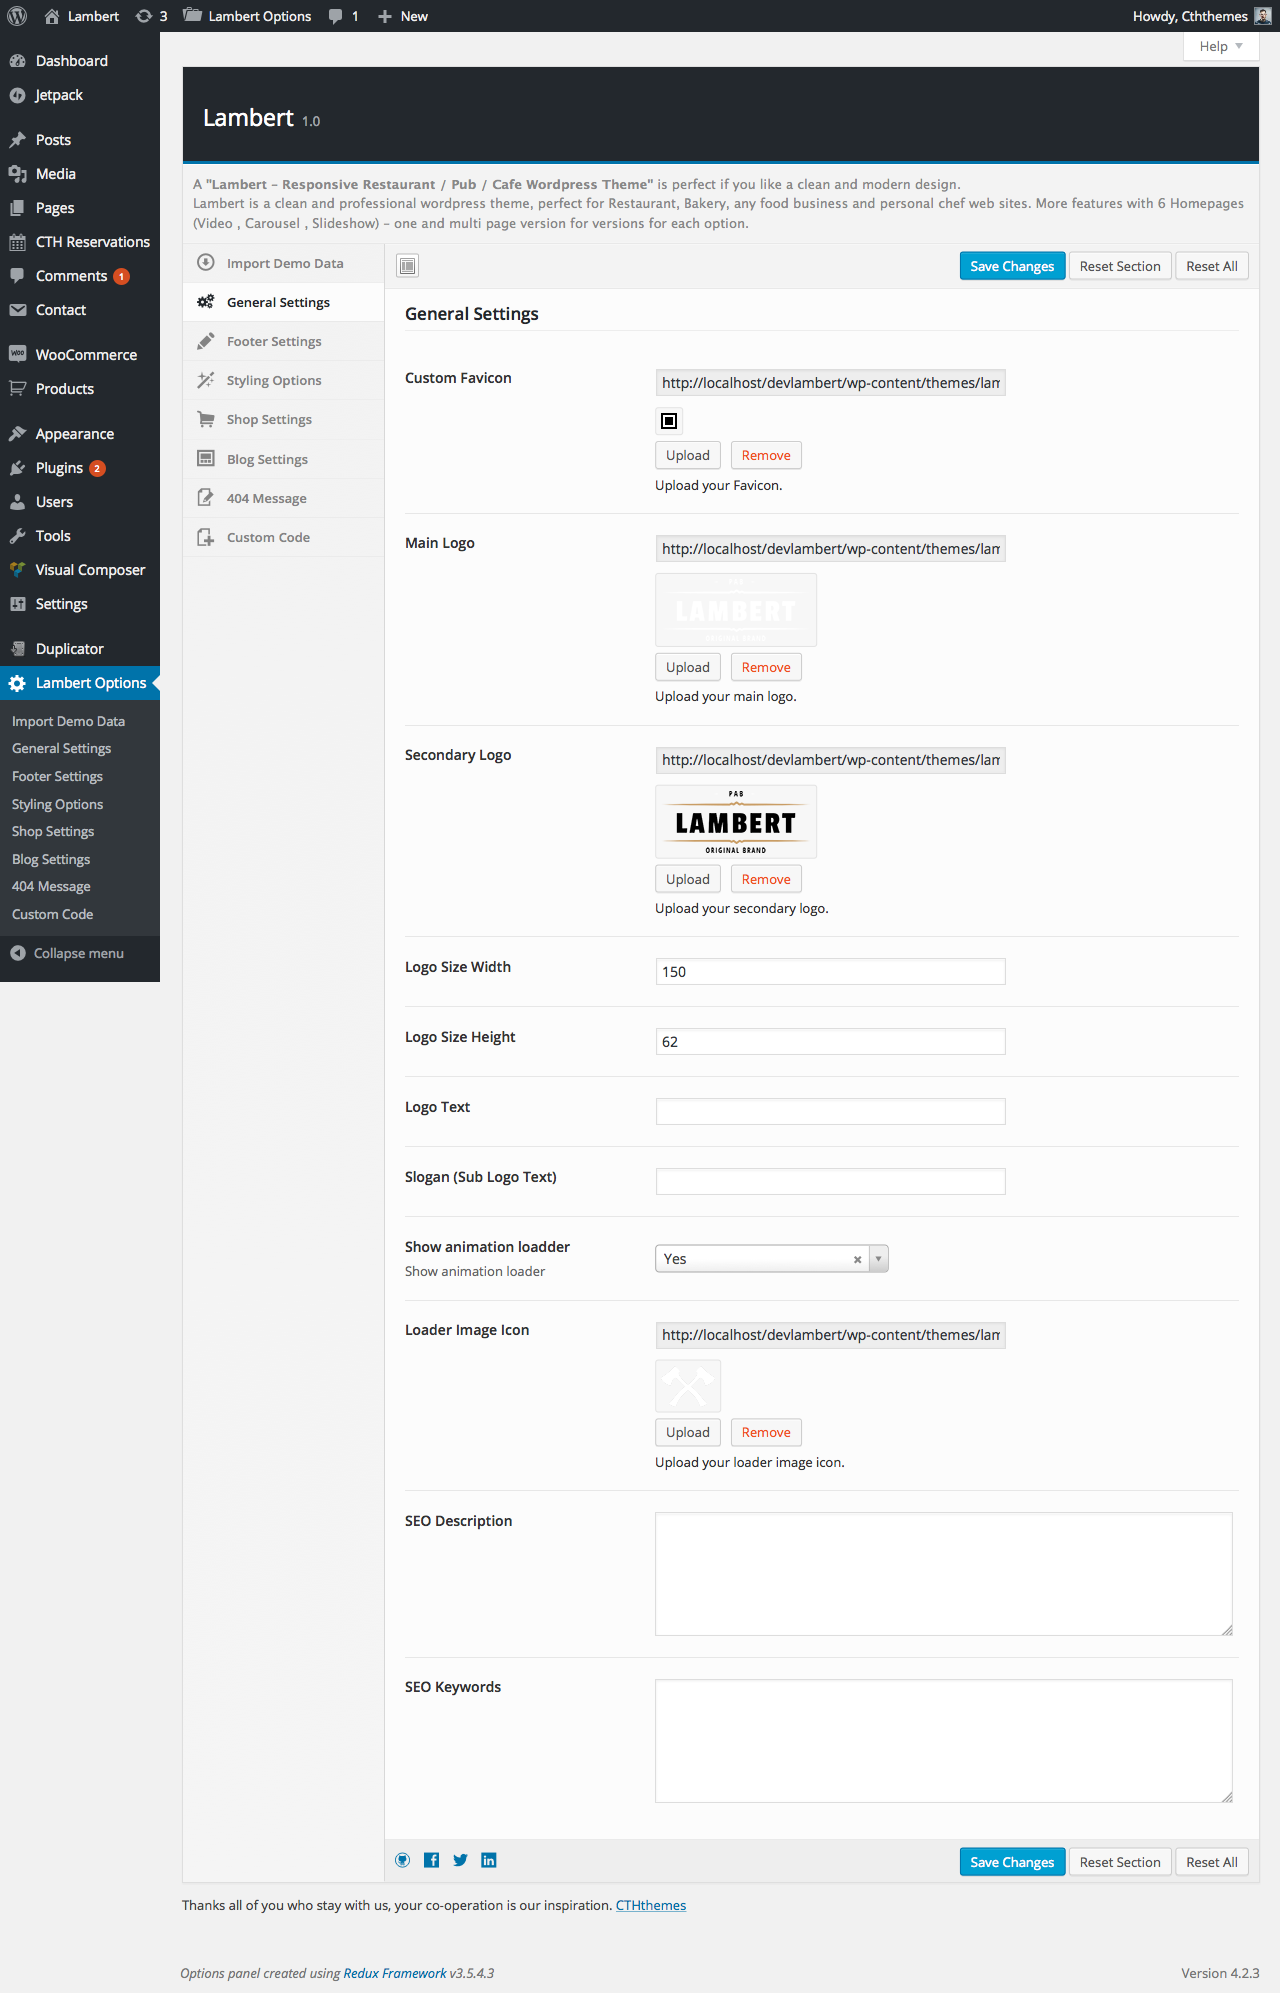
2. General Settings:
In general setting you can change favicon icon, admin logo, SEO info on your site.
See a look for screenshot for general settings
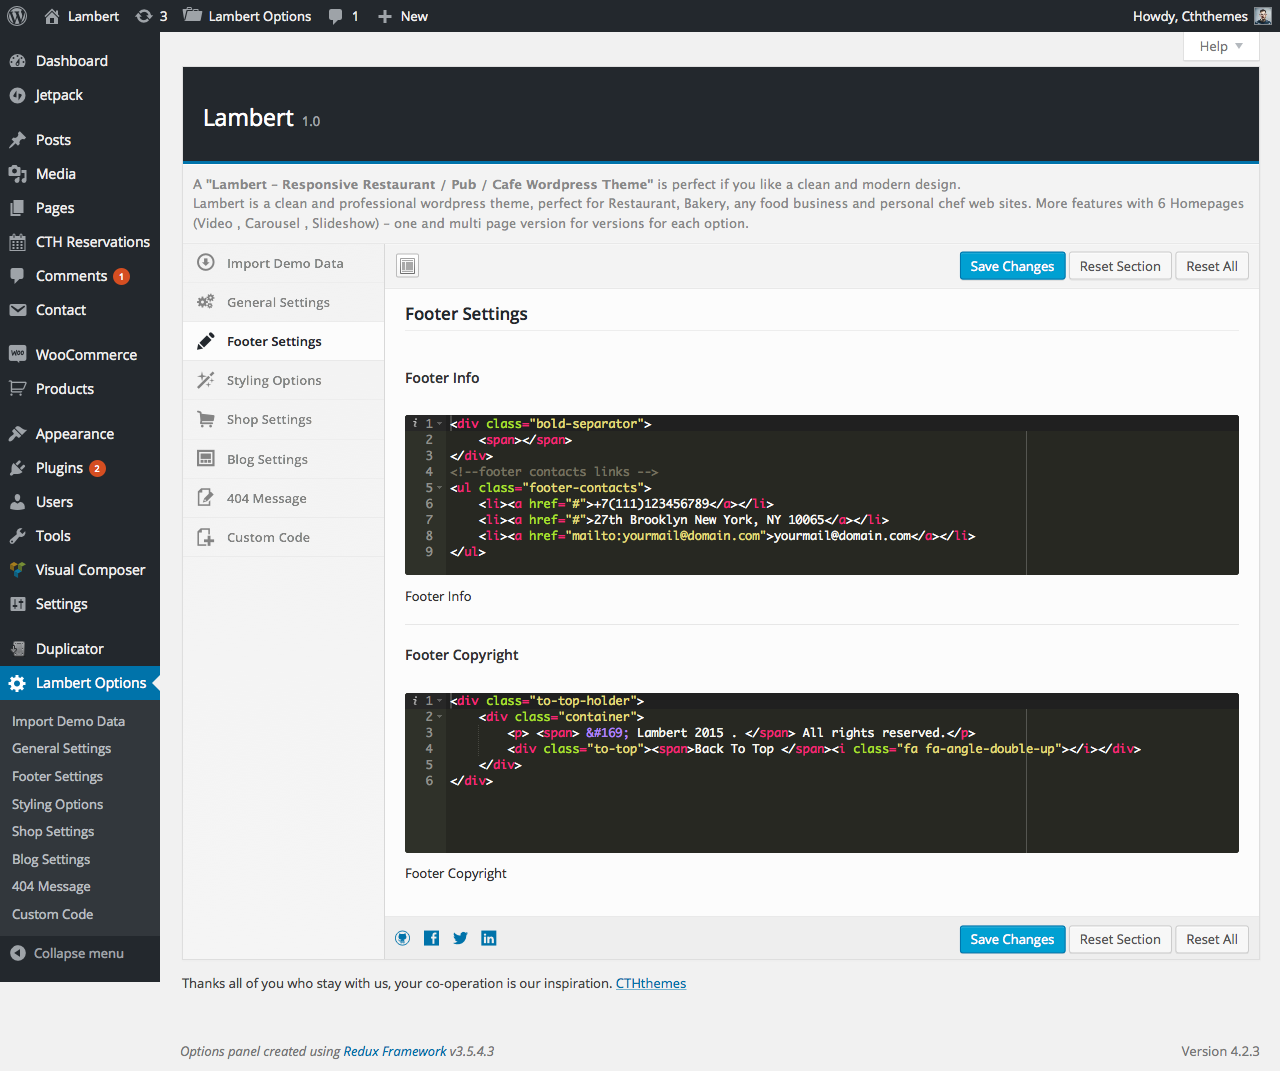
3. Footer Settings:
In this tab you can enter additional message for 404 error page.
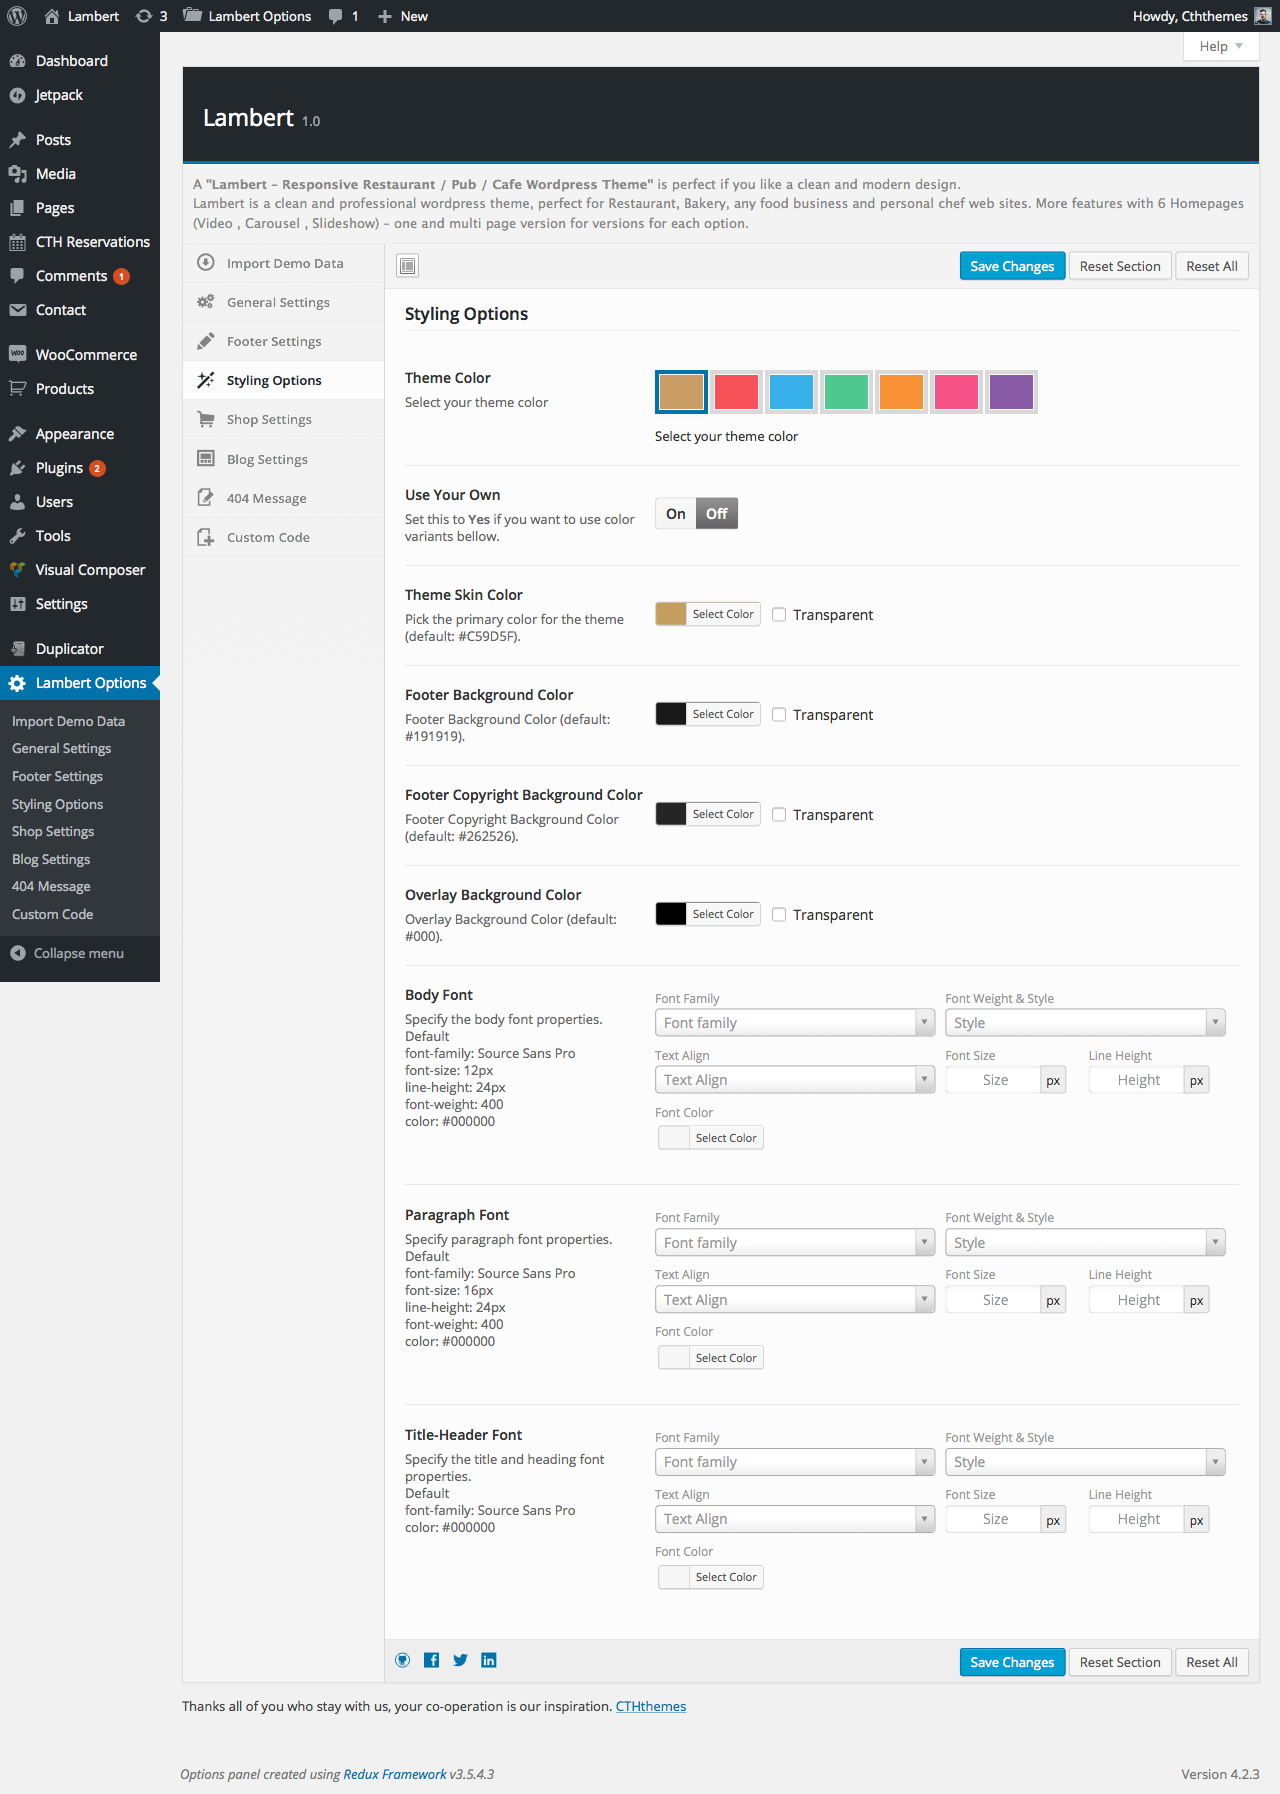
4. Styling Options:
In styling options you can select pre made skin color or build your own. You can change the typography for your site.
See a look for screenshot for styling settings
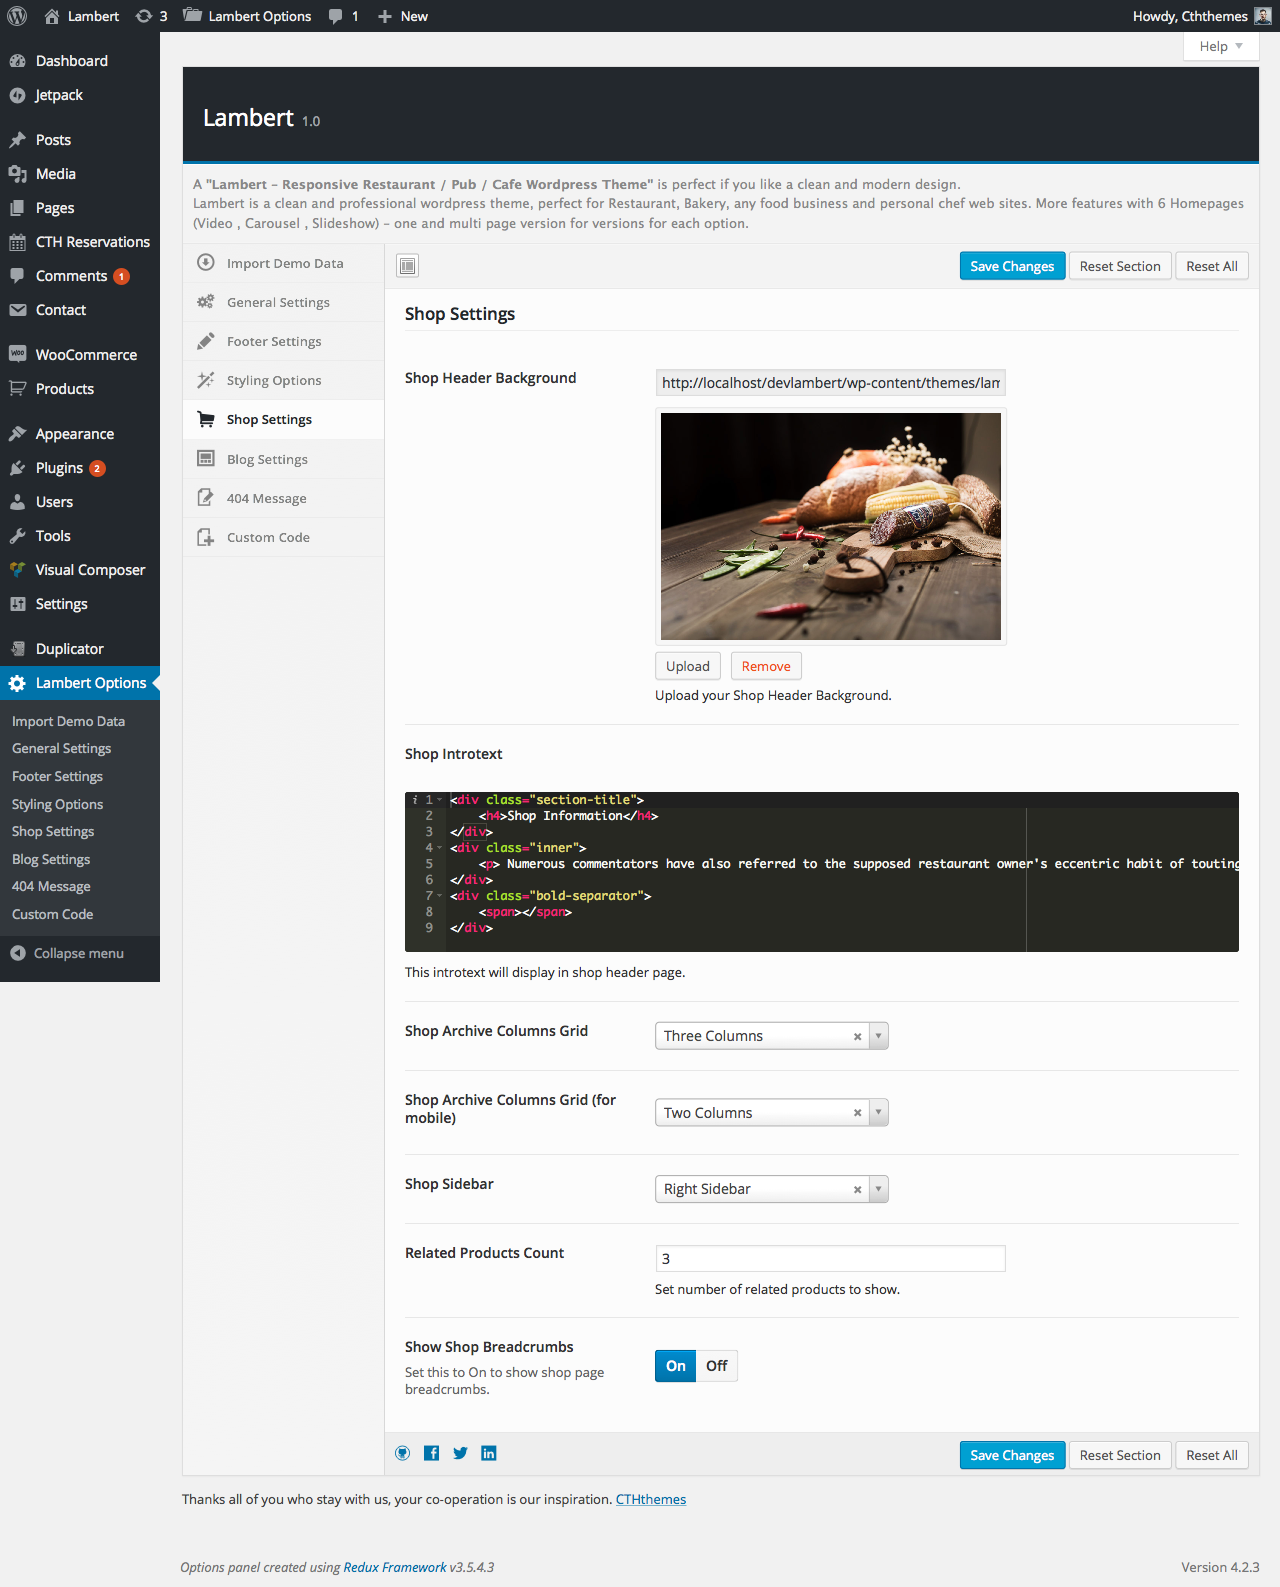
5. Shop Settings:
In this tab have some general options that used for your shop page layout.
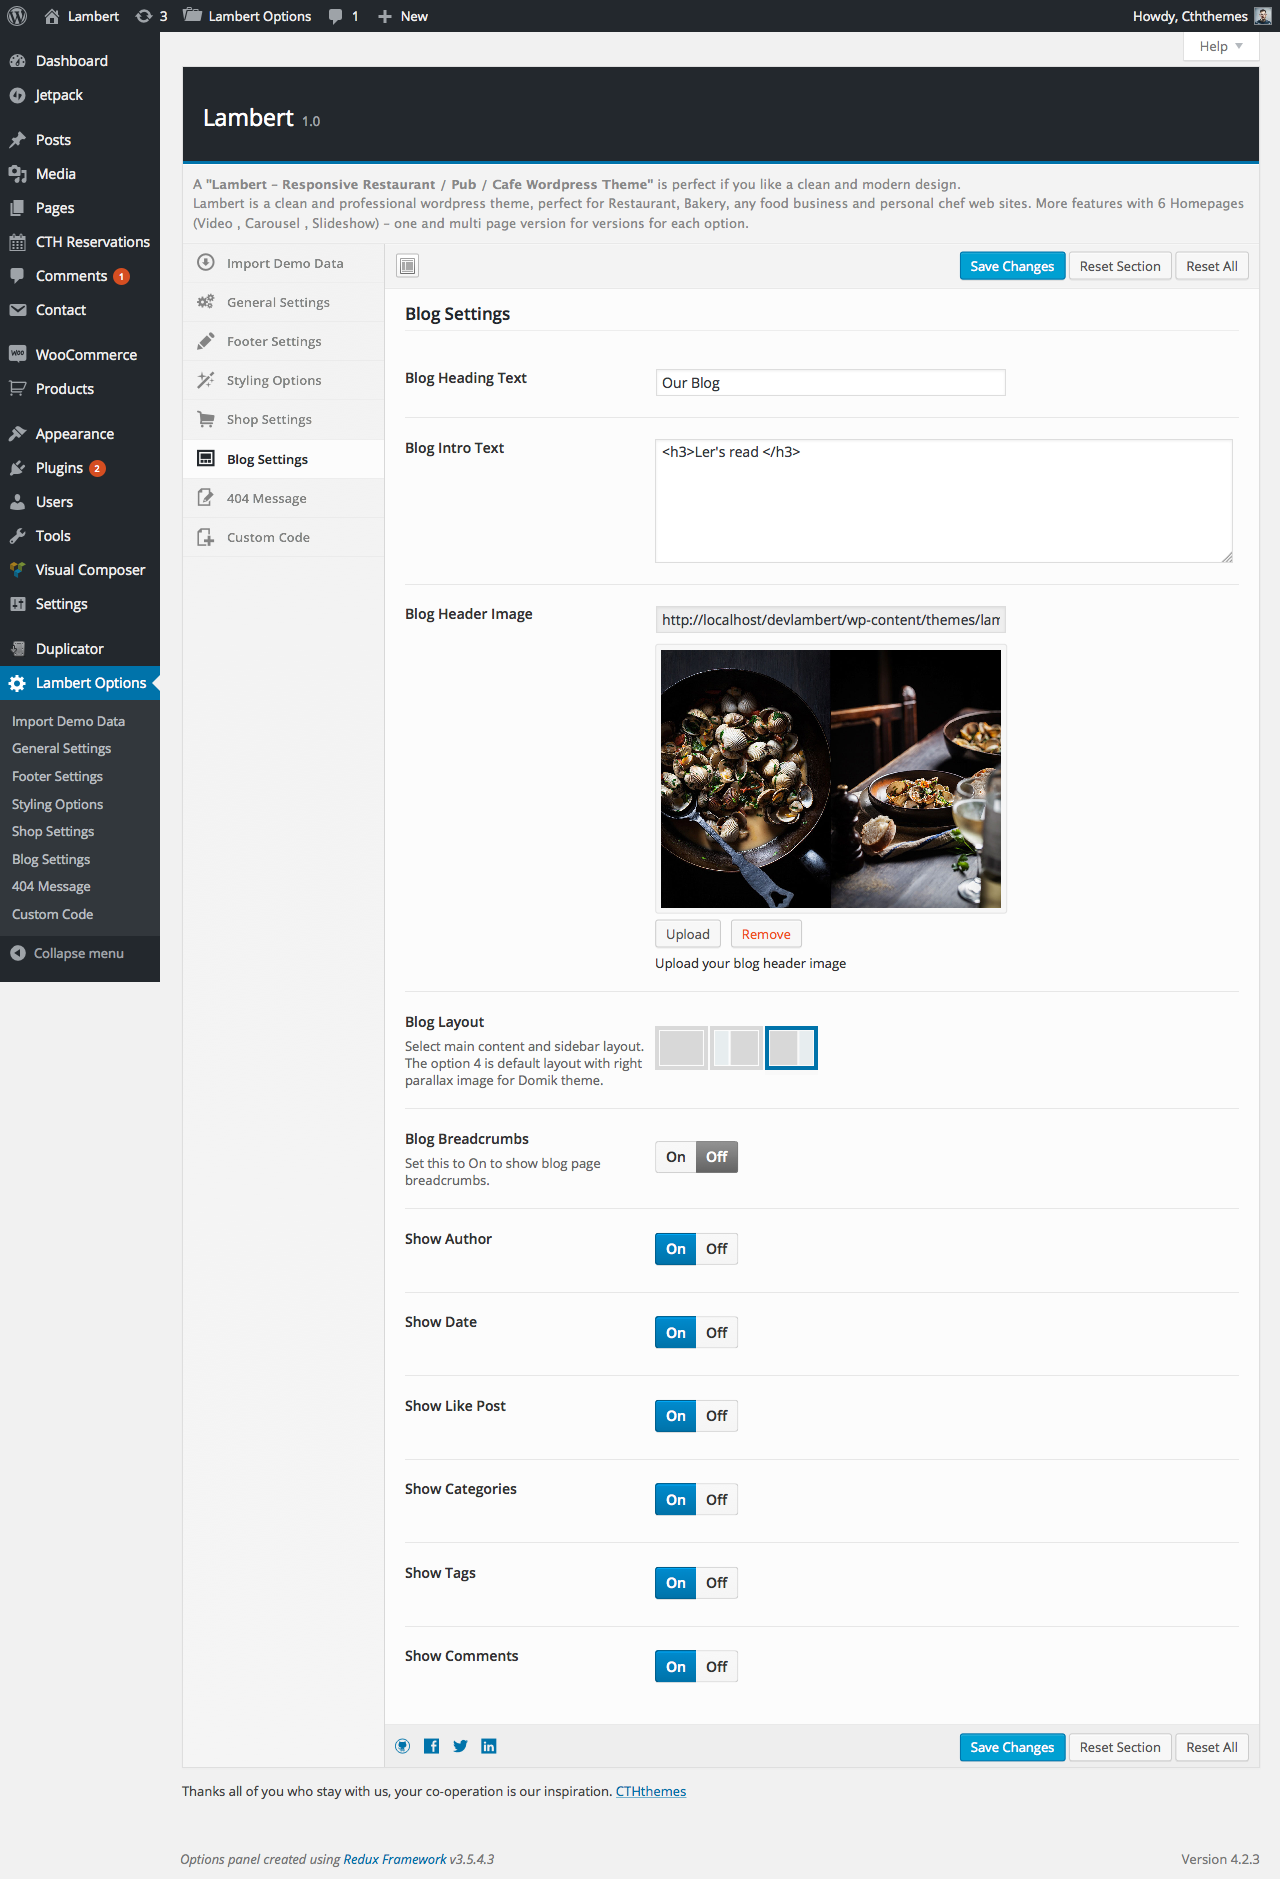
6. Blog Settings:
In this tab have some general options that used for your page layout (blog layout).
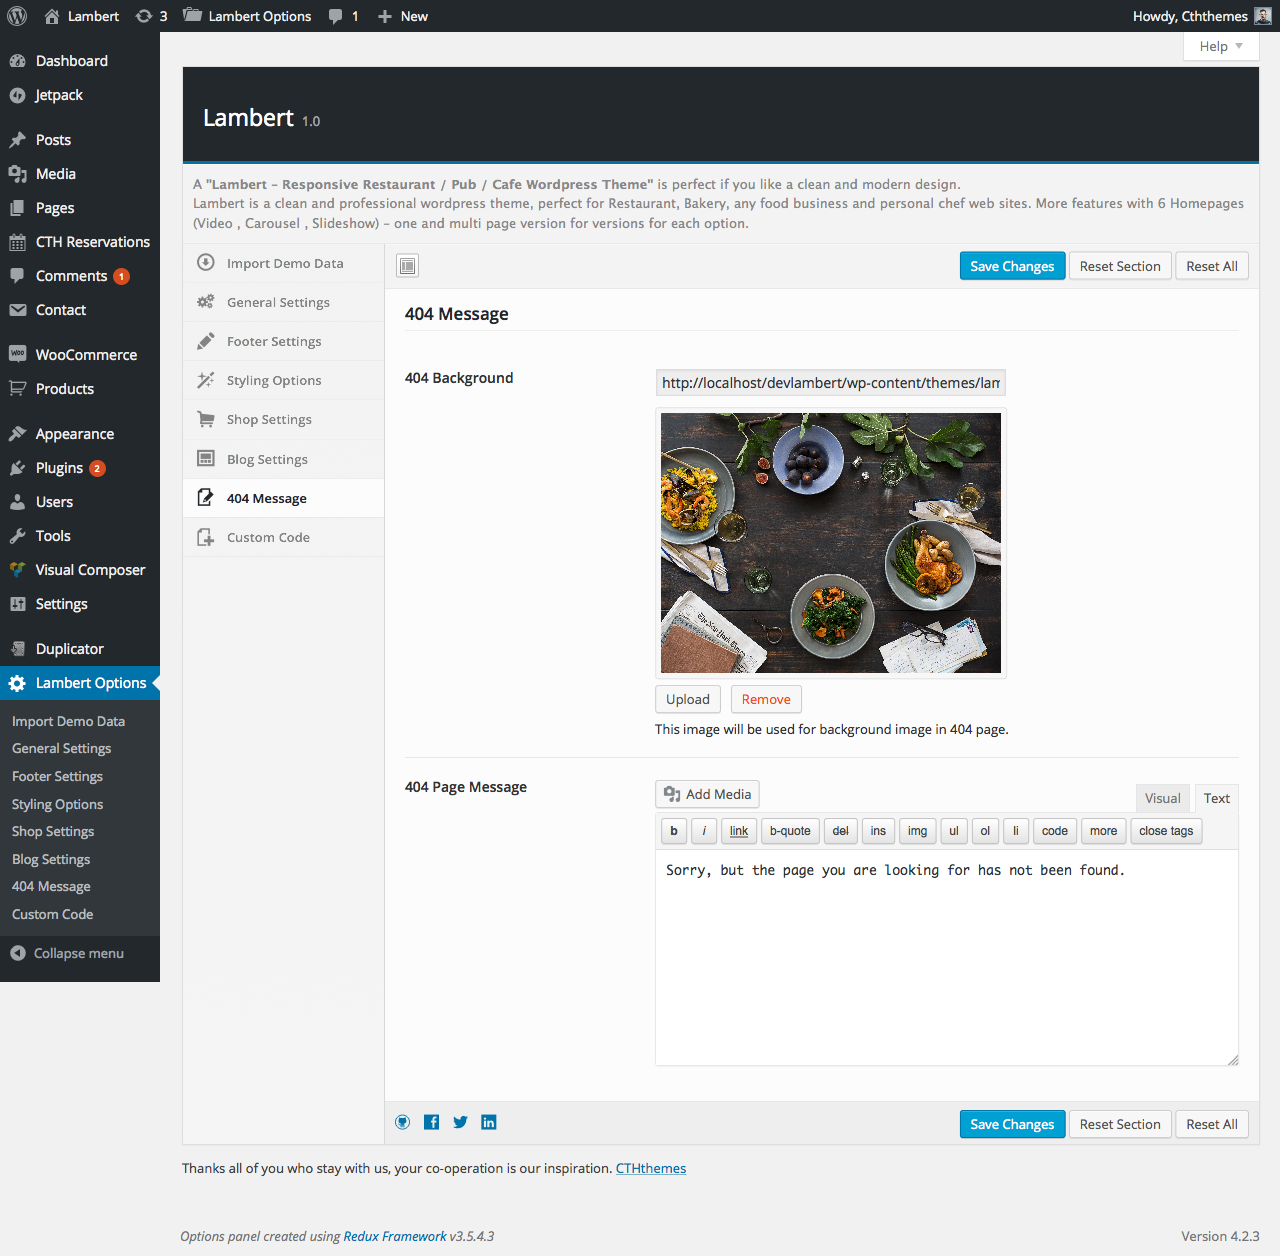
7. 404 Error Settings
Additional message for 404 error page.
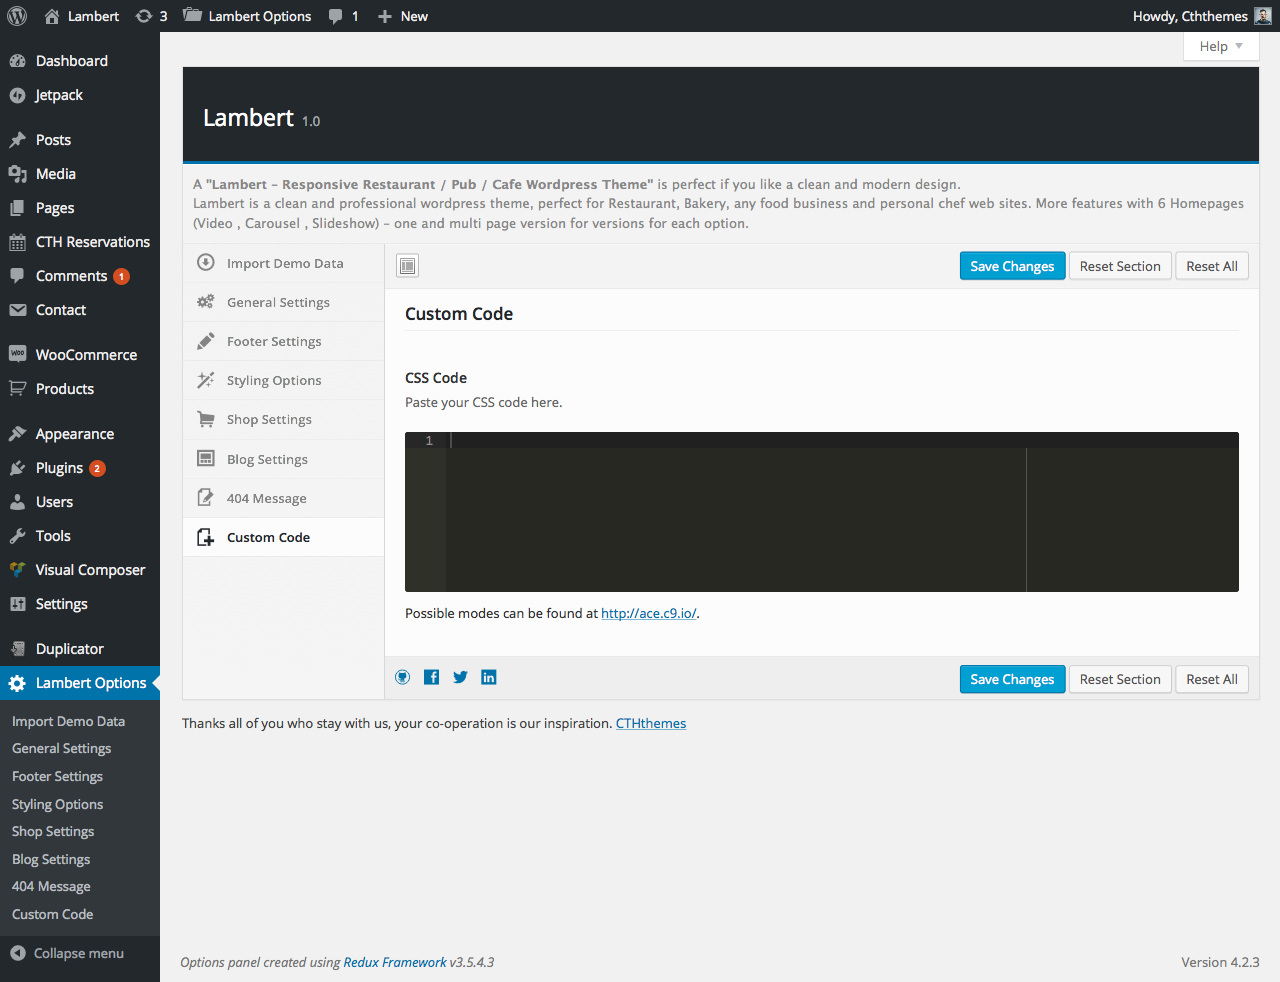
8. Custom CSS:
Allow you add your custom style, script (Google Analytics) codes to your site using Ace editor.
CTH Reservation Plugin
With this theme we included custom CTH Reservation plugin, this is outstanding theme feature. It let you customize your reservation form easily, reservation manager screen and custom reservation confirm email template.
Install the plugin
When uploaded and activated the theme you will receive a message that tell you need install required plugin, just check to CTH Reservation field in the list then click install button.
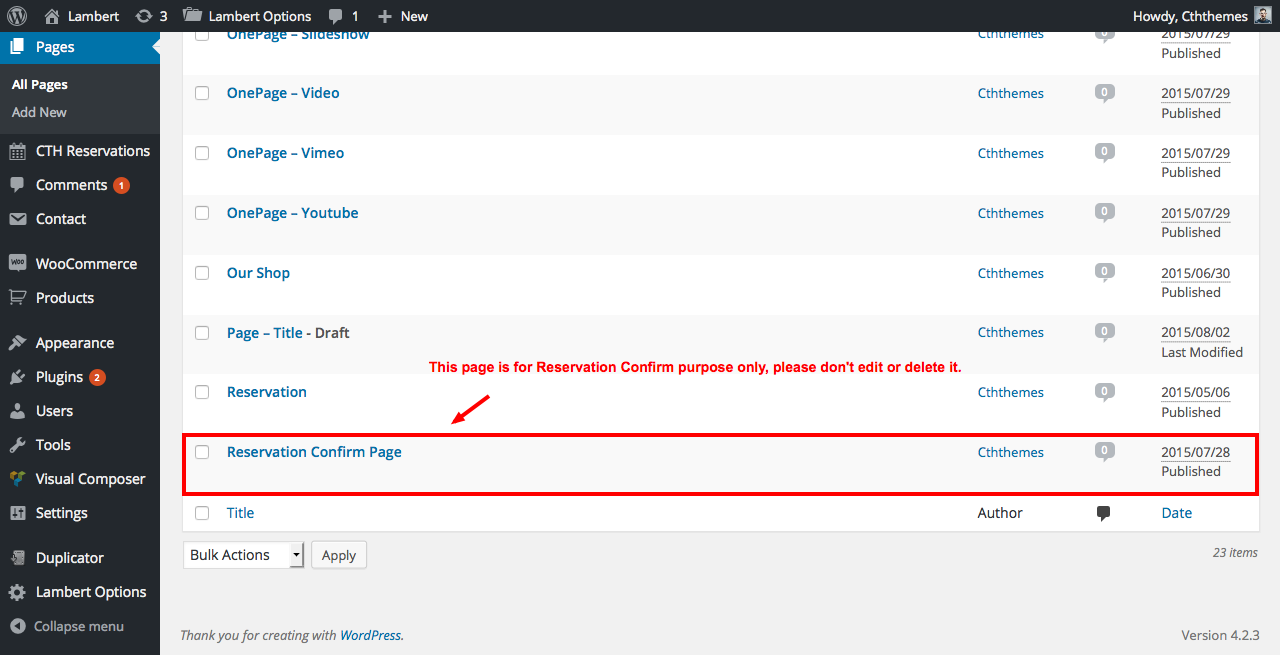
A new page name Reservation Confirm Page was created right after activate plugin. The page will be used for reservation confirm purpose, please do not edit or delete it.
Plugin Configuration
- Go to Settings > CTH Reservation screen.
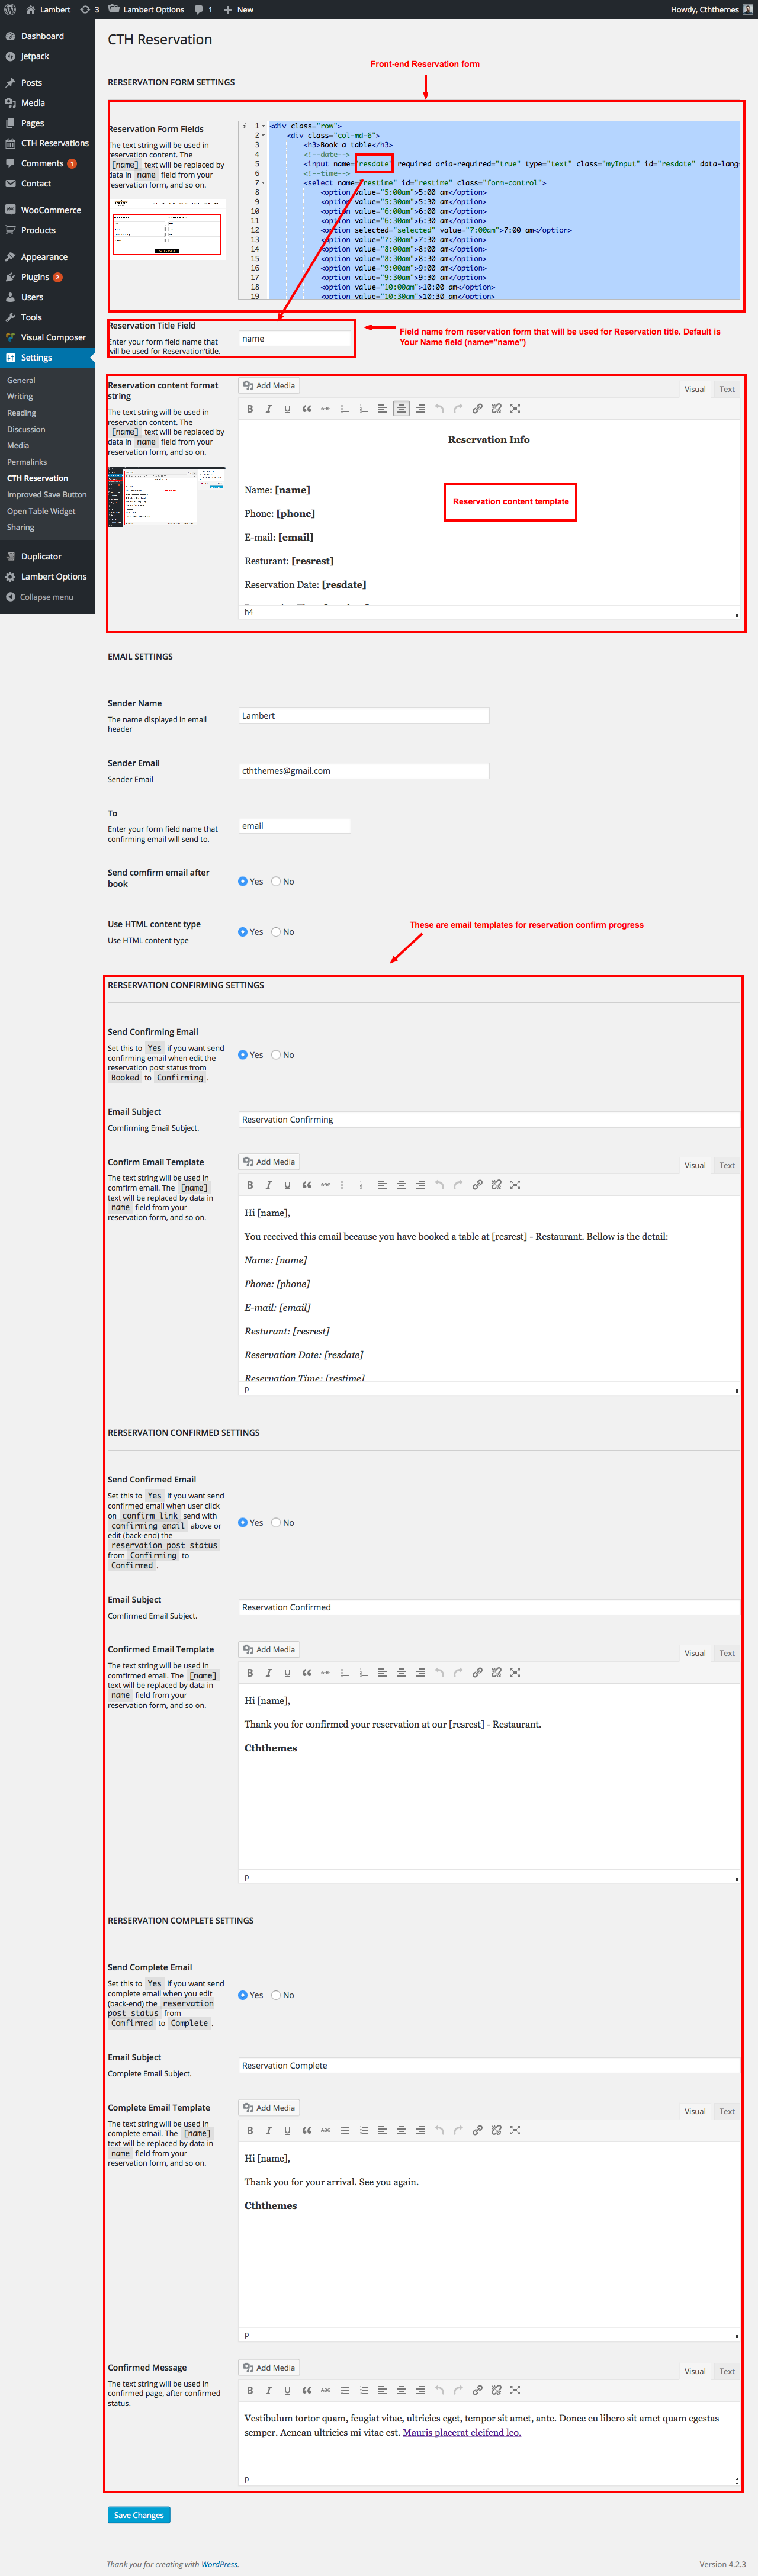
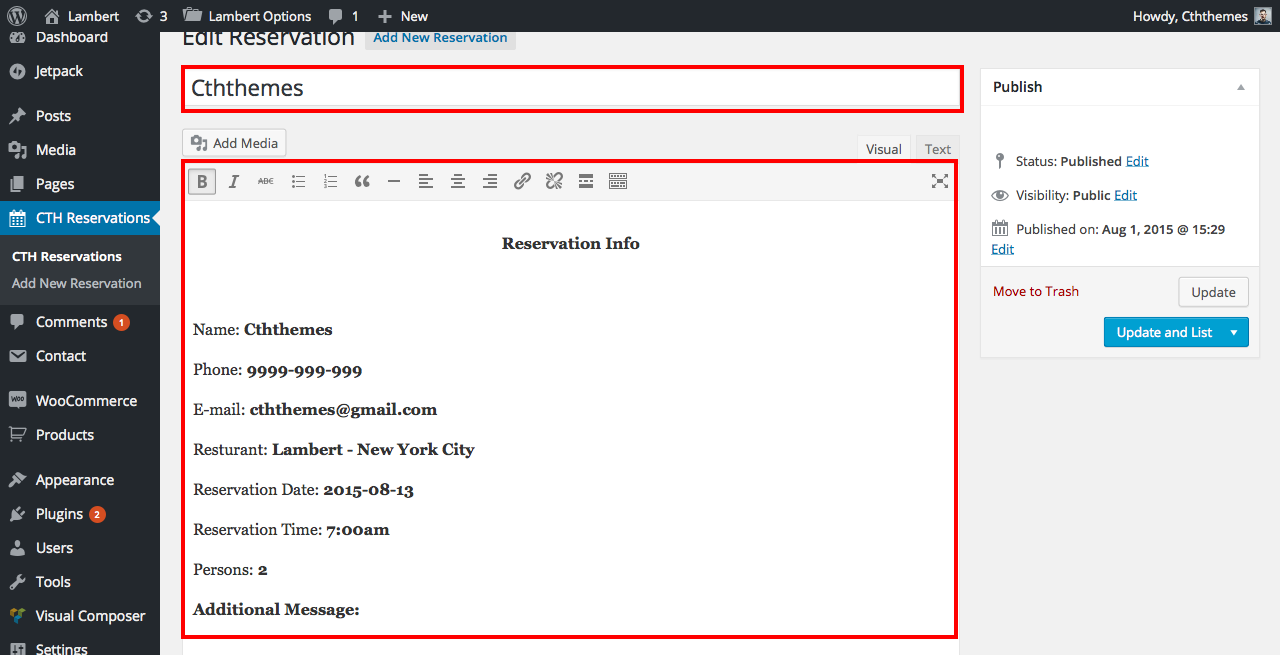
In this screen you can change settings for the plugin form front-end reservation form display to back-end reservation content template. Also the plugin provide a email system for reservation confirm progress. You can change email templates for Confirming, Confirmed and Completed reservation.
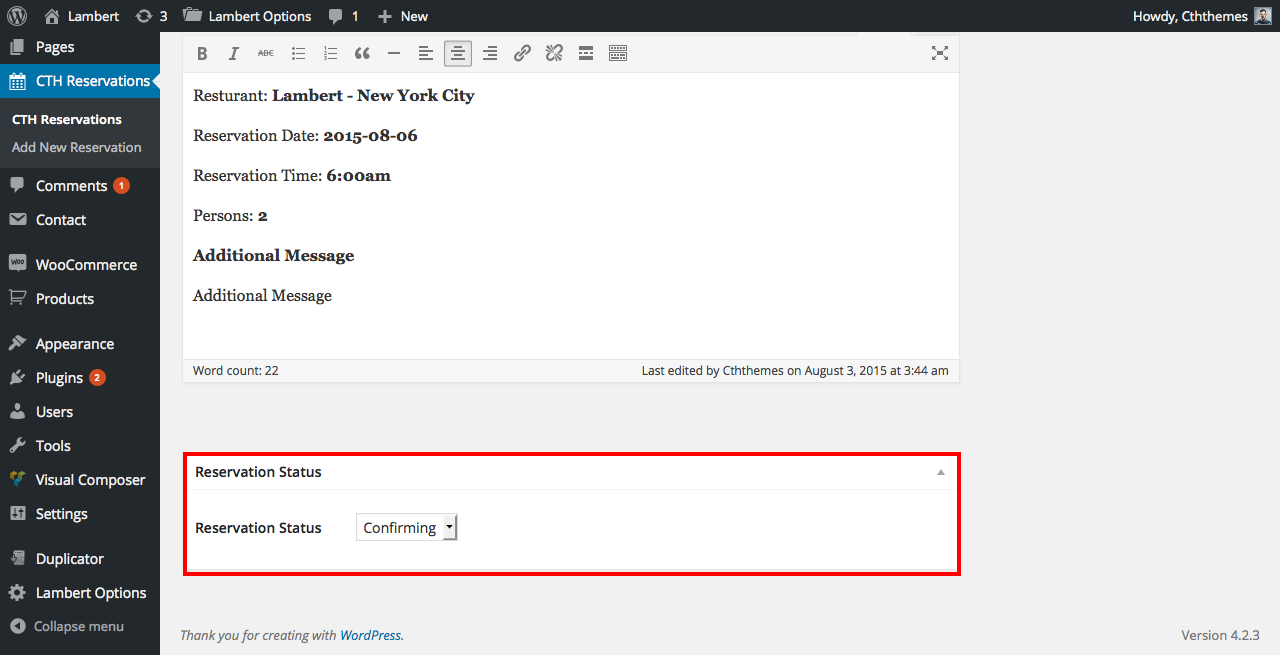
In the plugin manager screen there is a Reservation Status field with 4 value: Booked, Confirming, Confirmed and Complete.
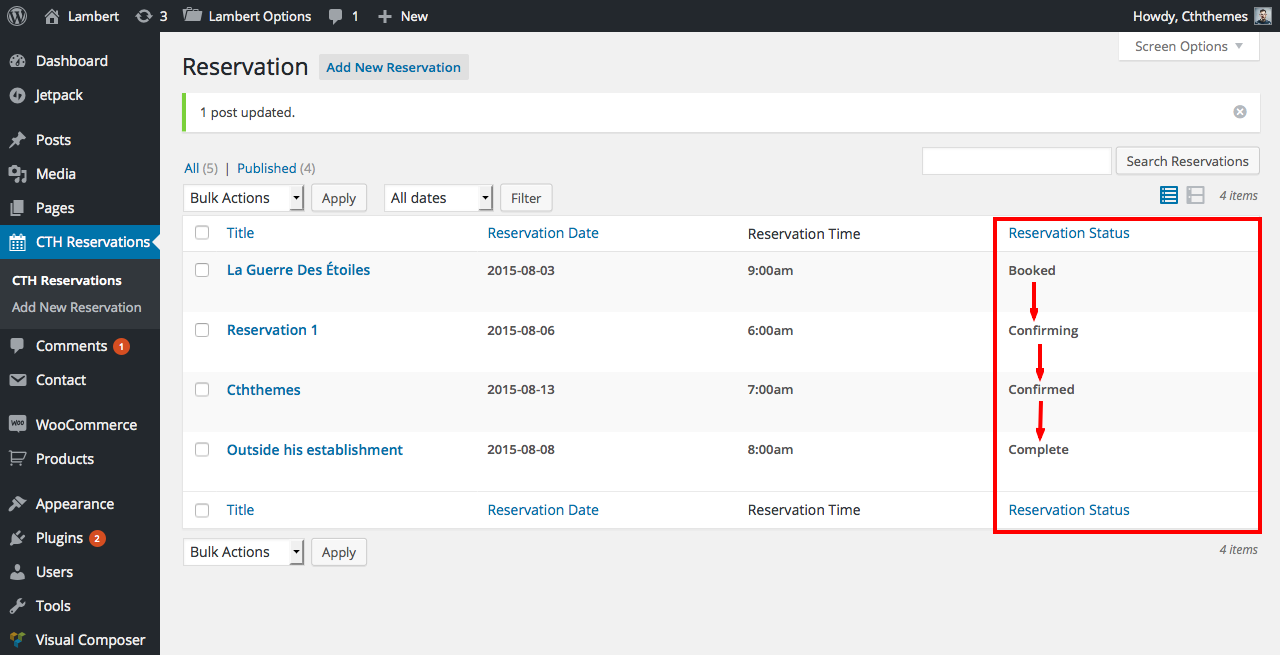
- The Booked status is for a reservation was just booked by a user.
- If Send Confirm Email field was checked from plugin setting screen a confirming email with confirm link (that allow user click to it to confirm the reservation) will be sent to the user.
- If the field was unchecked, from the backend you can send the confirming email to the user by change reservation status from Booked to Confirming the click to Publish button.
- The Confirming status indicate that the confirming email was sent to the user and the user was not click to the confirm link.
- The Confirmed status is for reservation that user click to confirm link and see confirm success message from reservation confirm page. Also confirmed email will send to the user and reservation status will change from Booked to Confirmed or from Confirming to Confirmed if you have changed reservation status to Confirming before. You can send confirmed email to the user via backend when update reservation status form Confirming to Confirmed.
- The Complete status indicate that the user have completed the reservation and when change to the status from the back-end screen the thank you email will send to the use.
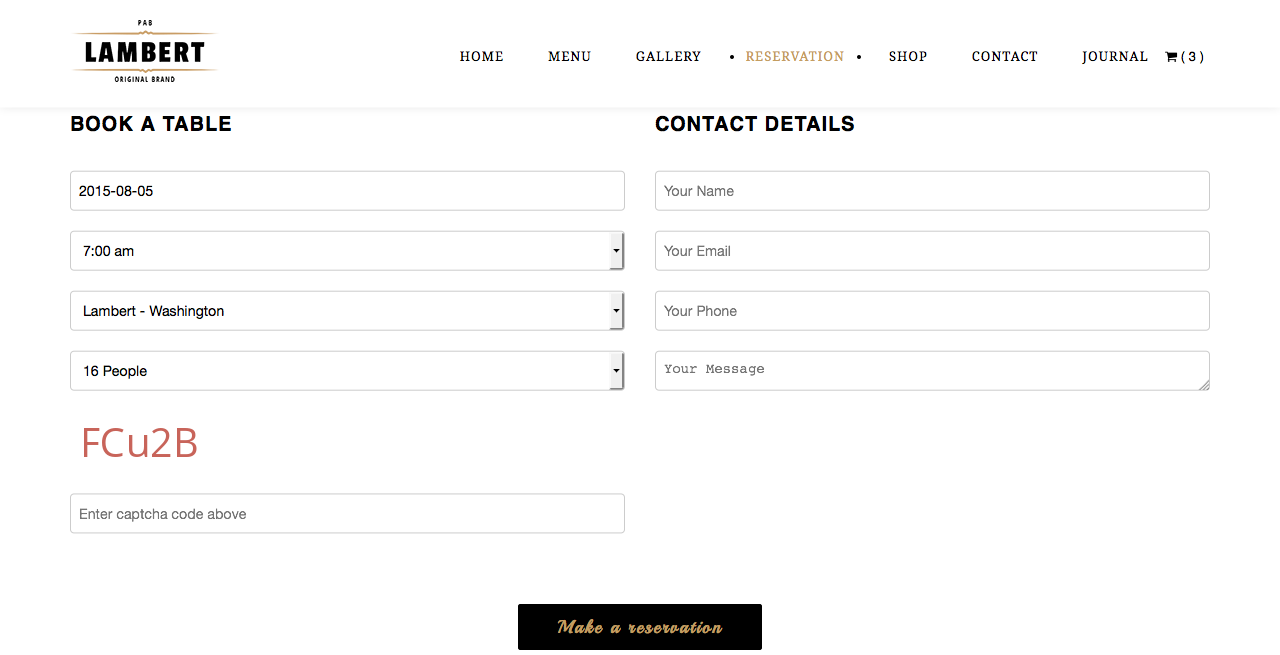
To insert the reservation form to your page pleae use CTH Reservation Form element in Visual Composer editor or use [cth_reservation_form] shortcode in text editor instead.
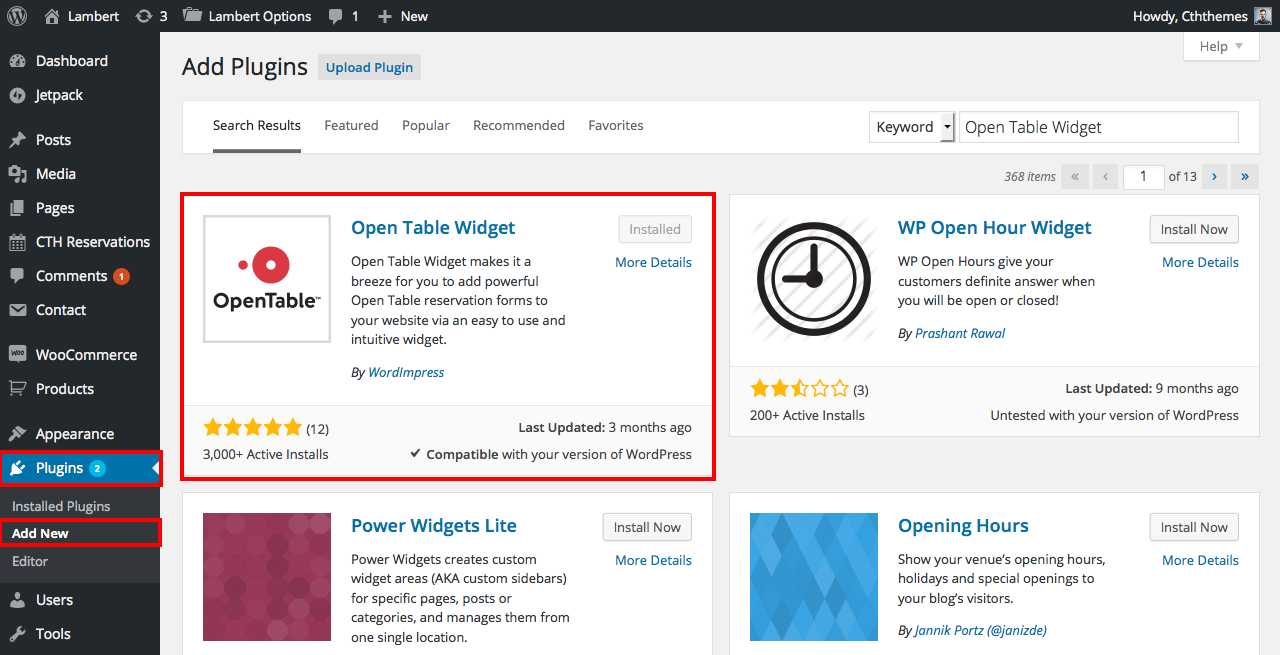
OpenTable Reservation Form
Our also give you an alternative way to import popular OpenTable reservation form to your site via Widgetised Sidebar element from Visual Composer.
- Go to Plugins click Add New the search for Open Table Widget plugin then install it form the result list.
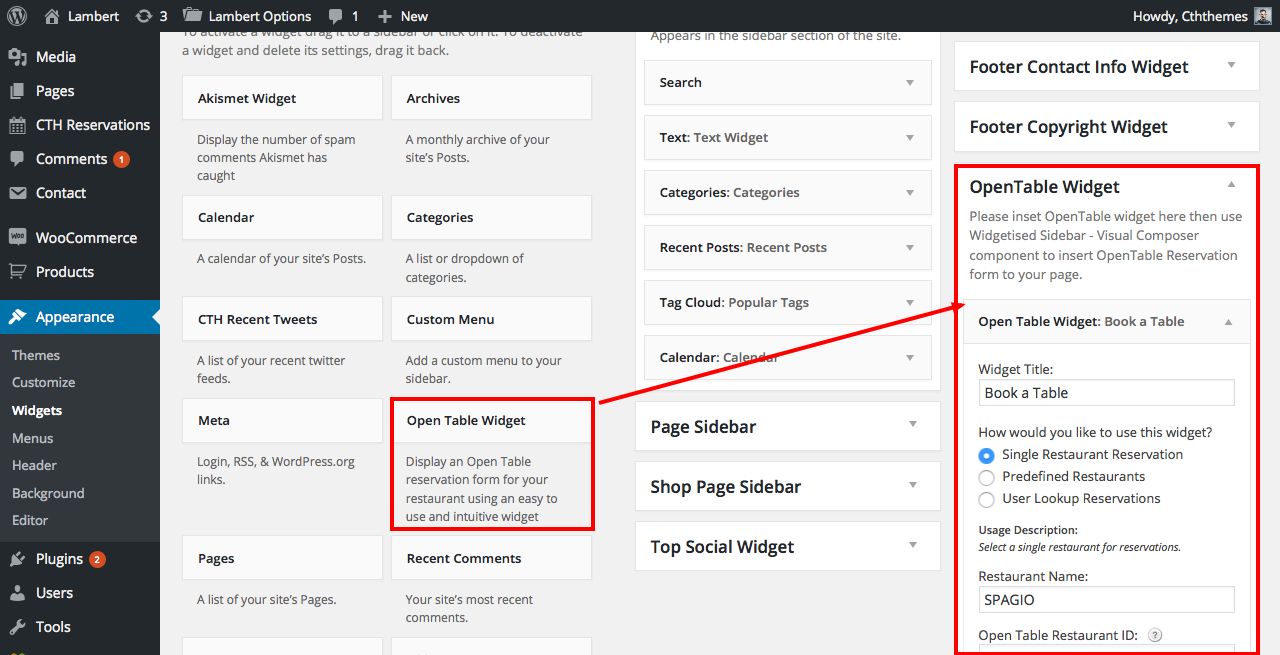
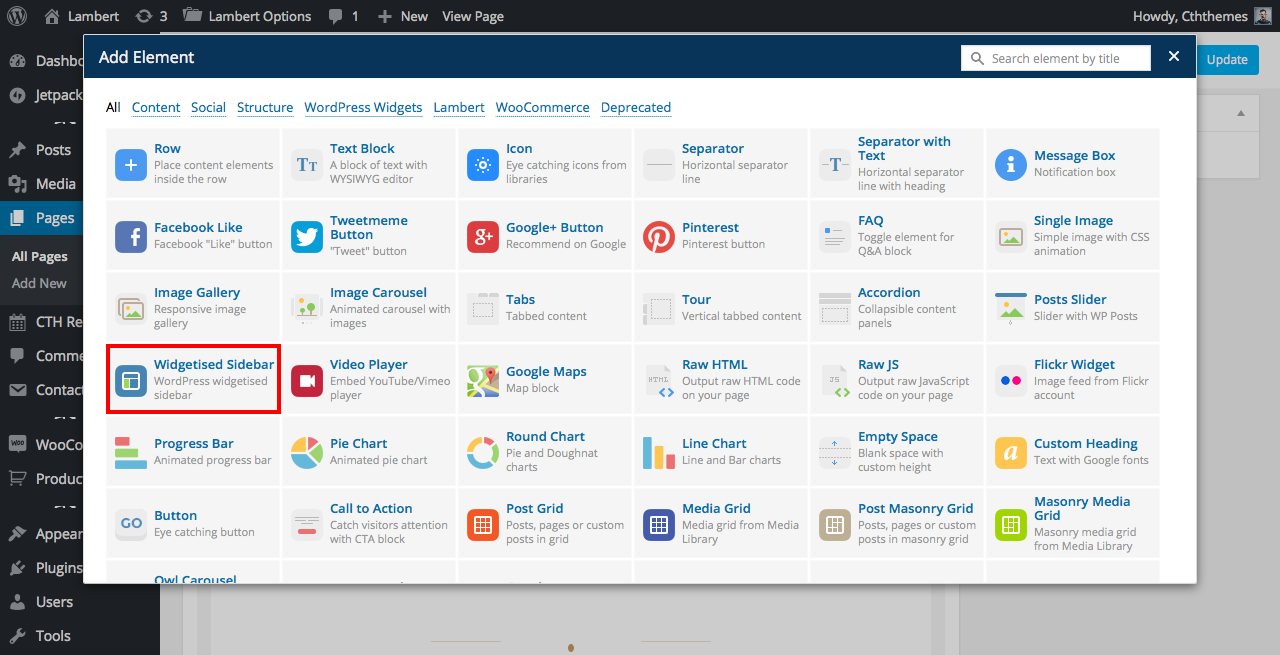
- Go to Appearance > Widgets then drag the widget to OpenTable Widget area. This widget area will be used in Visual Composer editor only.
- Use Widgetised Sidebar element to insert the widget area to your page.
Theme Translation
The theme comes localization ready out of the box – all that’s needed is your translation, if the theme does not come bundled with one for your language.
There are several methods to create a translation, most of which are outlined in the WordPress Codex. However, we find the easiest method is to use a plugin called Loco Translate. More advanced users can use PoEdit. Both methods are covered in this doc.
Before you begin
The theme includes a language file (.po or .pot file) which contains all of the English text. You can find this language file inside the theme folder in lambert/languages/.
Set up WordPress
WordPress needs to be told which language it should run under.
- Go to: Dashboard > Settings > General and change the Site language.
Once this has been done, the theme will be displayed in your locale if the language file exists. Otherwise you need to create the language files (process explained below).
Translating with Loco Translate
Loco Translate is a free plugin that you can download here. You can also add directly from the WordPress administration, in Plugins > Add New.
Once you downloaded and installed Loco Translate, a new “Loco Translate” menu item is created with two sub-sections. By default the “Manage Translations” section will list all your themes and plugins and will display all available translations for each of them:
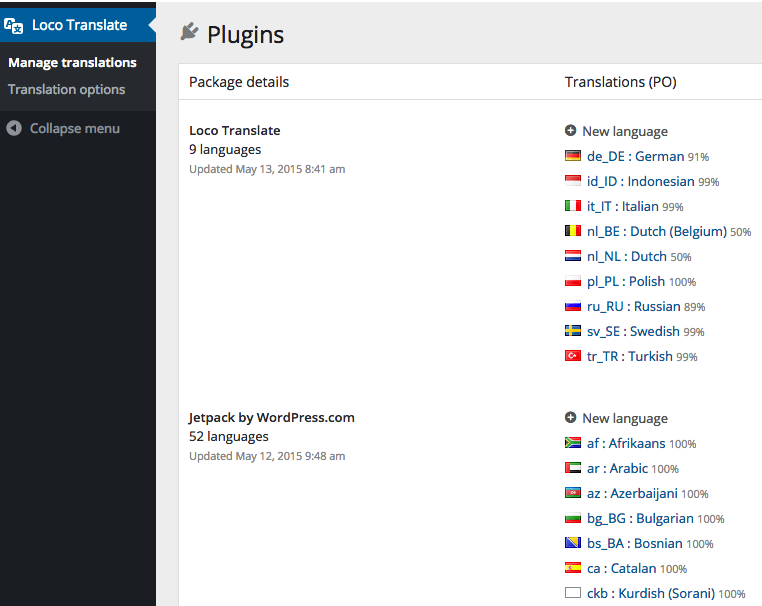
Loco Translate Listings
You can easily add new languages to a theme or a plugin using the Add New Language link:

Loco Translate: add new language
Then choose the language to add in the list, or enter the language ISO code (ex: fr_FR, en_US etc…), and select the folder to add the translation files to, and hit Start Translating:
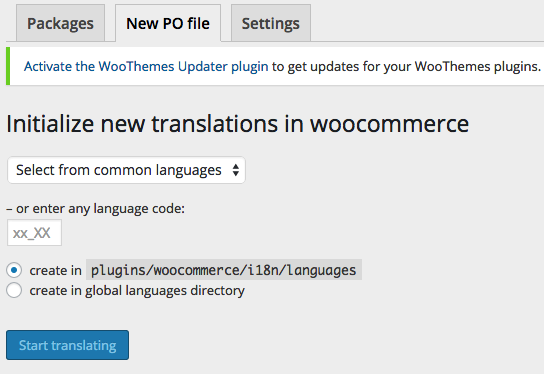
Loco Translate: create new language
Finally start translating, and save when you finish:
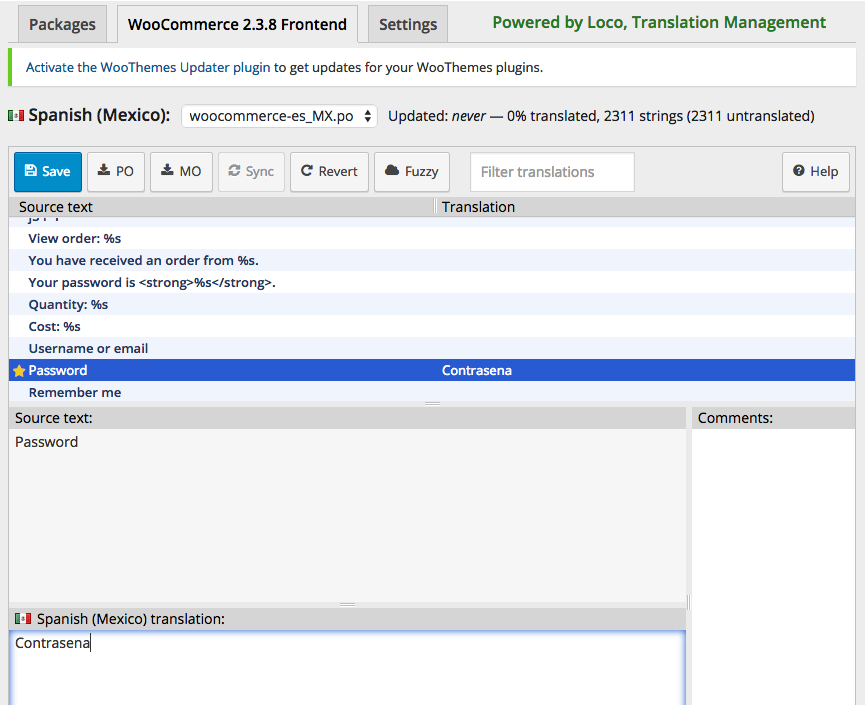
Loco Translate: Start translating!
Translating with PoEdit
PoEdit is a more advanced alternative to Loco Translate. Only advanced users should attempt this method.
Lambert comes with 2 PO files which can be imported into PoEdit to translate. These files are broken up to make the frontend more efficient.
- lambert.po – Contains frontend strings
- lambert-admin.po – Contains admin strings
Each is translated separately. To get started open \Root/wp-content/themes/lambert/languags/ folder > Duplicate lambert.po file the rename it based on what you are translationg to, for example, a GB translation would be saved as en_GB.po or lambert-en_GB.po. Now open new file with PoEdit, the strings will be listed.
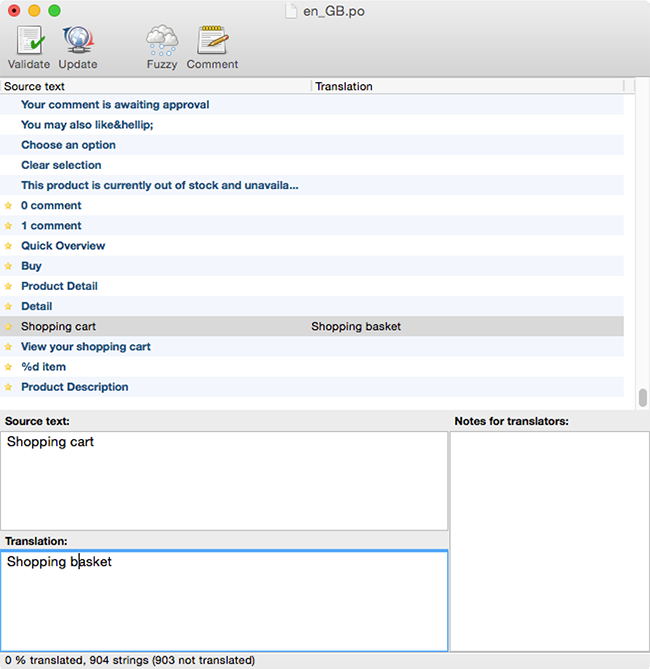
Translate the strings
After translating all strings you can save – the .mo file will also be generated automatically.
Woocommerce Plugin
Usefull links:
Thanks
Thanks all of you who stay with us, your co-operation is our inspiration.