Springbook - Responsive WordPress Blog Travel Photography Theme
- created: 11/8/2016
- latest update: 11/8/2016
- by: Cththemes
- email: cththemes@gmail.com
Theme Overview
Welcome to Springbook - Responsive WordPress Blog Travel Photography Theme
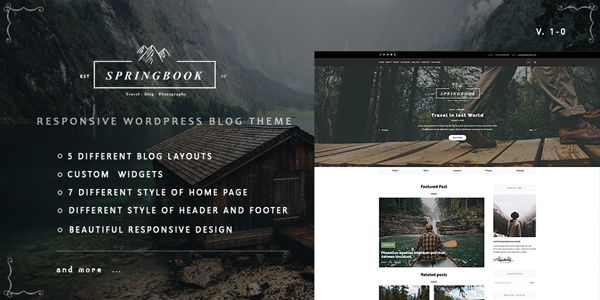
Springbook - Responsive WordPress Blog Travel Photography Theme is perfect if you like a clean and modern design. This theme is ideal for bloggers, travelers, photographers, and those who need an easy, attractive and effective way to share their work with clients.
Finally thanks for selecting Springbook
Get started with Springbook
This documentation is briefly describe all of sections and themes options. I wish it is help you to customize your site what you want.
What's Included
When you purchase our theme from Themeforest, you need to login to Envato then download theme zipped file from Downloads tab. ( Downloads -> All files & documentation )
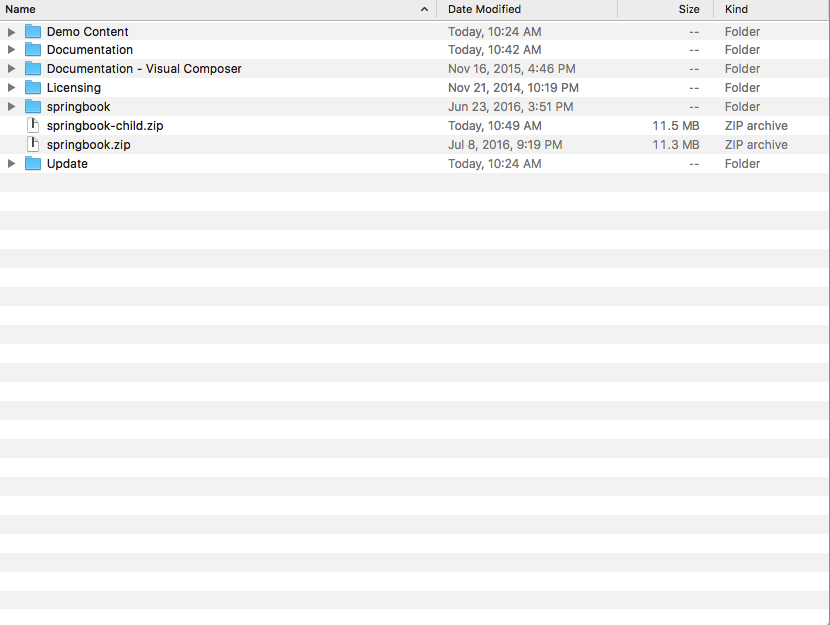
Theme zipped file:
- Demo Content – folder contains exported .xml demo content file and shortcode content for all demo pages, portfolios.
- Documentation - folder contains off-line documentation version for Springbook theme.
- Documentation - Visual Composer - folder contains documentation for Visual Composer plugin.
- springbook - folder is unzip theme folder which is used when Install Springbook theme Manually (FTP).
- springbook.zip – file is Springbook theme file which is used when Install Springbook theme using the Administration Panels and Install Springbook theme by using cPanel.
- springbook-child.zip – file is Springbook child theme.
- Update – folder contains information for updating Springbook theme. Will be updated in new version.
Theme Information
Get an overview of versions, file modifications and potential issues in Springbook theme.
Version:
You have to use WordPress version 4.4+ .
System Check:
The system check shows you all critical files or potential problems.
File permission: Check out the WordPress documentation for more information on file permissions.
PHP Version: Checks, if your theme runs on an unsupported/deprecated PHP version.
PHP Extensions: Checks, if these necessary PHP extensions are installed (JSON, DOM XML, Multibyte String).
Installation
Setting up a Springbook theme follows the standard WordPress installation procedure and works like with any other themes.
- Download WordPress from the WordPress website.
- Setup a new WordPress install.
- Install and activate your theme.
For more information in regard to installing the WordPress platform, please see the WordPress Codex WordPress documentation.
When you are ready to install a theme, you must first upload the theme files and then activate the theme itself. The theme files can be uploaded in three ways:
Install Springbook theme using the Administration Panels
- Log in to the WordPress Administration Panels.
- Select the Appearance panel, then Themes.
- Select Add New.
- Use the Upload link in the top links row to upload Springbook theme zipped file (springbook.zip file in the downloaded package) that you have previously downloaded to your machine.
Install Springbook theme by using cPanel
If your host offers the cPanel control panel.
- Download the Theme to your local machine and extract it you will find springbook.zip file in the extracted folder.
- In cPanel File Manager, navigate to your Themes folder. If your WordPress is installed in the document root folder of your web server you would navigate to "public_html/wp-content/themes" and if you have WordPress installed in a sub-folder called wordpress, you would navigate to "public_html/wordpress/wp-content/themes".
- Once you've navigated to the Themes folder in cPanel File Manager, click on Upload file(s) and upload that .zip file in Step 1.
- Once the .zip file is uploaded, click on the name of that file in cPanel, then in the panel to the right, click on "Extract File Contents", and that .zip file will be uncompressed.
- Follow the instructions below for selecting the new Theme.
Install Springbook theme Manually (FTP)
To add Springbook theme to your WordPress installation, follow these steps:
- Download the Theme to your local machine and extract it you will find springbook folder in the extracted folder.
- Using an FTP client to access your host web server.
- Upload the Theme folder to the wp-content/themes directory provided by WordPress on your host server.
- Follow the instructions below for selecting the new Theme.
We recommand using the first method to prevent file permission issue.
Selecting the Active Theme
To select Springbook theme for your site:
- Log in to the WordPress Administration Panels.
- Select the Appearance panel, then Themes.
- From the Themes panel, roll over the Theme thumbnail image for the Springbook you are interested in to see options for that theme.
- You can view more information about any theme by clicking Theme Details.
- A live preview of any Theme (using your blog's content) can be seen by clicking Live Preview.
- To activate the Theme click the Activate button.
For more detail on install and using a WordPress Theme please read this tutorial: Codex - Using Themes
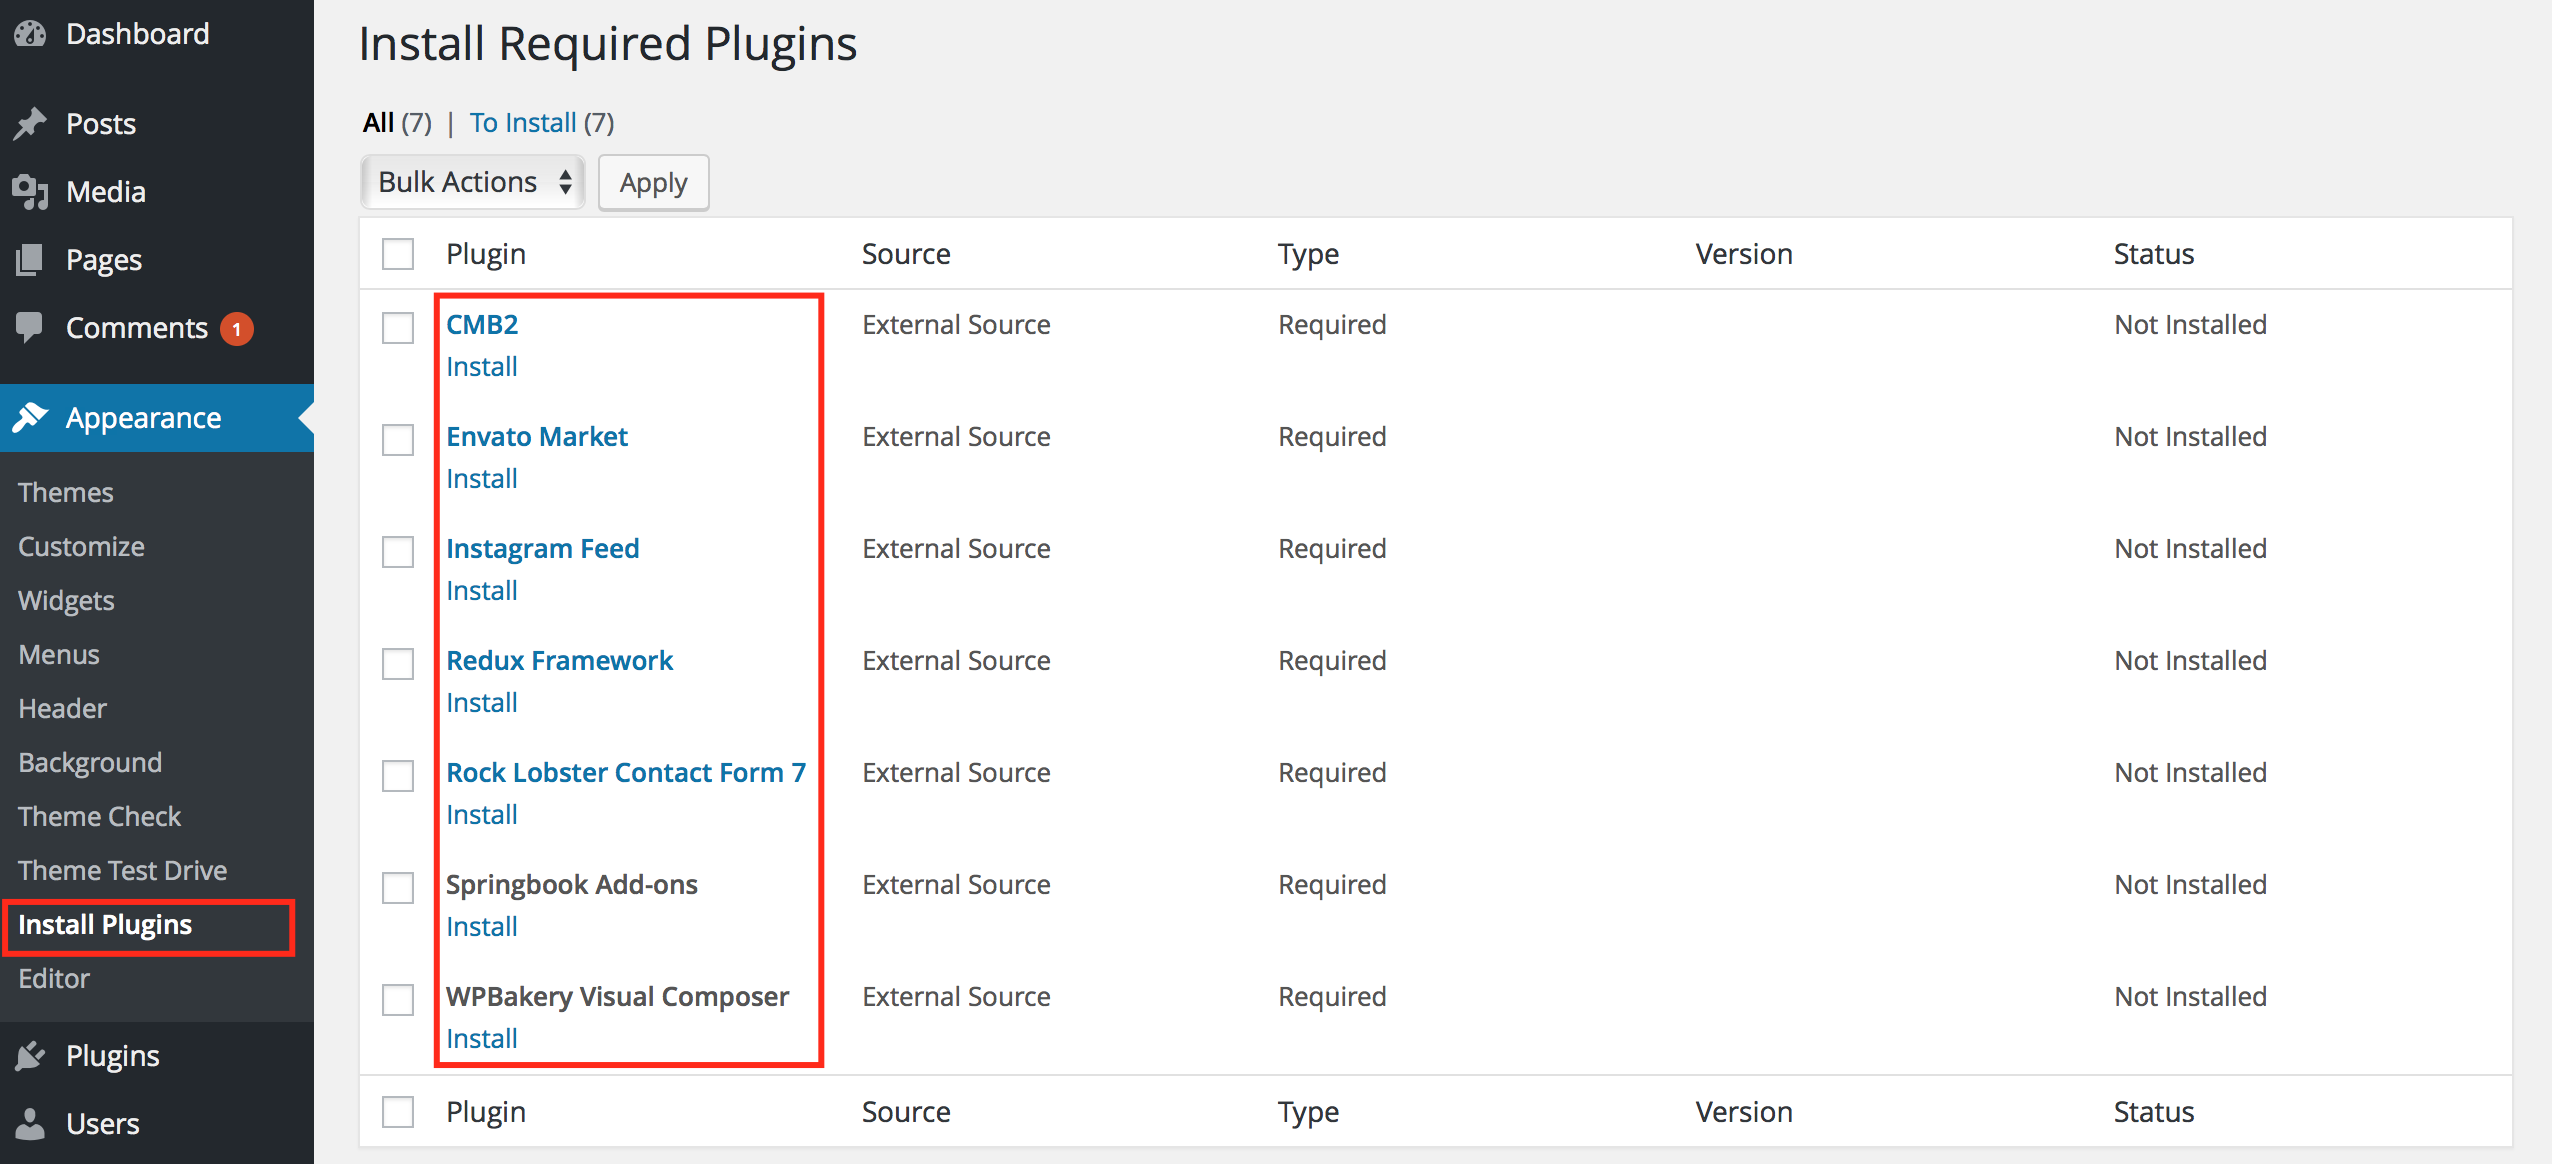
Install Required and Recommanded Plugins
After activating the theme you will see a submenu in your admin Appearance > Install Plugins. Where you have to install and active all required plugins.
Setup a Demo package
Before you can get started with your Springbook theme and have it look as the demo, you first need to add content to WordPress. There are two way to import demo data for the theme.
Method 1: - Using One Click Demo Import plugin intergrated in Appearance menu.
When installed and activated the theme you can import demo data using One Click Import Demo Data by follow these steps:
- Log into your site as an administrator.
- Go to Appearance -> Import Demo Data admin menu.
- On Import Demo Data screen select data you want to import to your site then click to Import Demo Data button and wait until you get the success message.
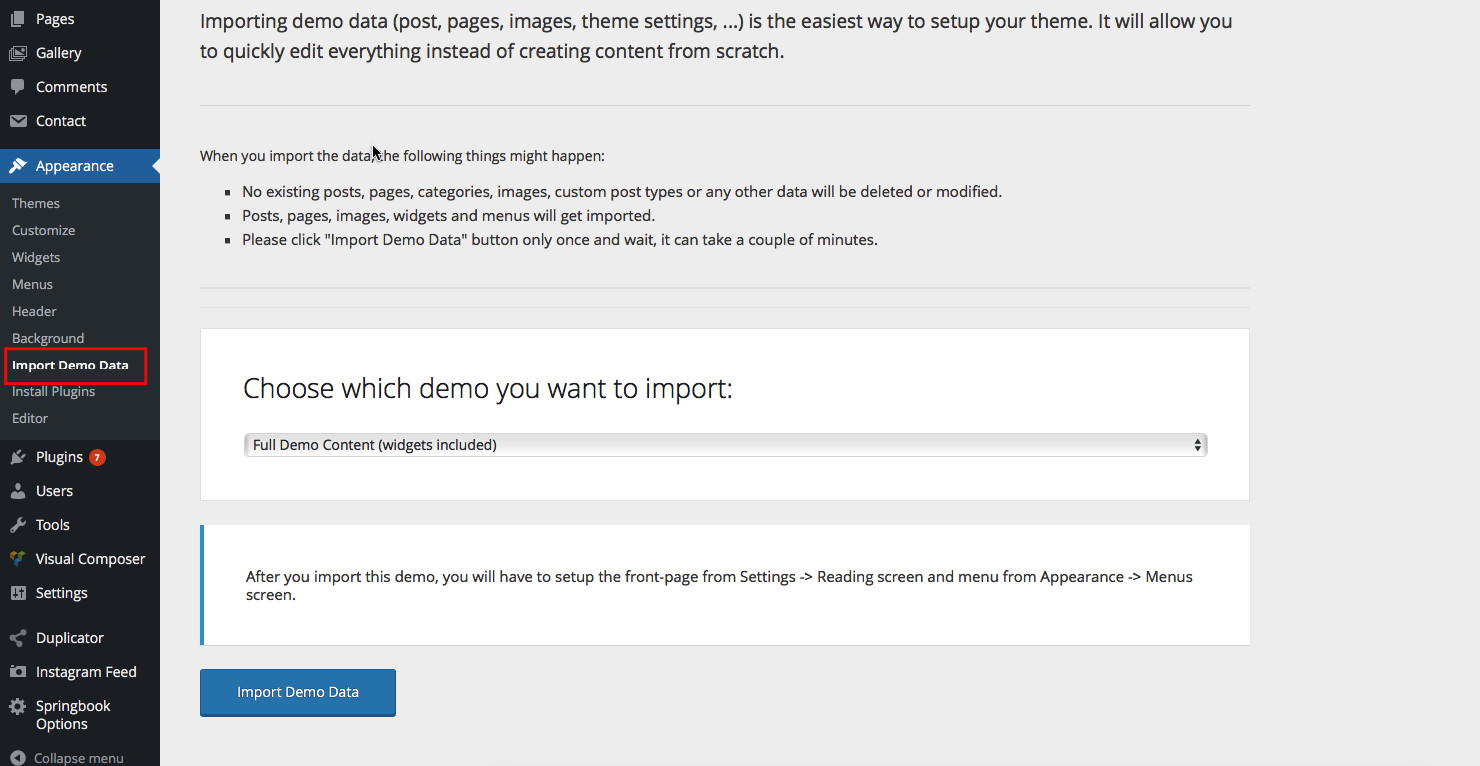
With Full Demo Content (widgets included) demo data selected you don't need to follow Import Demo Widgets tutorial from Sidebars and Widgets section.
Method 2: - Using WordPress Importer plugin.
In your downloaded theme package folder there is a file name /Demo Content/springbook.wordpress.2016-08-11-all-content.xml, it is the demo data .xml file that was exported from our demo. It will be used in WordPress Importer plugin to import all demo data to your site.
There are also separated content files for each post type from demo, was exported there if you only want import one of them. They are in \Post Types .XMLs/springbook.wordpress.2016-06-12-post-type.xml format.
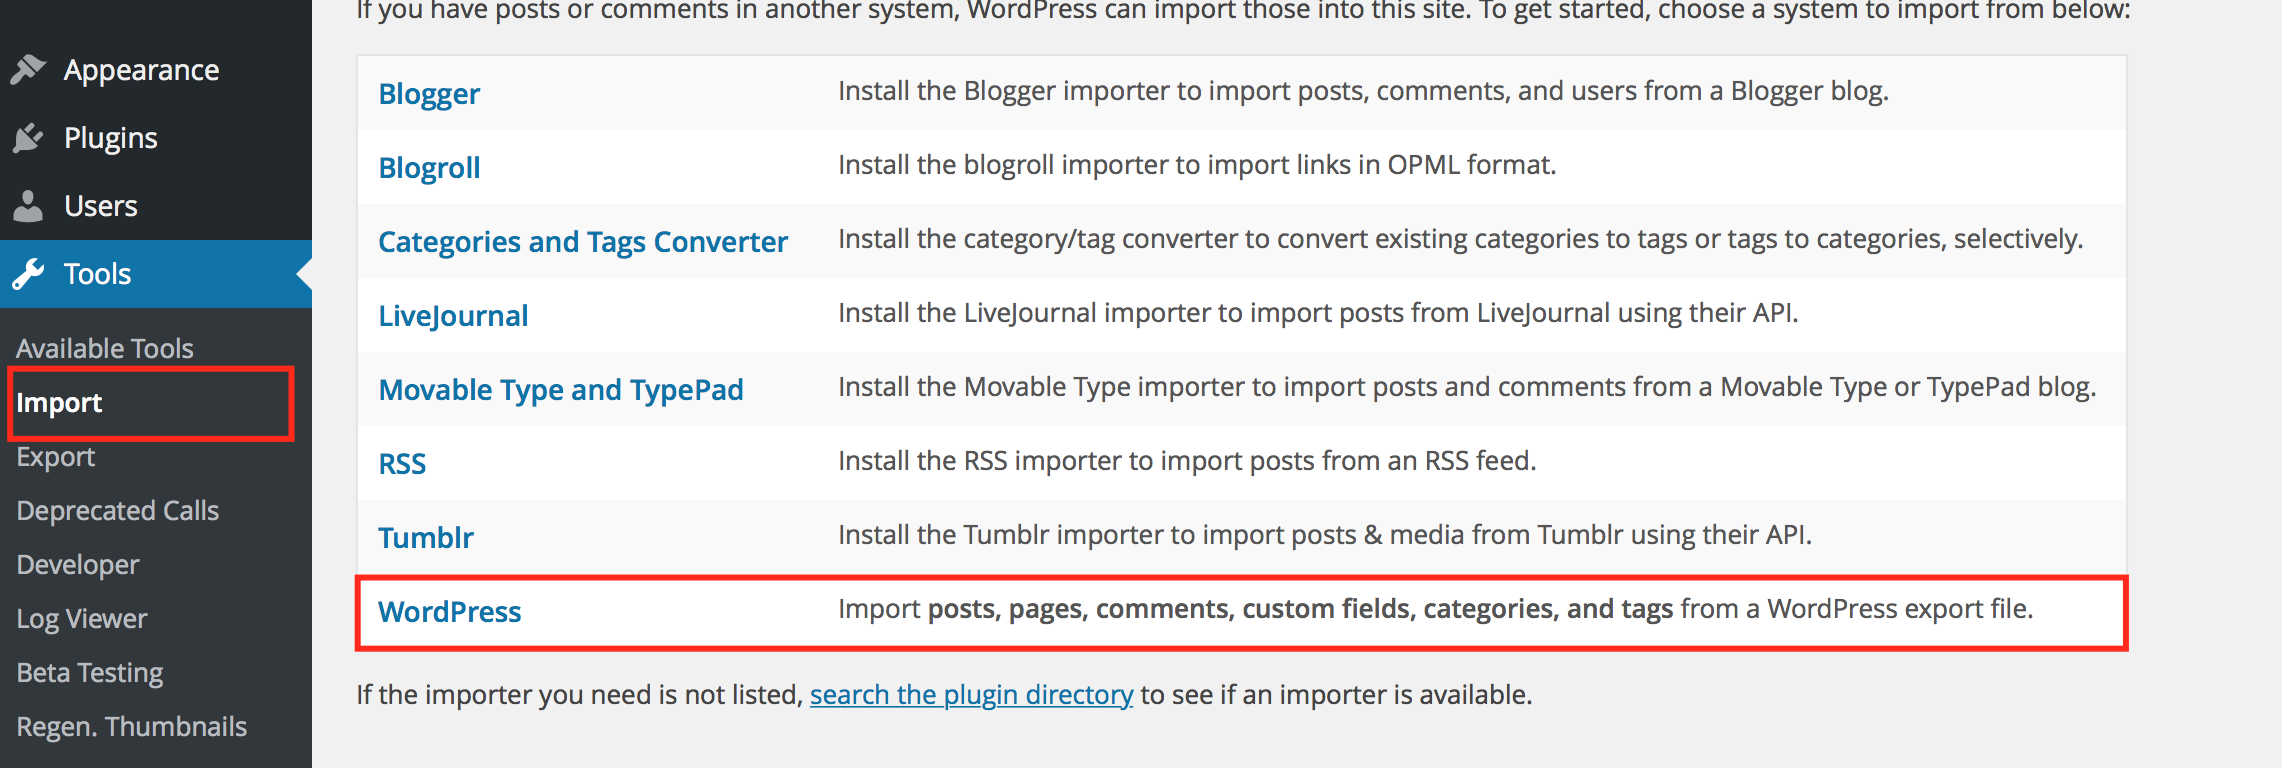
To import from a WordPress export file into a WordPress blog follow these steps.- Log into that blog as an administrator.
- Go to Tools > Import in the blog's admin panels.
- Choose WordPress from the list. (You need install the plugin for the first time)
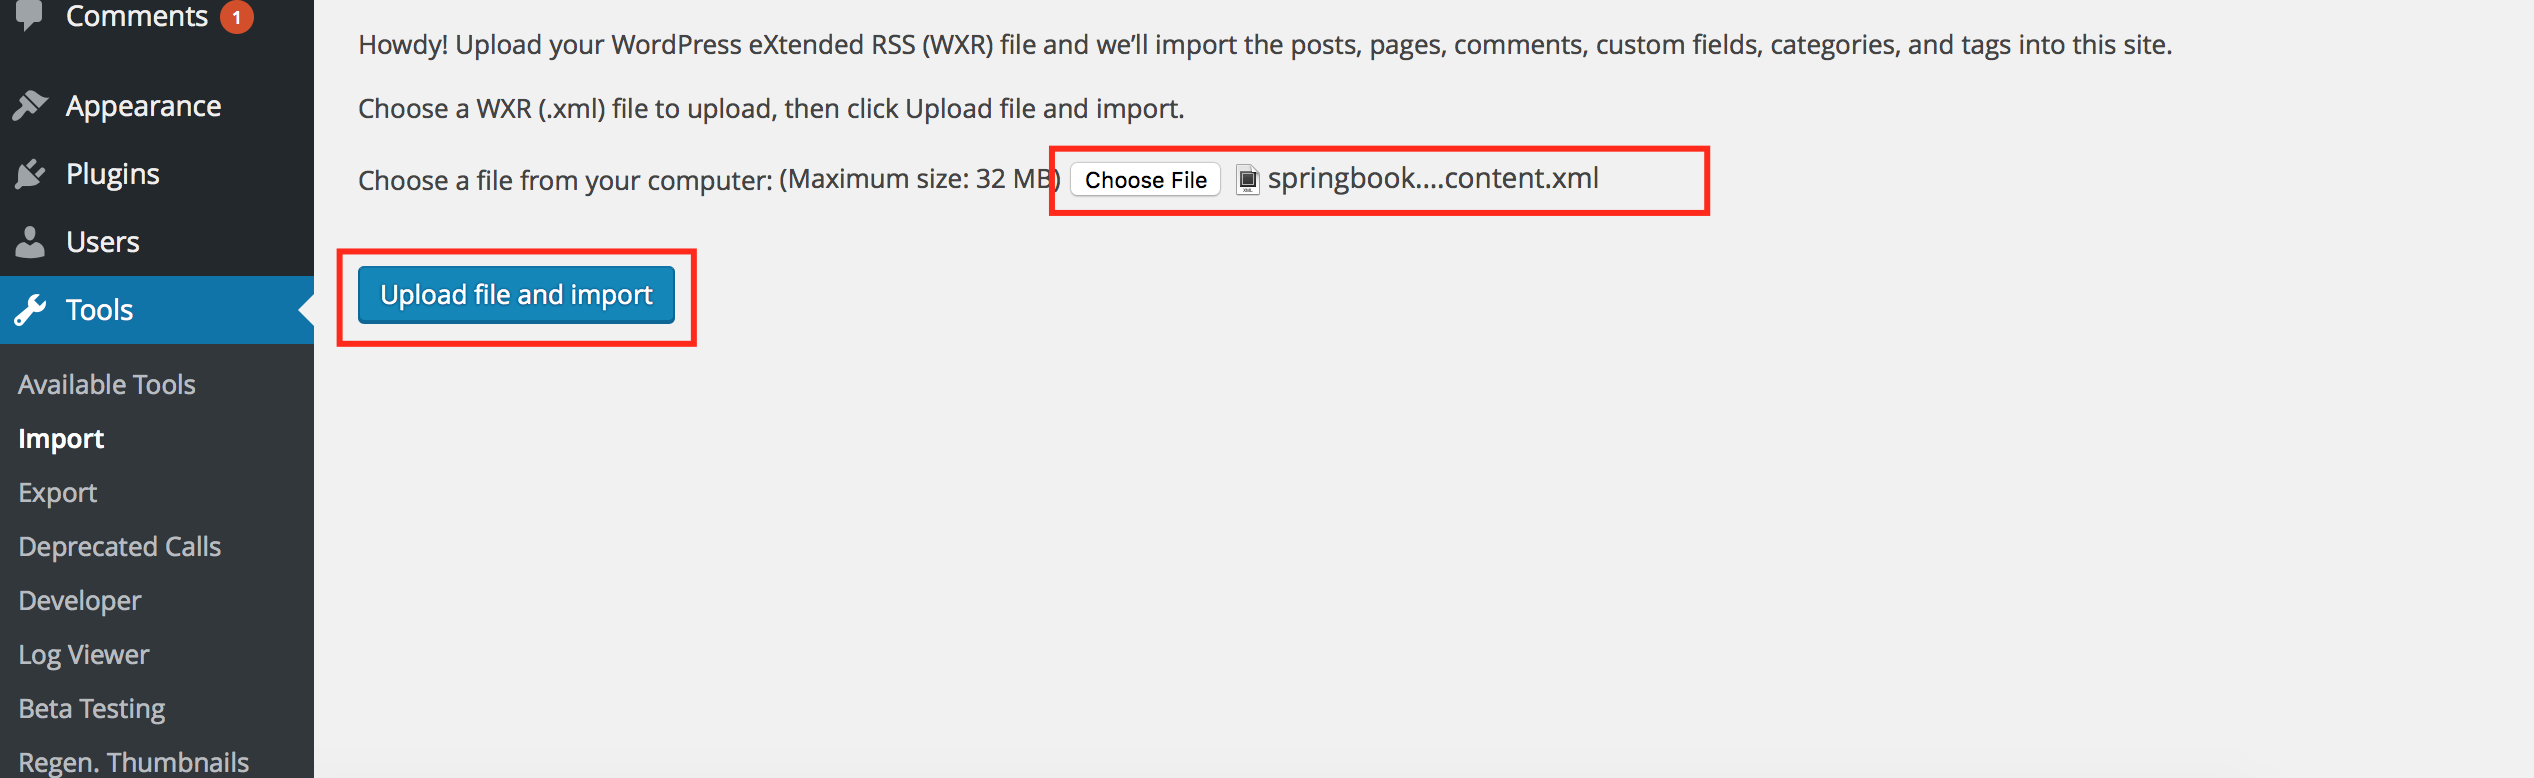
- Upload the file using the form provided on that page.
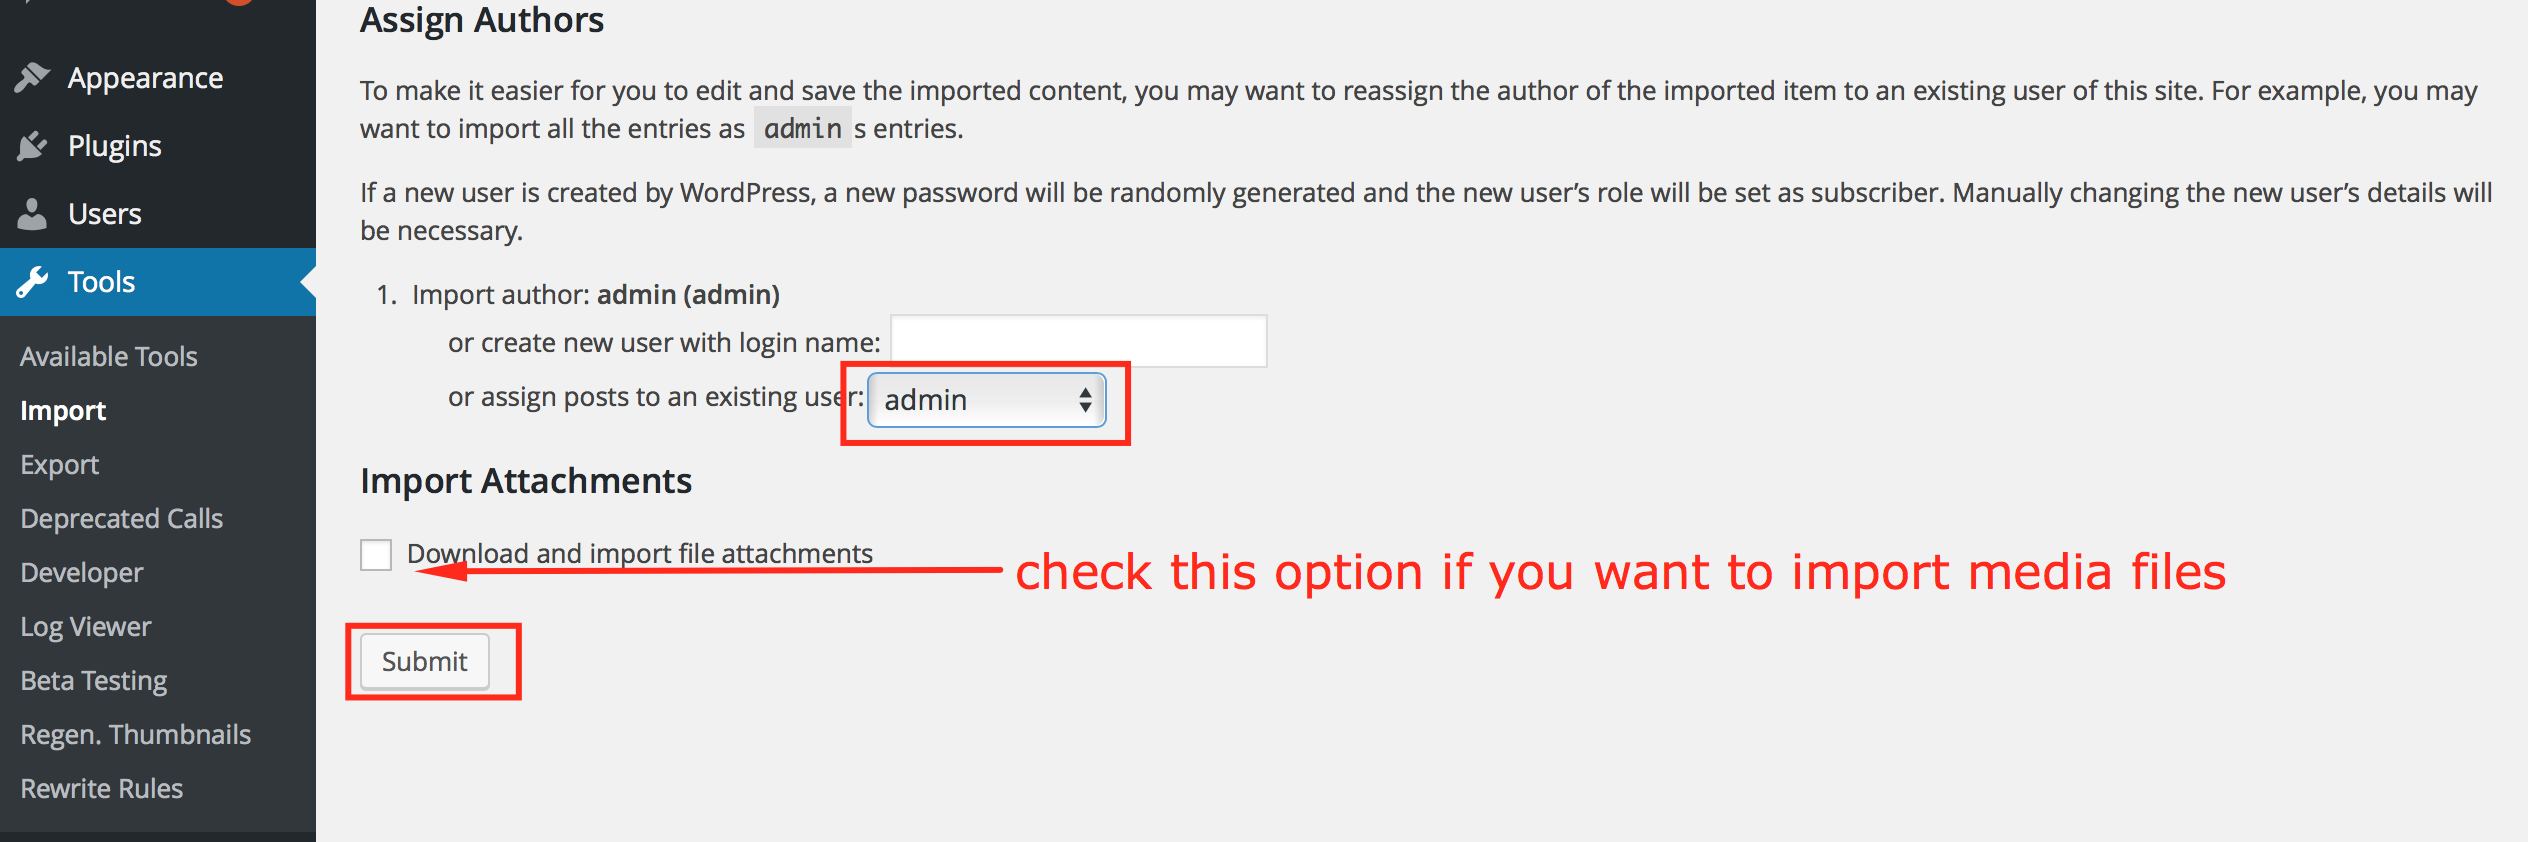
- You will first be asked to map the authors in this export file to users on the blog. For each author, you may choose to map to an existing user on the blog or to create a new user
- WordPress will then import each of the demo pages, posts, galleries, media, comments, categories and contact froms contained in this file into your blog.
After imported the demo content let setup your blog like our demo
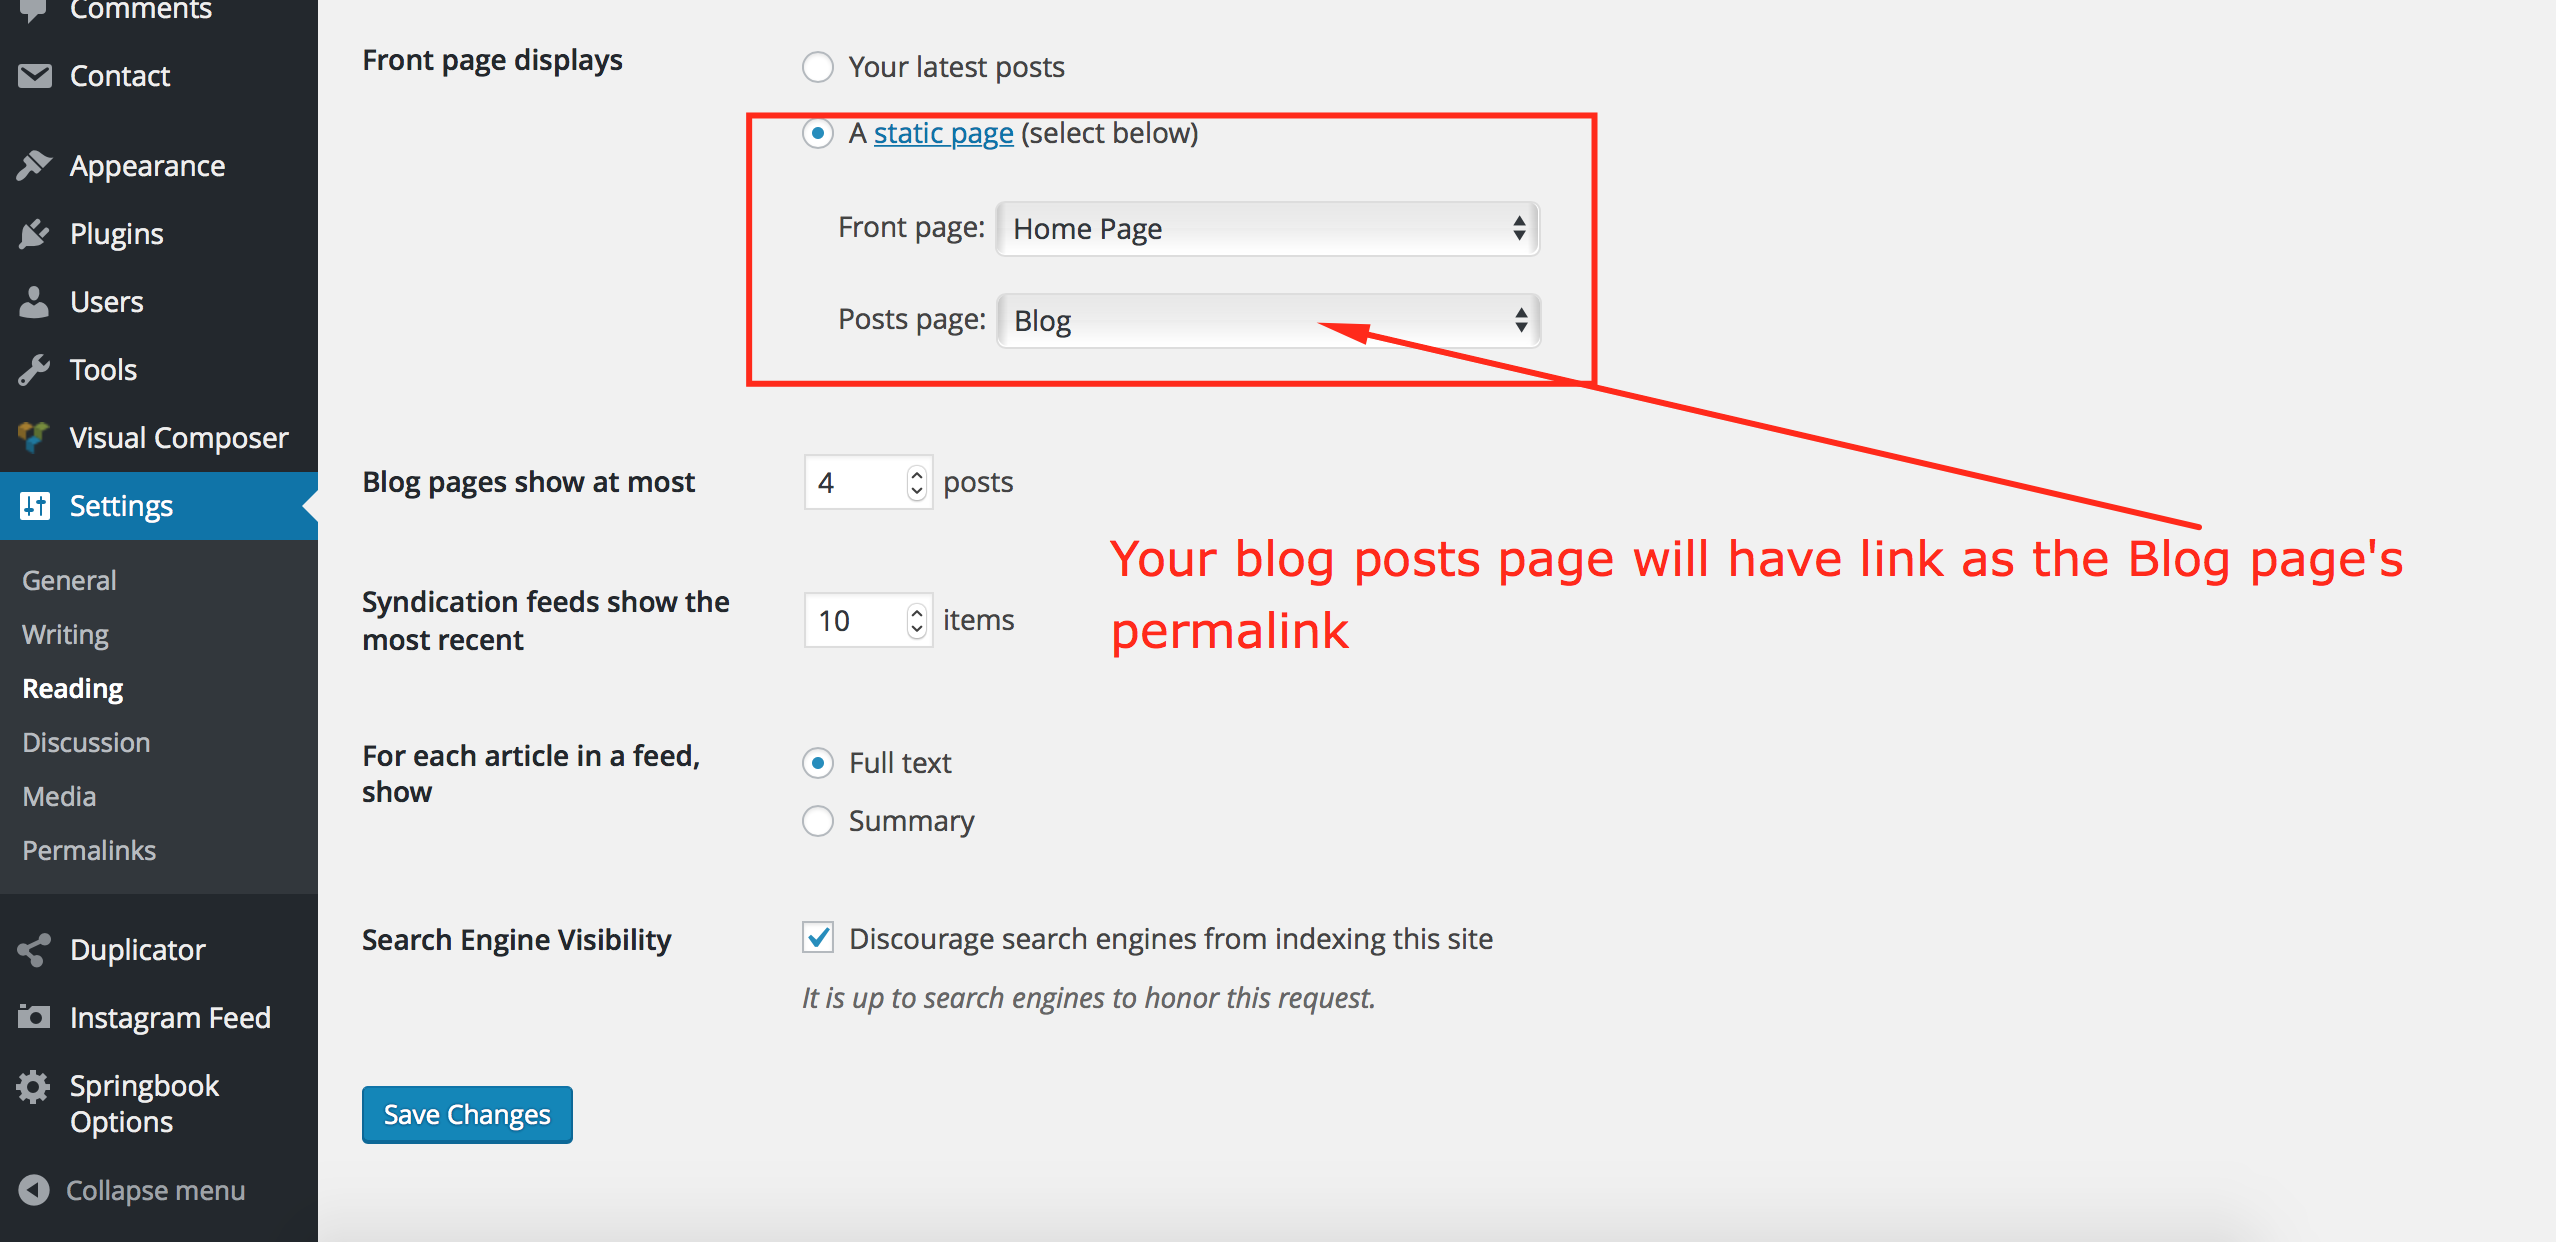
Setting up your front page
- Go to Settings > Reading in the blog's admin panels
-
In Front page displays option you will have two options
- Your latest posts - If select this your front page will look like our blog demo page (listing posts from your blog)
- A static page (select bellow) - Select one (Home page) of our demo pages that imported to your site before - Then your front page will look like our home demo page.
- Click Save Changes button
Theme Setup Tutorial Video
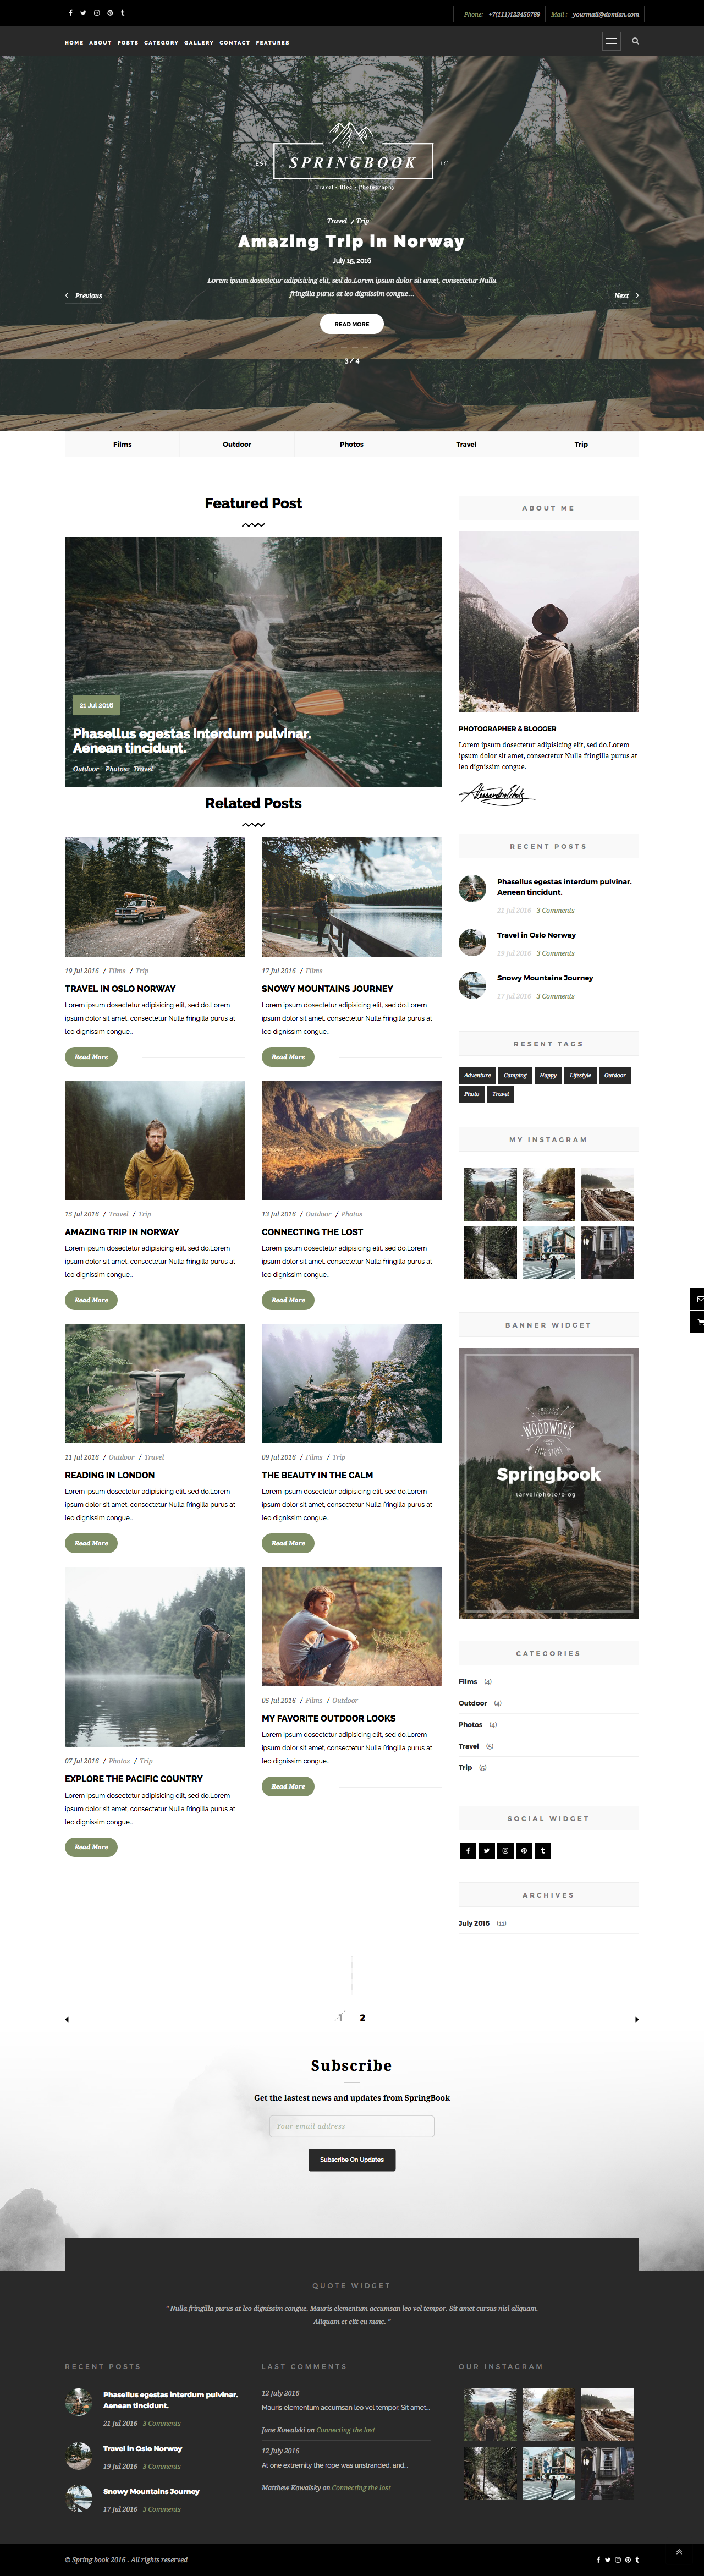
When done your font page will look like this:
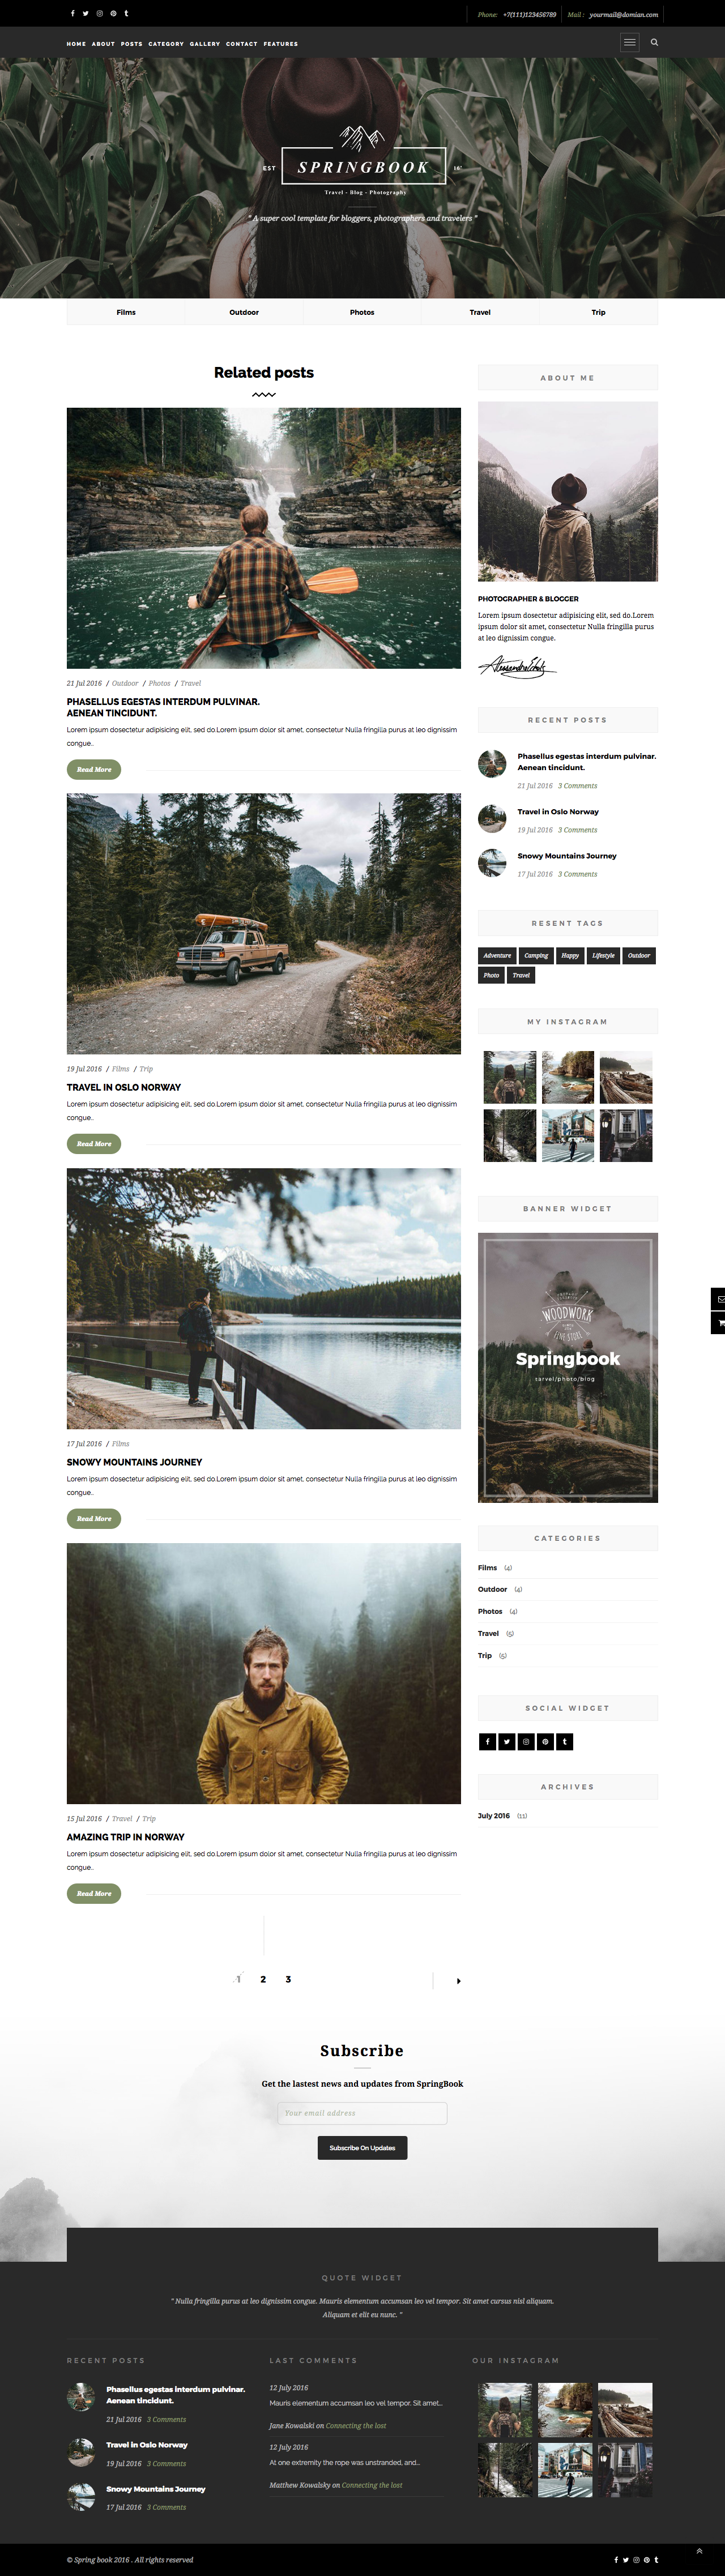
Or this for Your Latest posts option
For more details you can check this article:Creating a Static Front Page
Theme Features
Many of features has in our theme. Please take a look in total features.
- Visual Composer: Drag and Drop page builder (save $34)
- Contact Form 7
- WPML Compatible
- Filterable Galleries
- 6 different post format
- Limitless Options with Metabox Fields
- Unlimited Color
- Sidebar and full width page
- Right or Left sidebar position
- Fully Responsive
- Awesome Icons font
- Bootstrap 3.x
- Much More ...
Setup navigation Menu
All our themes have support for Custom Navigation Menu, and here are quick instructions on how you can create menus for your site. http://codex.wordpress.org/Appearance_Menus_SubPanel
Building the Main Navigation menu
You must define a menu before you can add items to it.
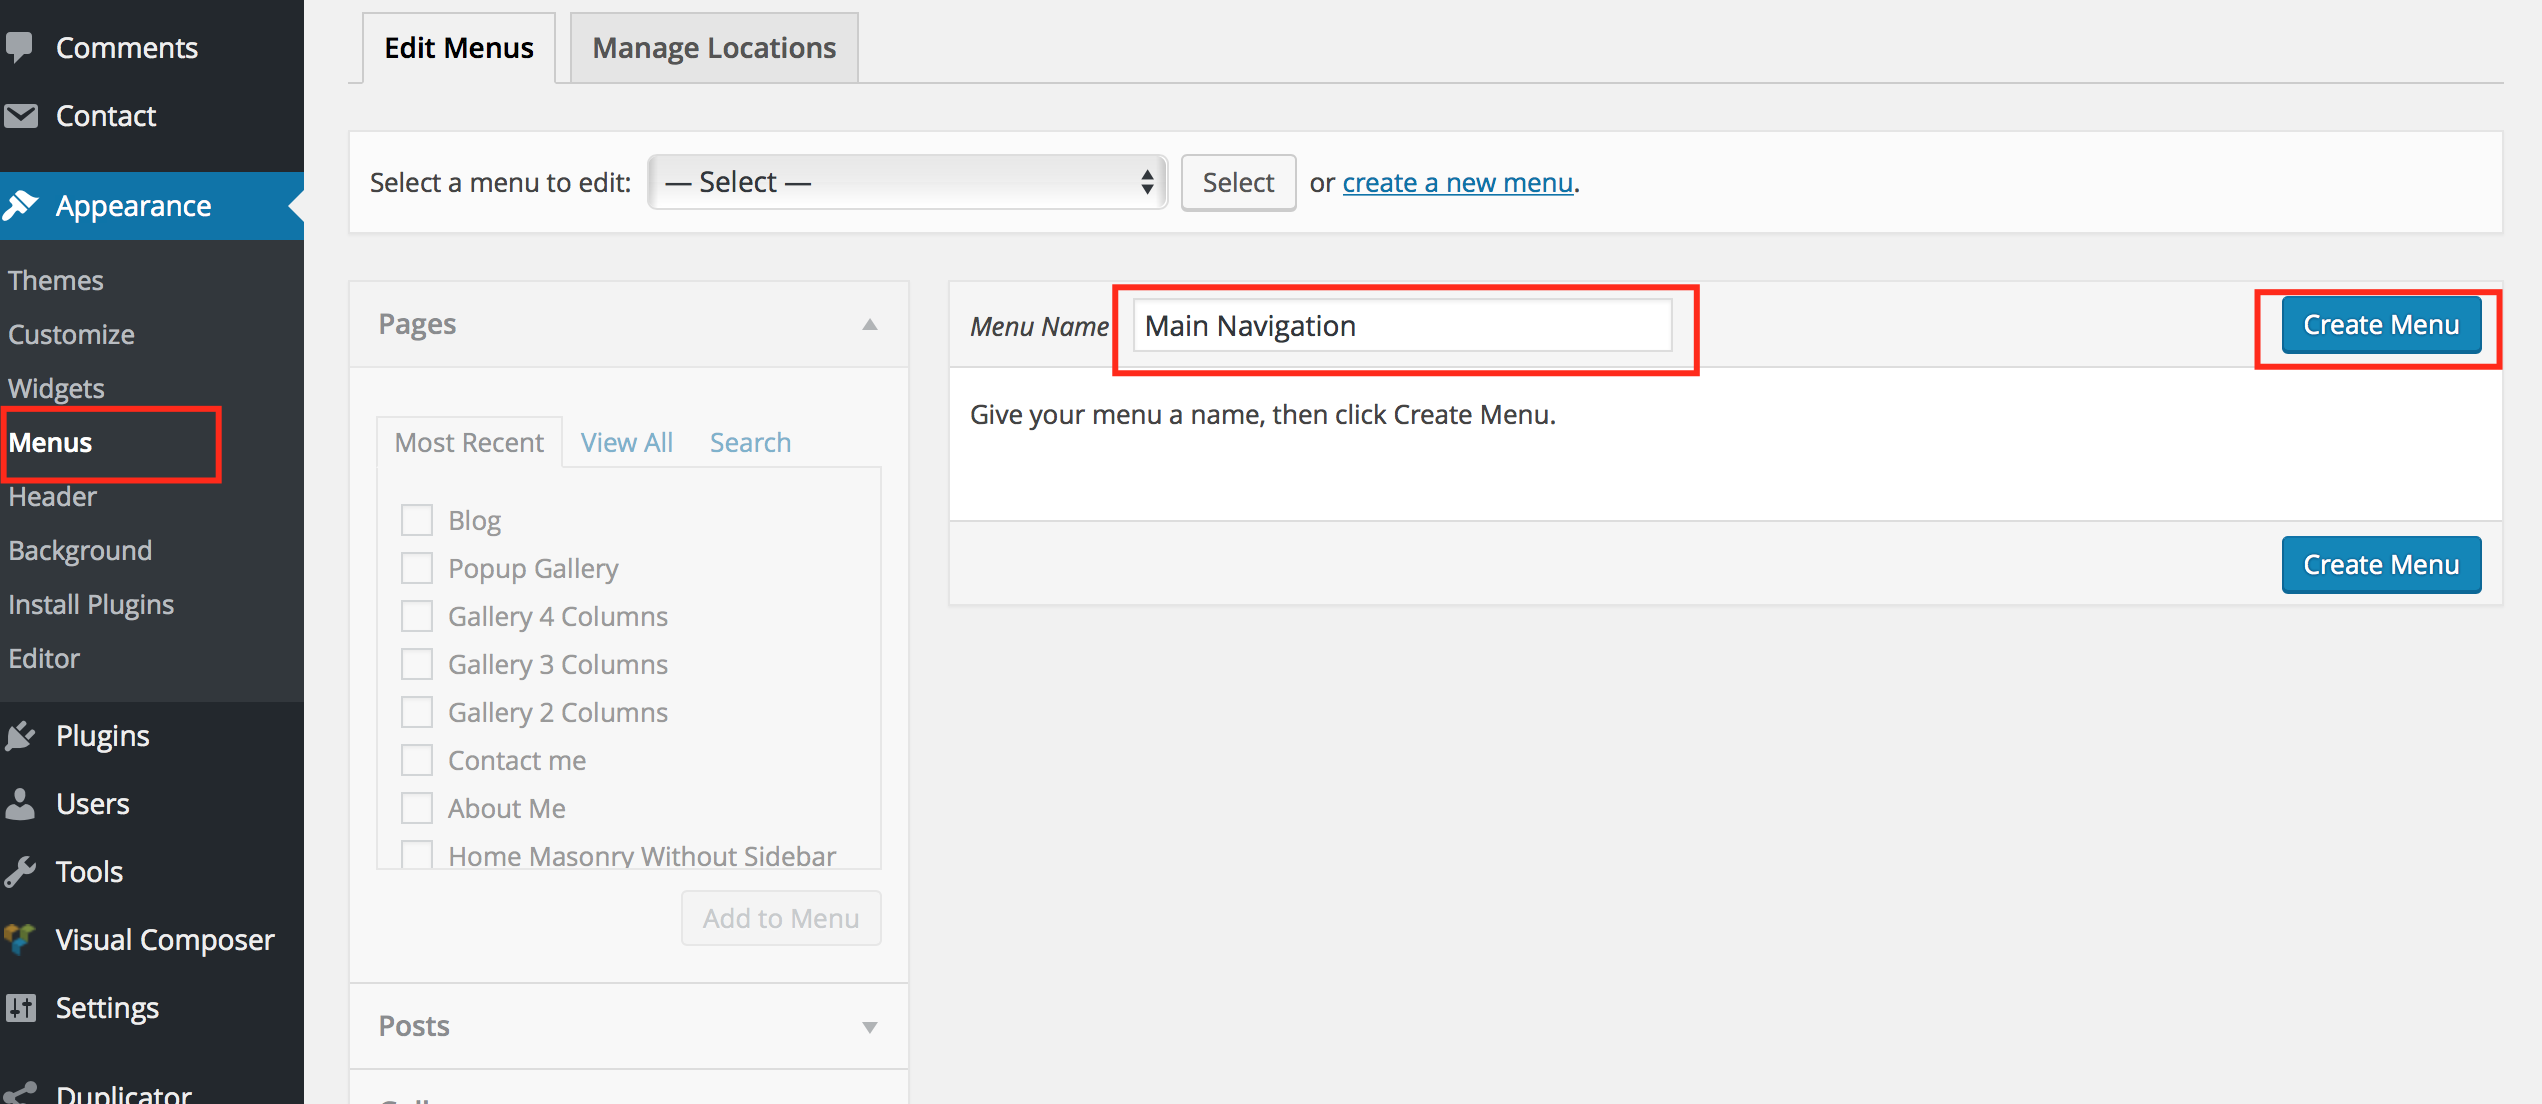
- Login to the WordPress Dashboard.
- From the Appearance menu on the left-hand side of the Dashboard, select the Menus option to bring up the Menu Editor.
- Select Create a new menu at the top of the page
- Enter a name for your new menu in the Menu Name box
- Click the Create Menu button.
Your new custom menu has now been defined.
Adding Items to a Menu
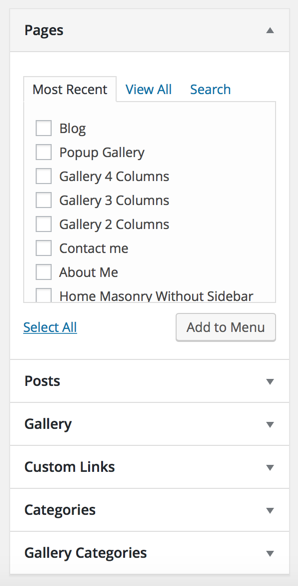
You can add different link types into your menu, these are split between panes left of the menu you're currently editing.
- Locate the pane entitled Pages.
- Within this pane, select the View All link to bring up a list of all the currently published Pages on your site.
- Select the Pages that you want to add by clicking the checkbox next to each Page's title.
- Click the Add to Menu button located at the bottom of this pane to add your selection(s) to the menu that you created in the previous step.
- Click the Save Menu button once you've added all the menu items you want.
Your custom menu has now been saved.
Note The Screen Options allow you to choose which items you can use to add to a menu. Certain items, like Tags are hidden by default.

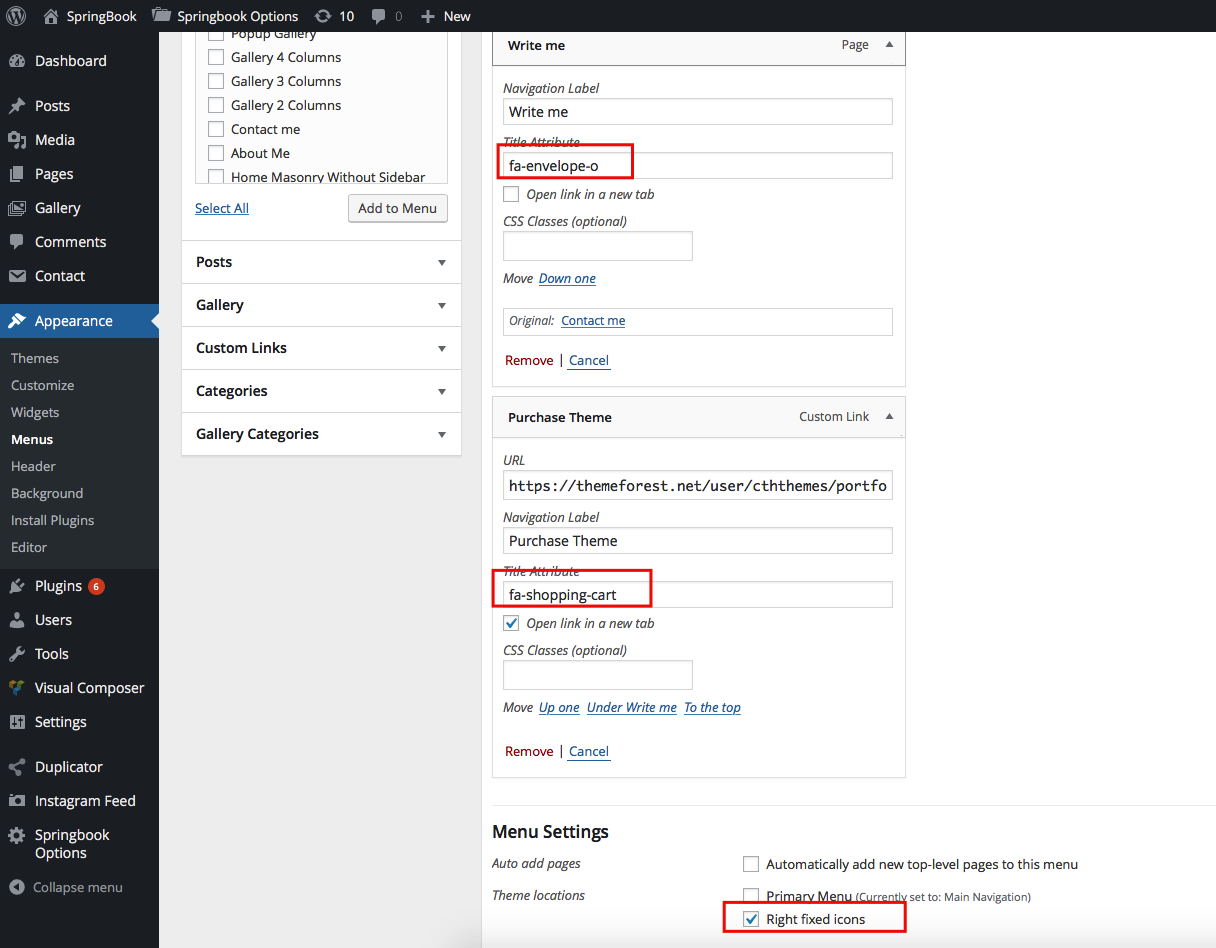
Customising Menu Items
- Navigation Label
- This field specifies the title of the item on your custom menu. This is what your visitors will see when they visit your site/blog.
- Title Attribute
- This field specifies the Alternative ('Alt') text for the menu item. This text will be displayed when a user's mouse hovers over a menu item.
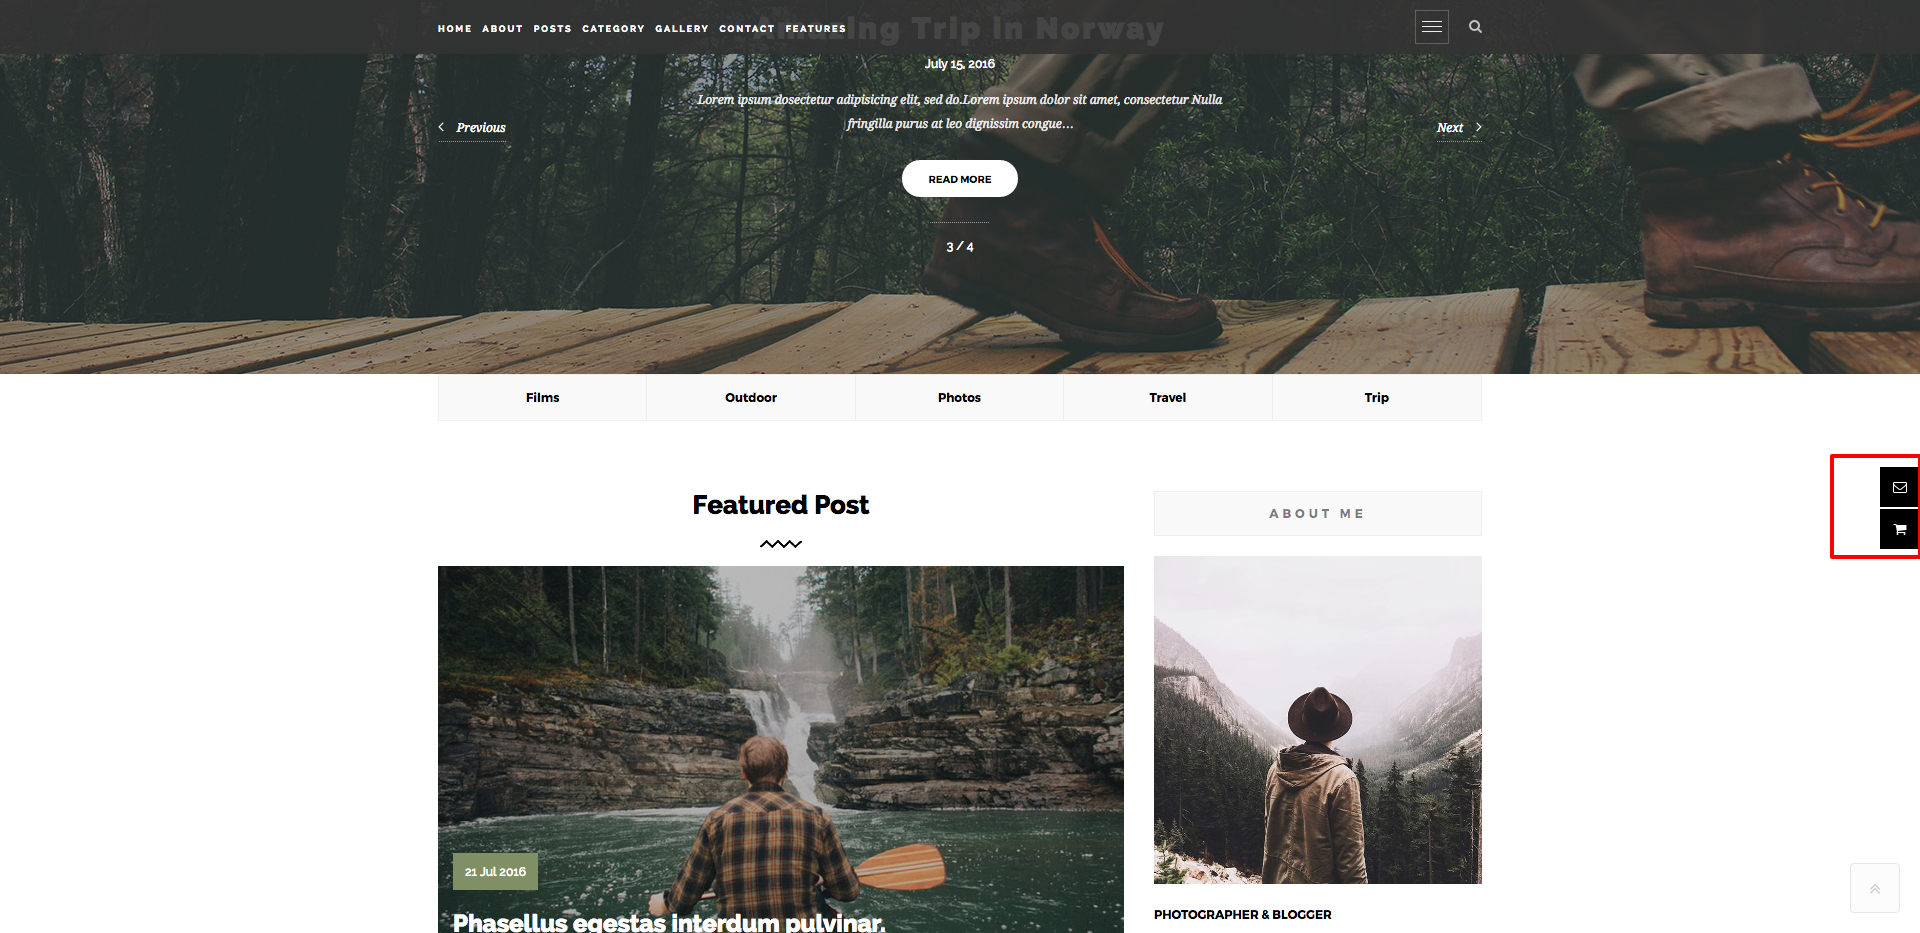
- Use Awesome font icon name (fa-envelope-o) for menu on Right fixed icons location. Like this: Right fixed icons menu. - Link Target
- Select "Same window or tab" or "New window or tab" from the pulldown.
- CSS Classes
- Optional CSS Classes for this menu item
Creating Multi-level Menus
When planning the structure of your menu, it helps to think of each menu item as a heading in a formal report document. In a formal report, main section headings (Level 1 headings) are the nearest to the left of the page; sub-section headings (Level 2 headings) are indented slightly further to the right; any other subordinate headings (Level 3, 4, etc) within the same section are indented even further to the right.
The WordPress menu editor allows you to create multi-level menus using a simple 'drag and drop' interface. Drag menu items up or down to change their order of appearance in the menu. Drag menu items left or right in order to create sub-levels within your menu.
To make one menu item a subordinate of another, you need to position the 'child' underneath its 'parent' and then drag it slightly to the right.
- Position the mouse over the 'child' menu item.
- Whilst holding the left mouse button, drag it to the right.
- Release the mouse button.
- Repeat these steps for each sub-menu item.
- Click the Save Menu button in the Menu Editor to save your changes.


Adding Menu to Your Site
Springbook theme supports custom menus, you will be able to add your new menu to one of two Theme Locations: Primary Menu and Right fixed icons.
- Scroll to the bottom of the menu editor window.
- In the section titled Theme locations, click the check box for the location where you want your menu to appear.
- Click Save menu once you've made your selection.
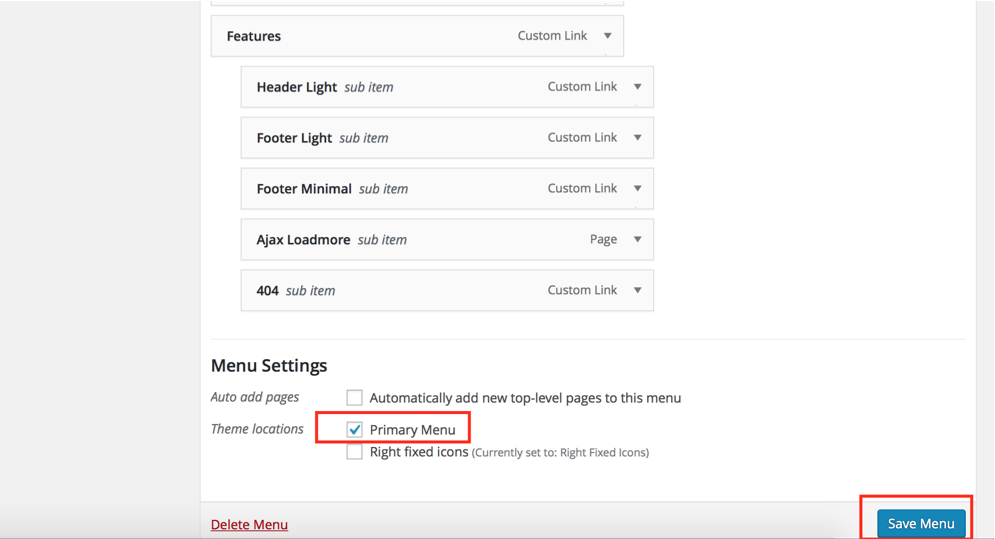
Main Navigation menu structure
Right Fixed Icons menu structure
For more detail in creating wordpress menu please read this guide: WordPress Menu User Guide
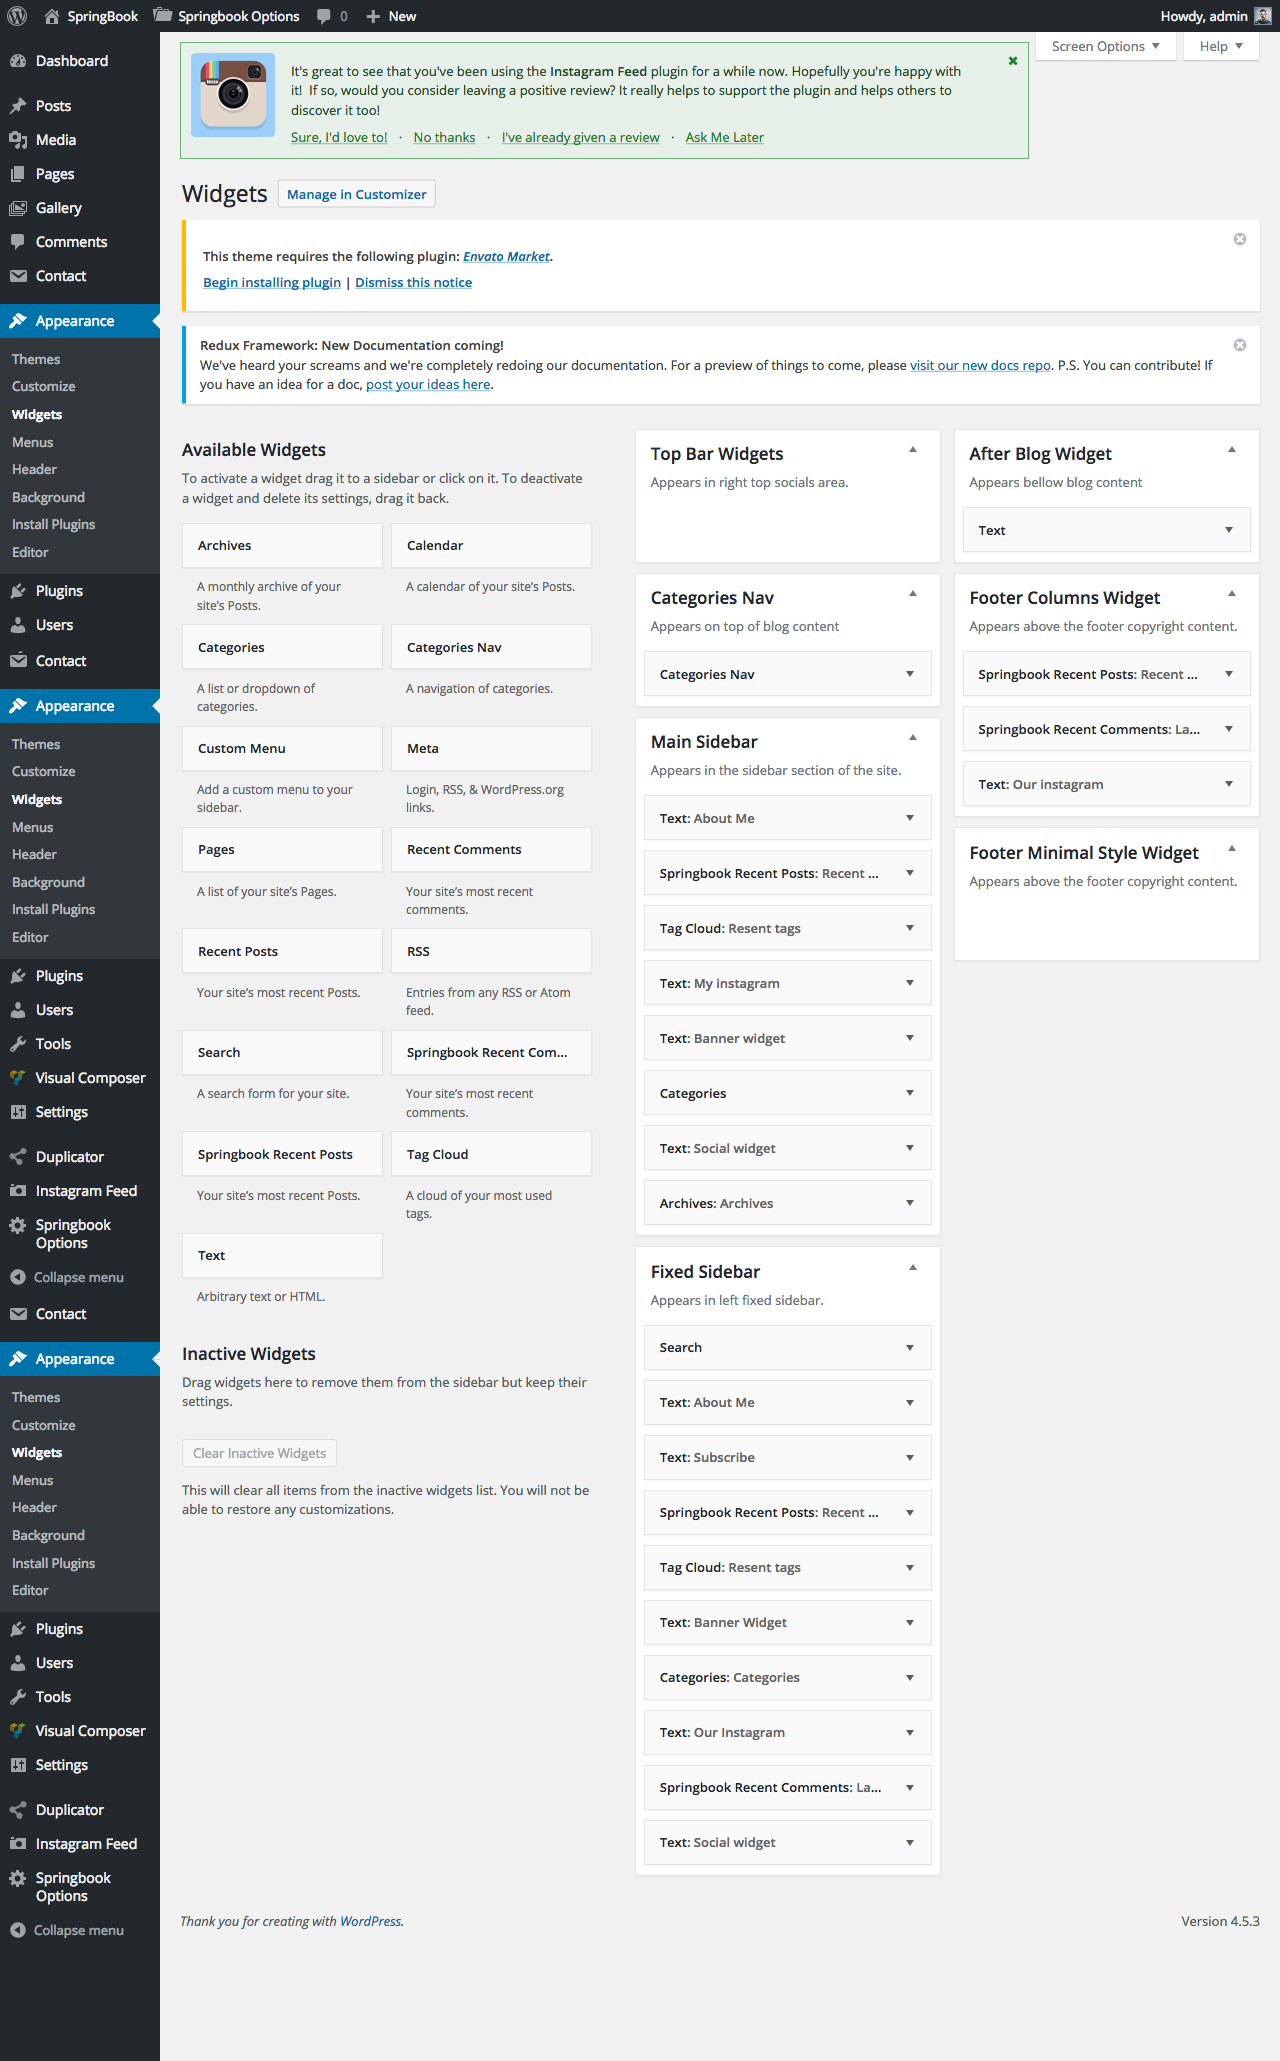
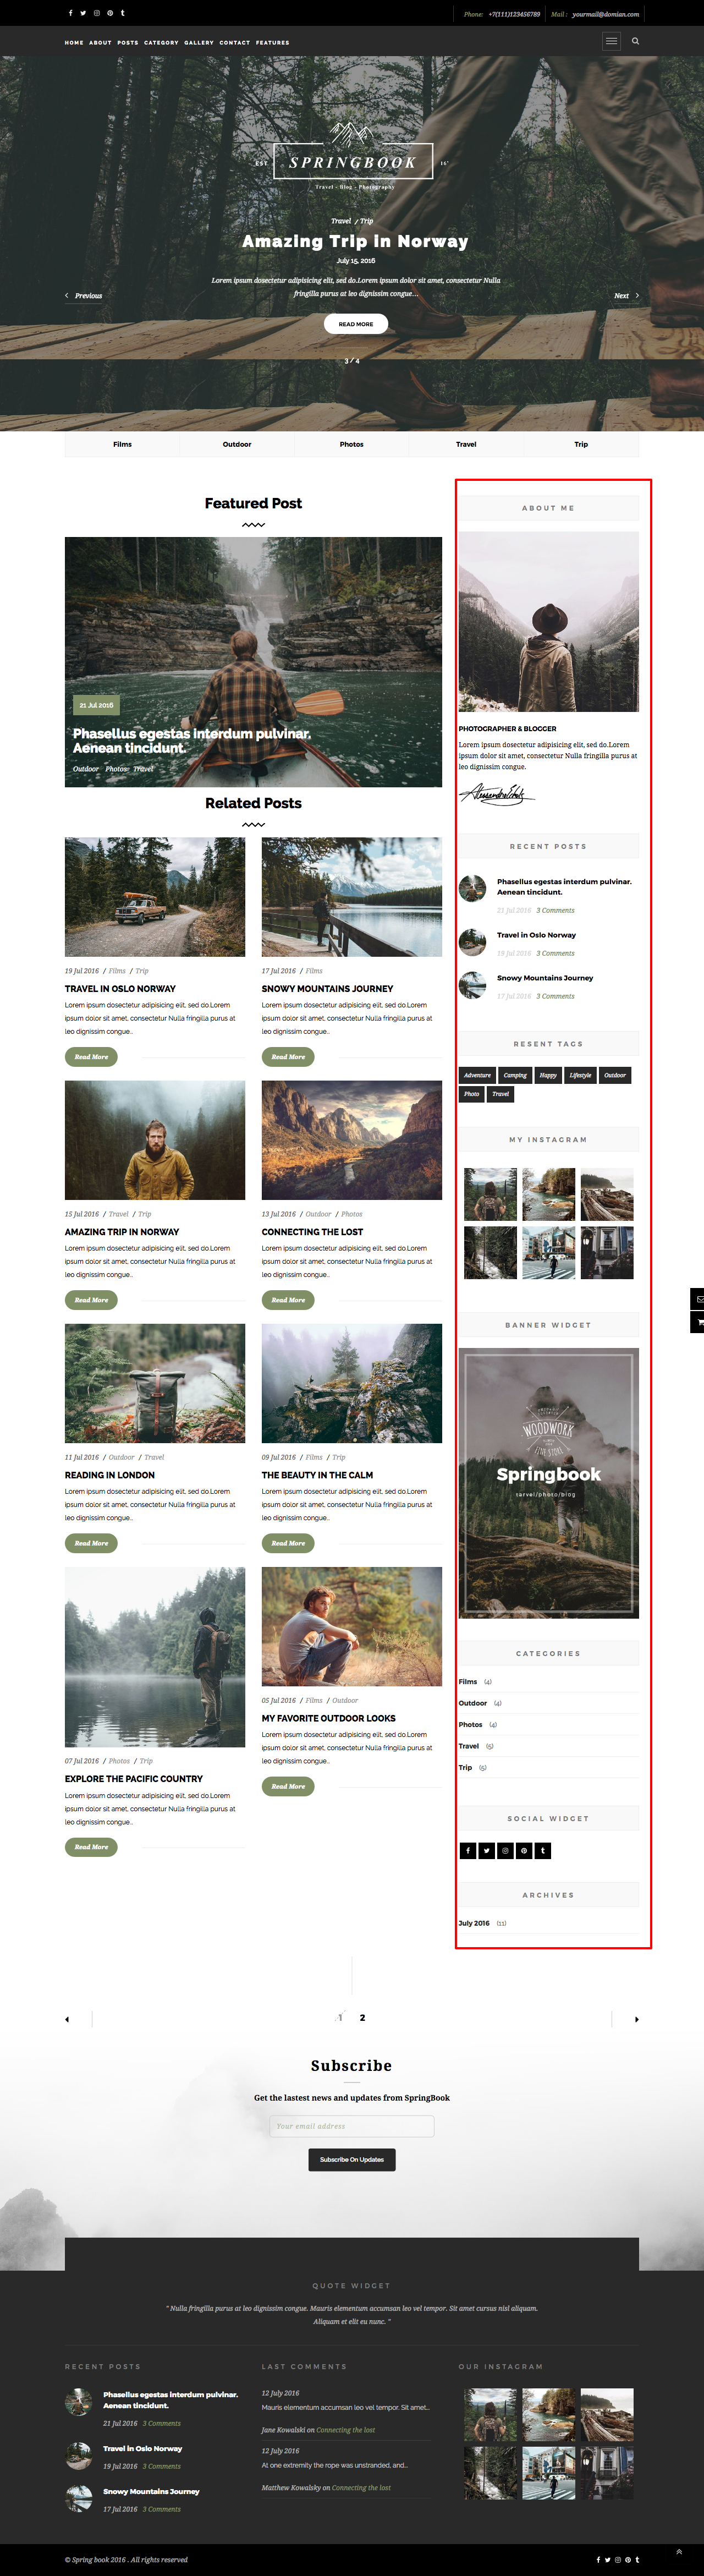
Sidebars and Widgets
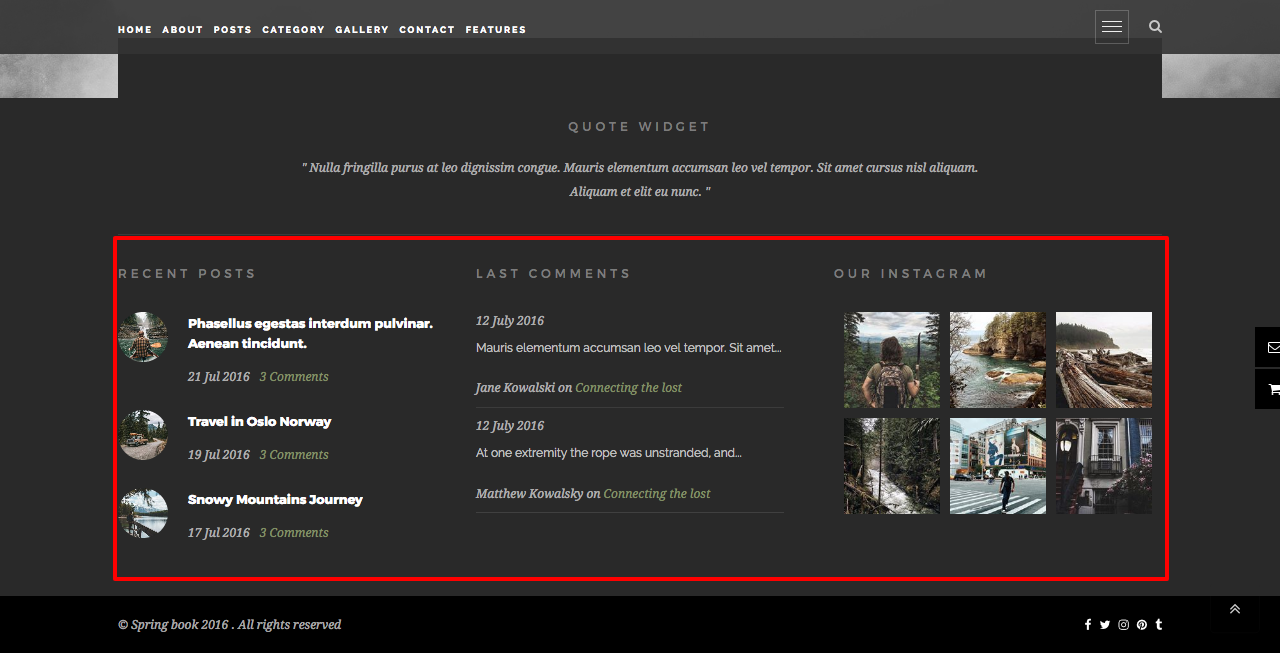
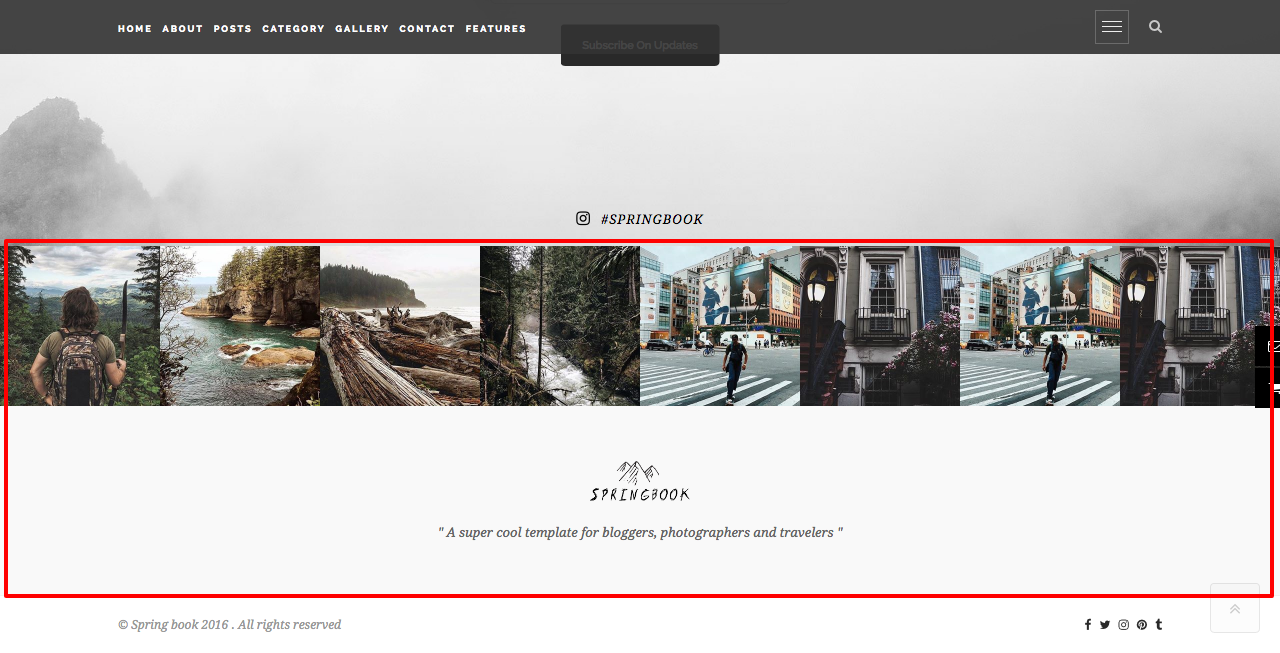
To add a widget in your theme’s Springbook, navigate to Appearance > Widgets. The big panel on the left side shows all available widgets. The small panels on the right are the widgetized areas. Total 7 areas are available.
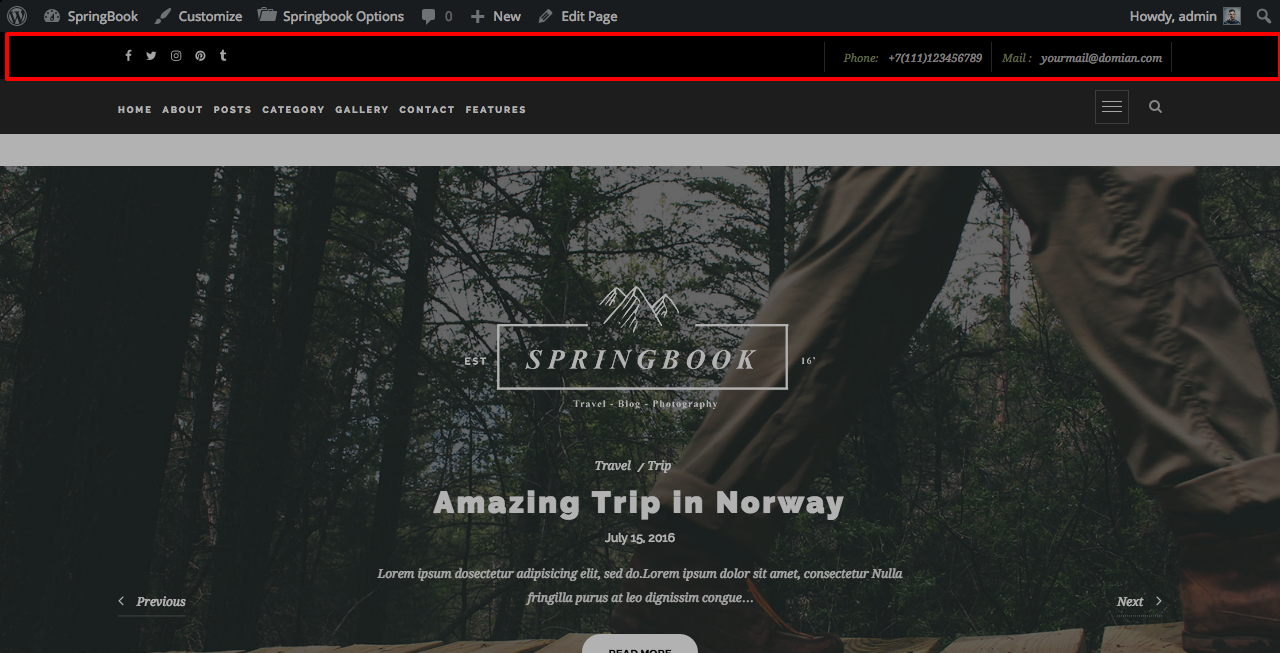
- Top bar widgets - Screenshot
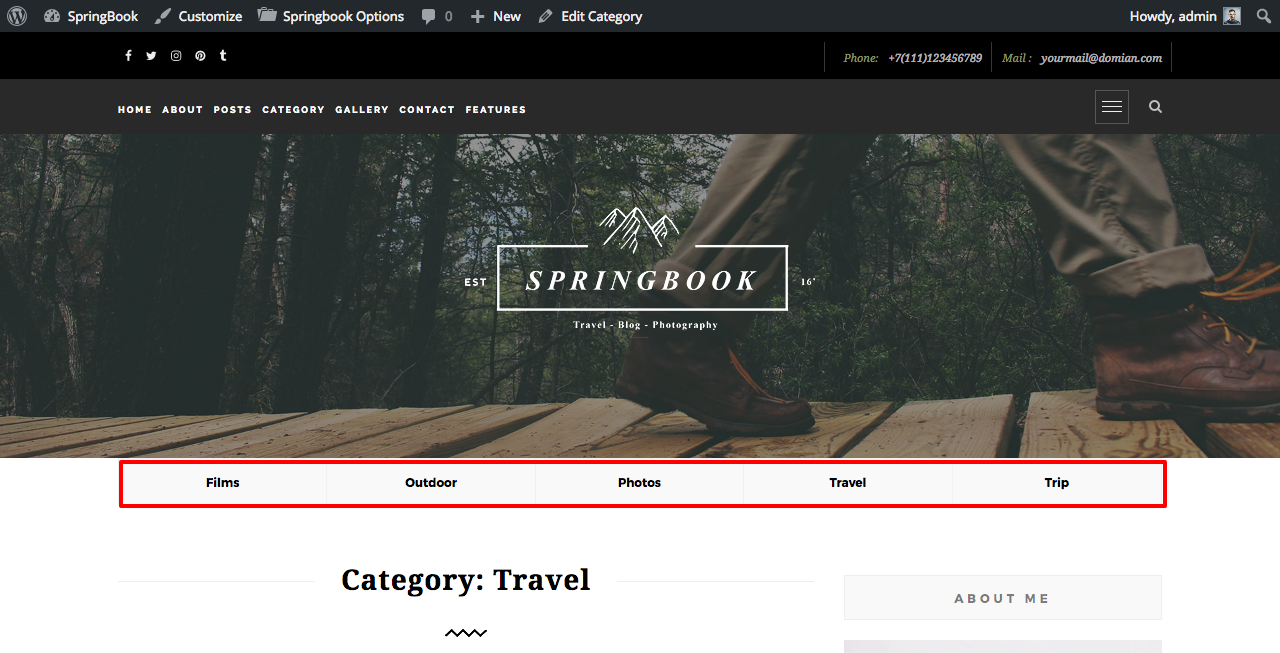
- Categories Nav: Screenshot
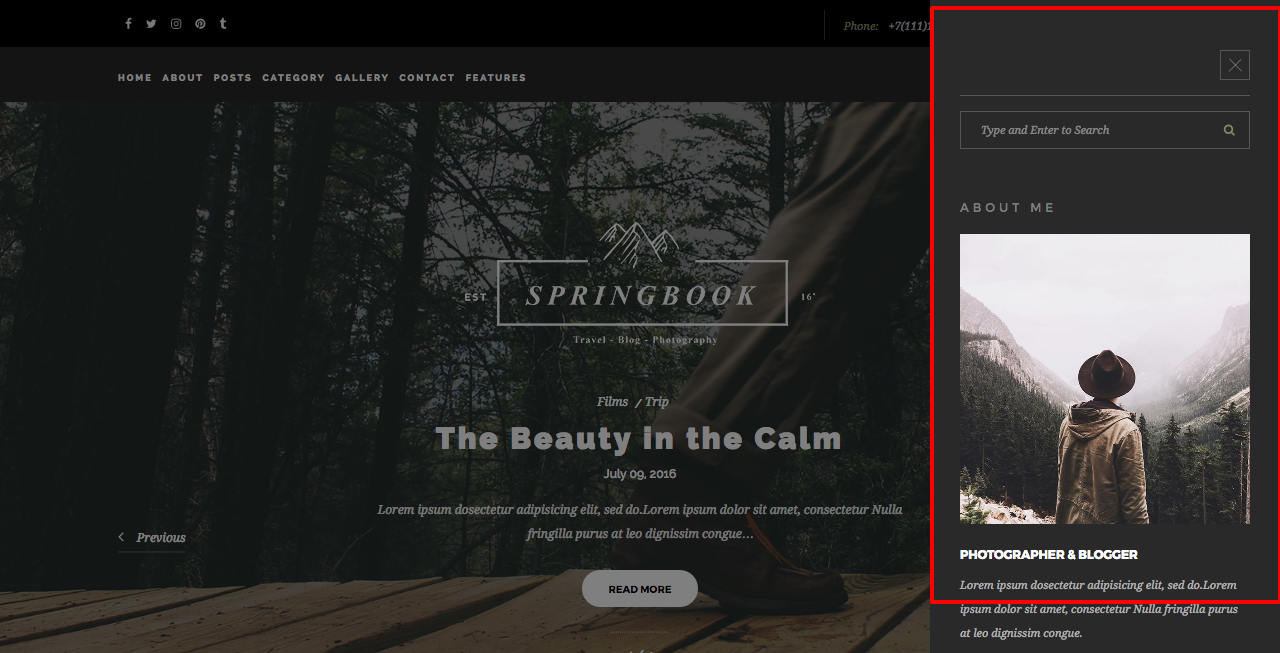
- Main Sidebar - Screenshot
- Fixed Sidebar - Screenshot
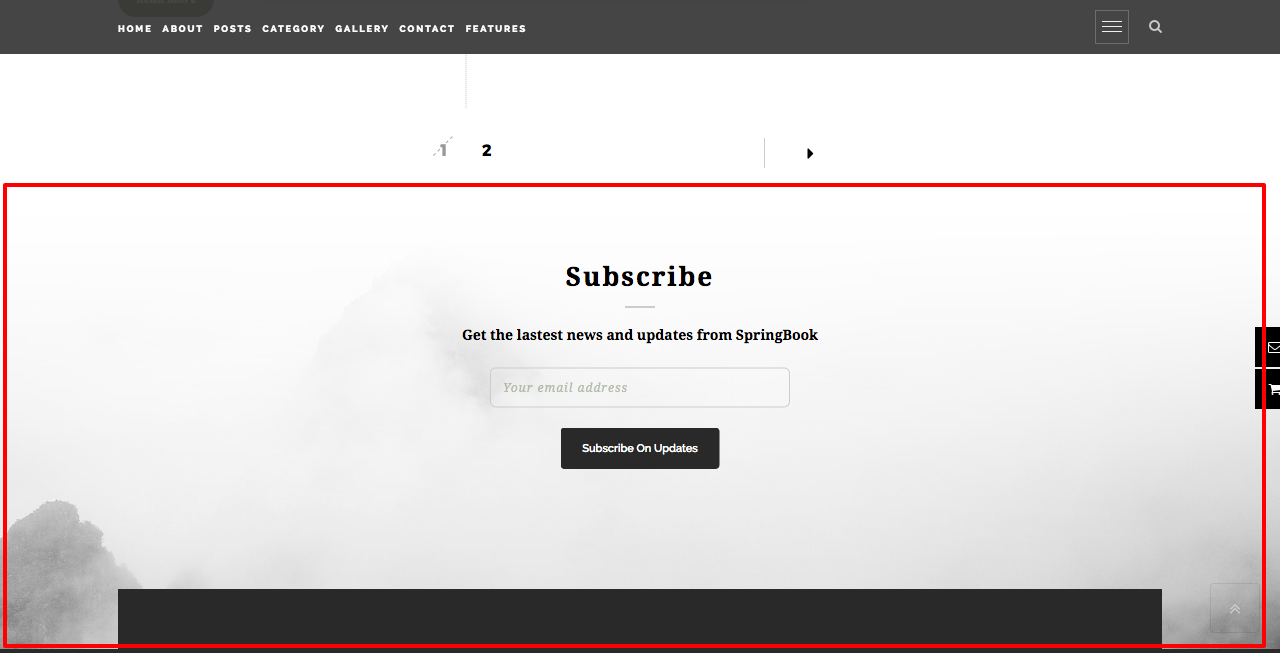
- After Blog widget - Screenshot
- Footer Columns widget - Screenshot
- Footer Minimal style widget - Screenshot
Note: There are some empty widgets because we use options from Springbook Options menu as replacements.
Screenshot:
Import Demo Widgets
Search in Theme Downloaded Package (extract zip file first) > Demo Content you will find springbook-widgets.wie file, is our demo widgets content exported and included in the package.
To use the exported file you must to install new plugin call Widget Importer & Exporter
- Go to Tools > Widget Importer & Exporter submenu.
- Use Choose File button under Import Widgets section select the file then click to Import Widgets button.
- When done you will have blog sidebar like our demo.
Sidebar Widgets Configuration
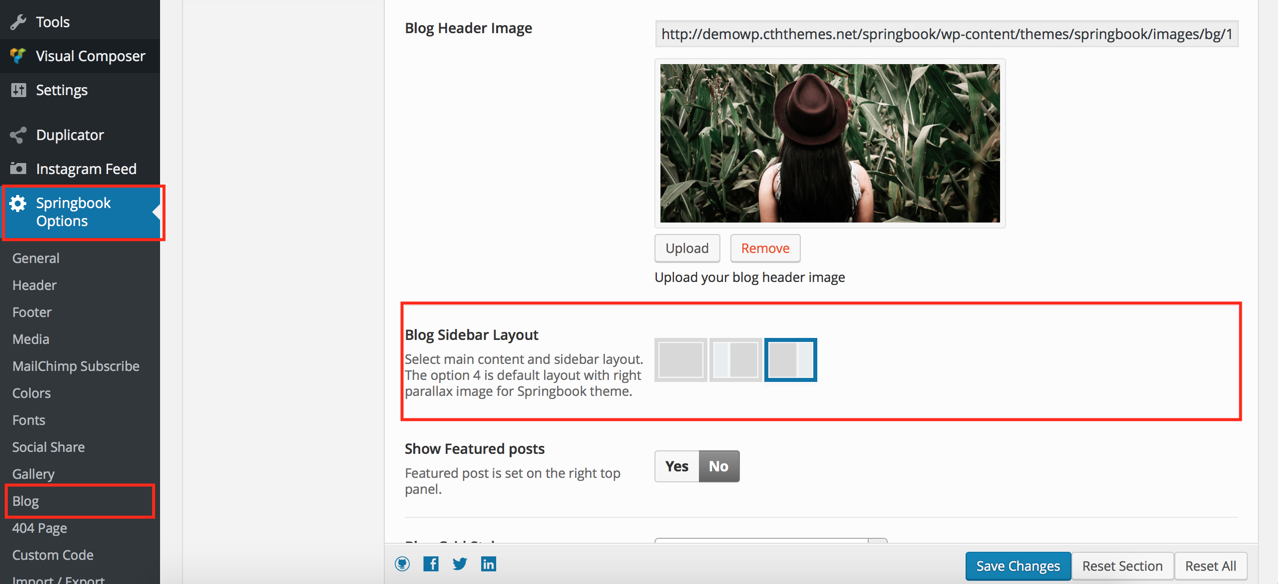
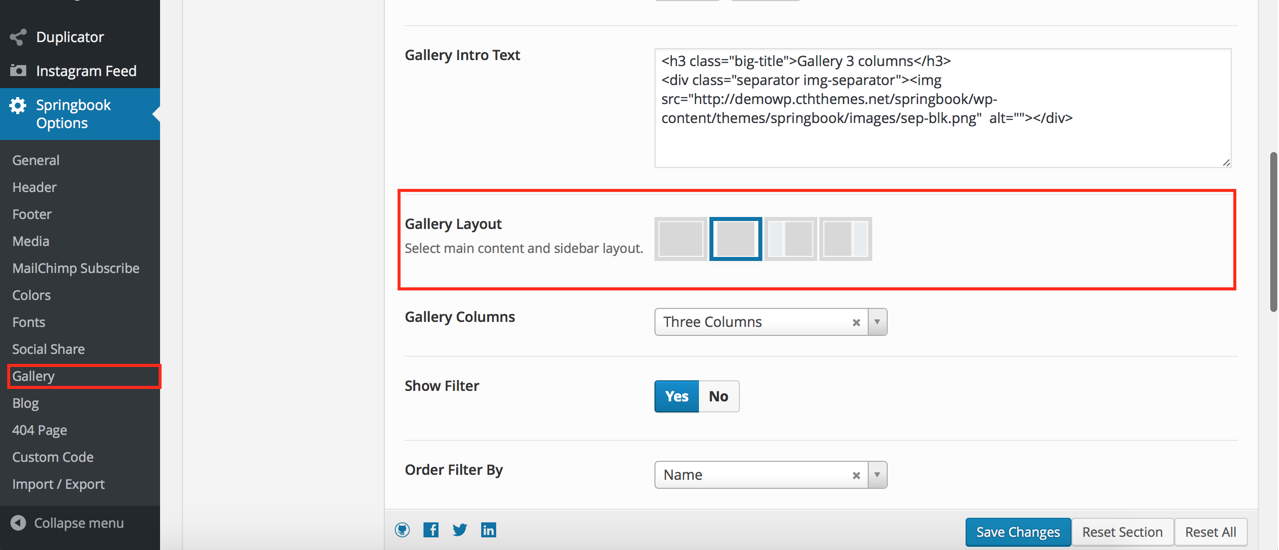
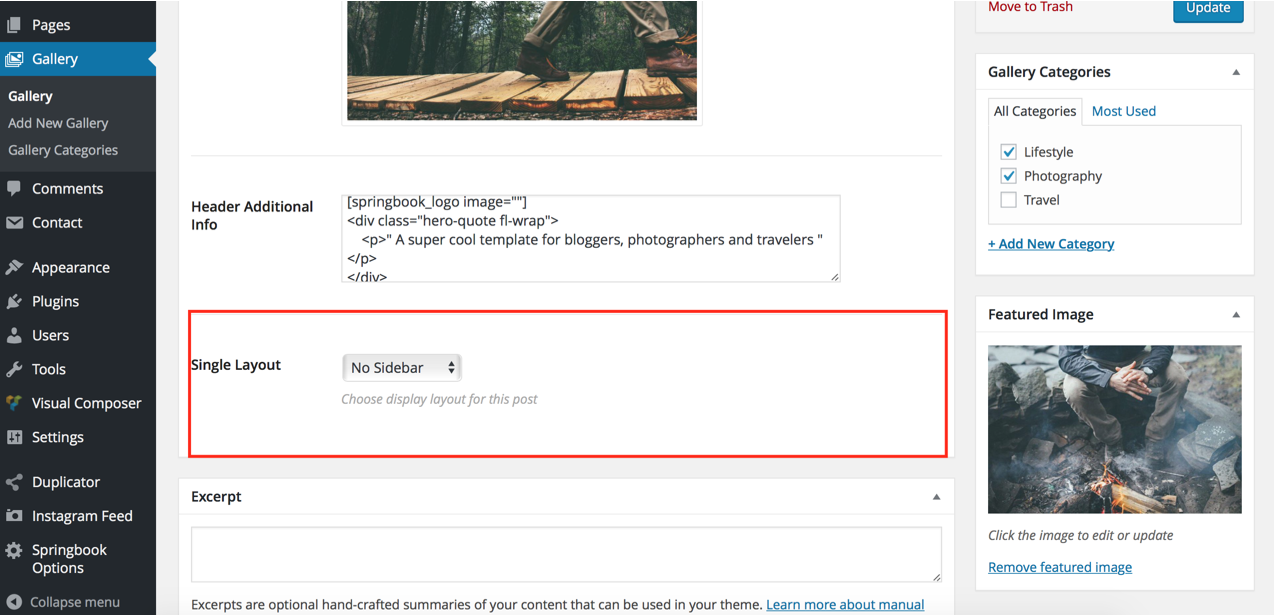
To make Main Sidebar and Gallery Sidebar widgets available you need change Blog and Gallery layout options in Springbook Options panel to Left or Right Sidebar. Or change layout for individual post using Single Layout option when editing them.

For more details in creating wordpress widgets please read this guide: WordPress Widgets
Visual Composer
Visual Composer for WordPress by WP Bakery will save you tons of time working on the site content. Now you’ll be able to create complex layouts within minutes! It’s build on top of the modern technologies – get the best for your lovely website!
Have you ever noticed how much time you spend fighting with [shortcodes]? No more trial and errors with “shortcodes magic” – Visual Composer will take care of that.
Add columns/elements with single click, then use your mouse to drag elements around to re-arrange them.
“Visual Composer″ comes as a part of Springbook.
Please visit CodeCanyon and Plugin Website for more details.
Setting up Pages
Springbook come with 9 homepage variants. They all were built with Visual Composer plugin. In this section we will help you build a page step by step.
If you use WordPress Importer to import exported xml demo data file your don't need follow this section.
Build A New Page with Visual Composer
- Go to Pages > New Page
- Click on Publish
See a screenshot for add new page
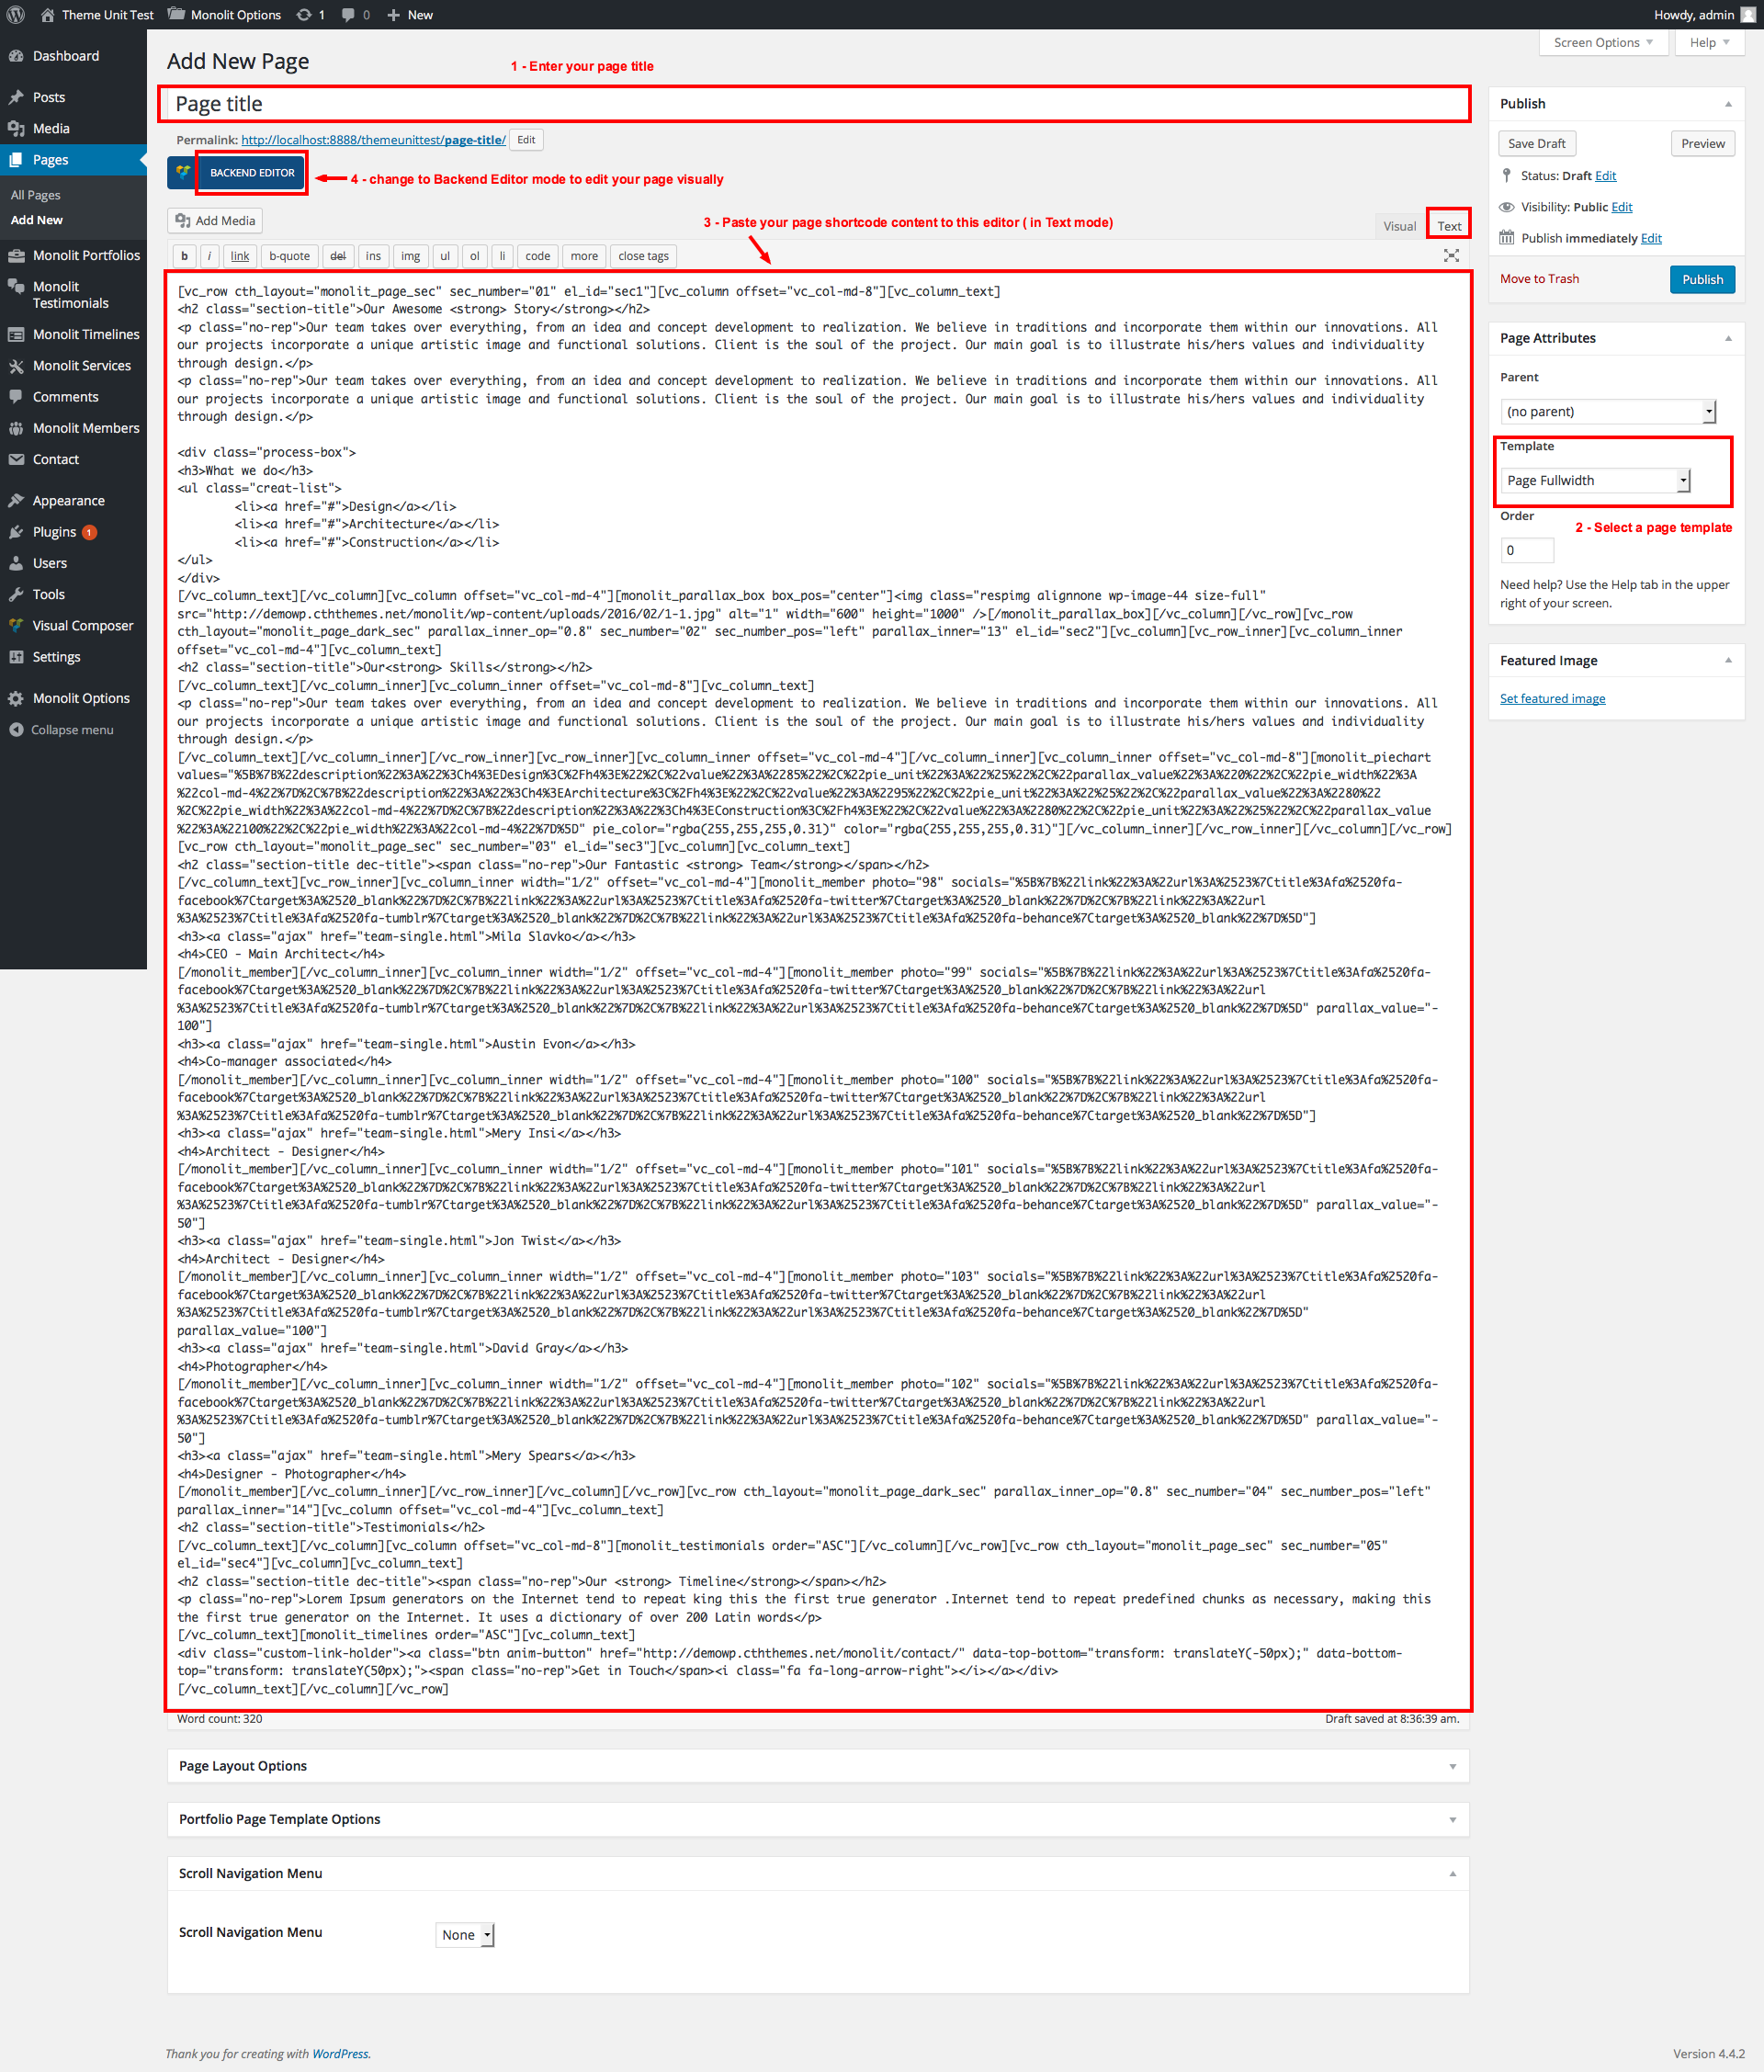
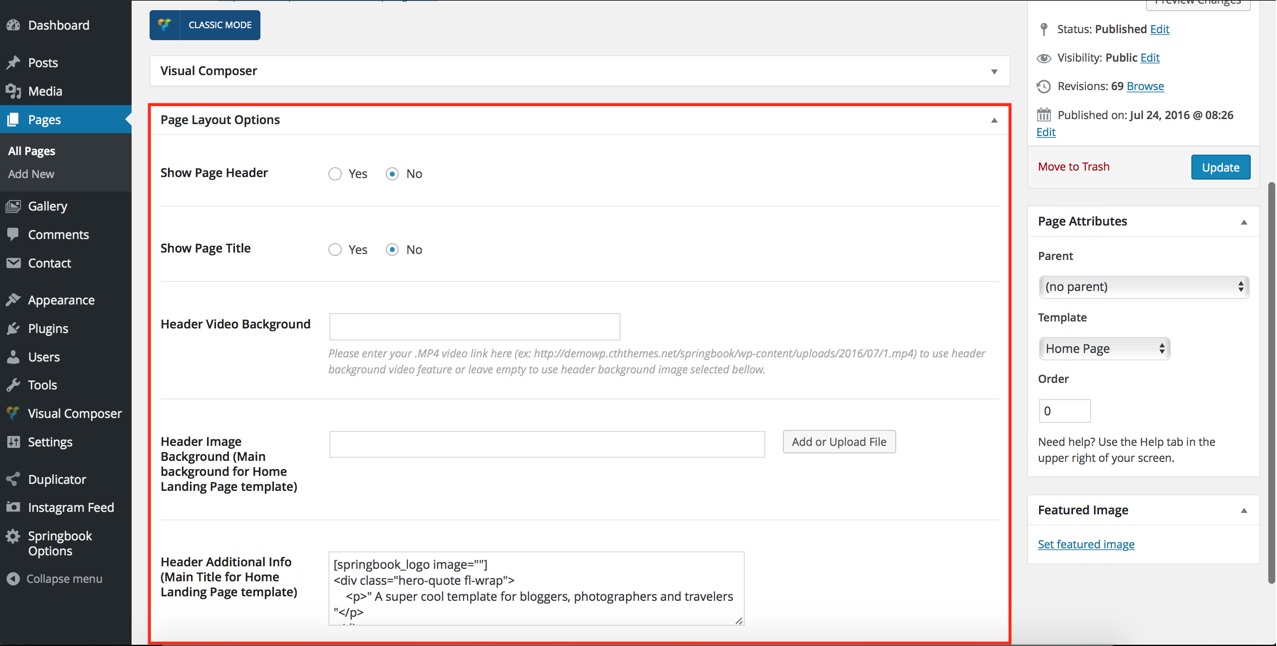
In visual backend editor mode you can edit everything with the edit icon
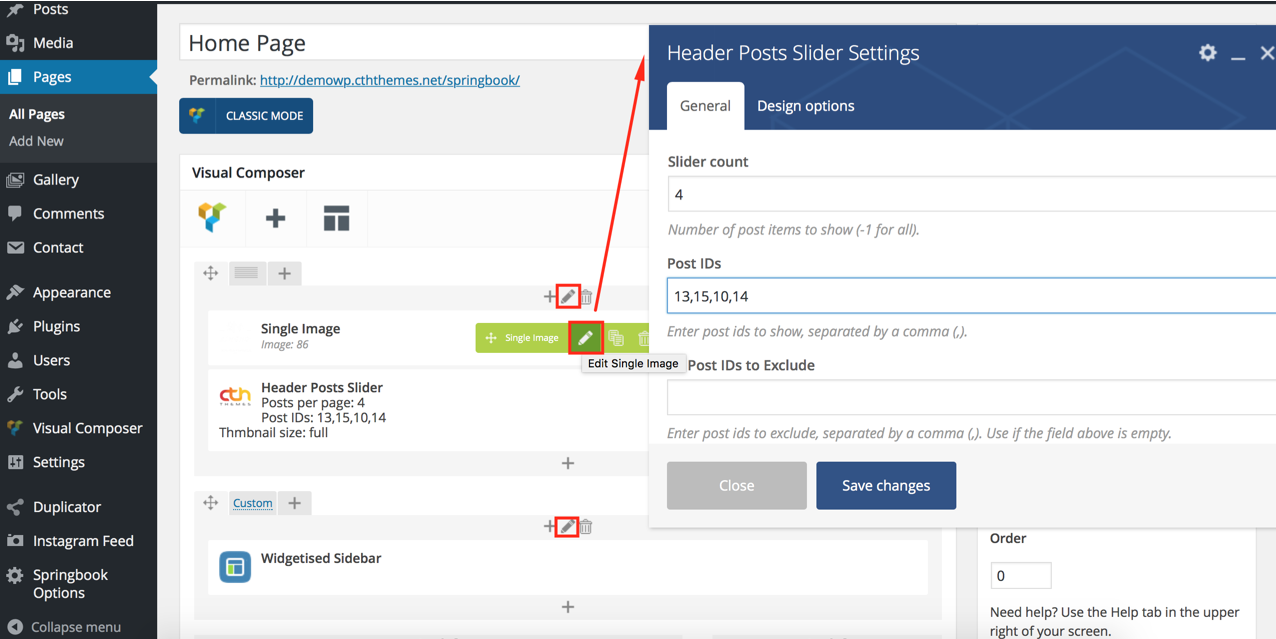
There are also some general options in metabox panel to config your page look as desire.
You can find shortcode content for demo pages from downloaded package then Demo Content > Page Shortcode Content folder.
Please open them in code or text editor the copy its content to your page editor.
Create new page using demo shortcode content
For more info about the Visual Composer plugin please read its documentation from \Documentation - Visual Composer/0 - README FIRST.html file
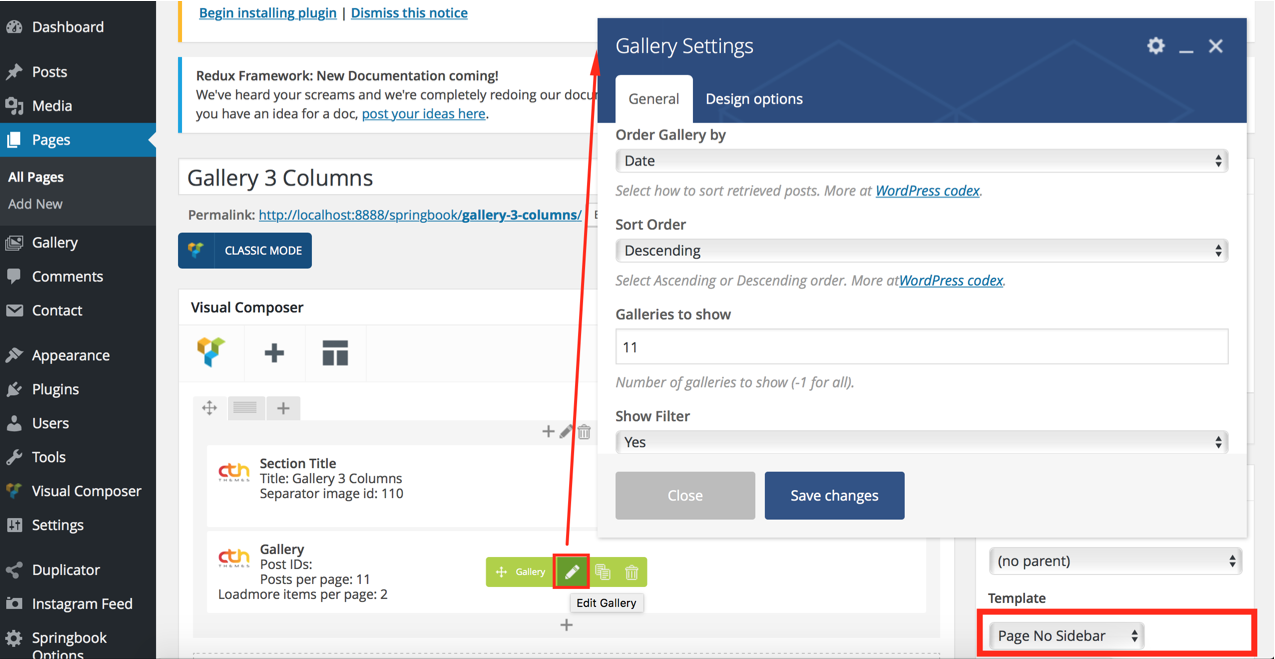
Gallery Settings
Create Gallery pages:
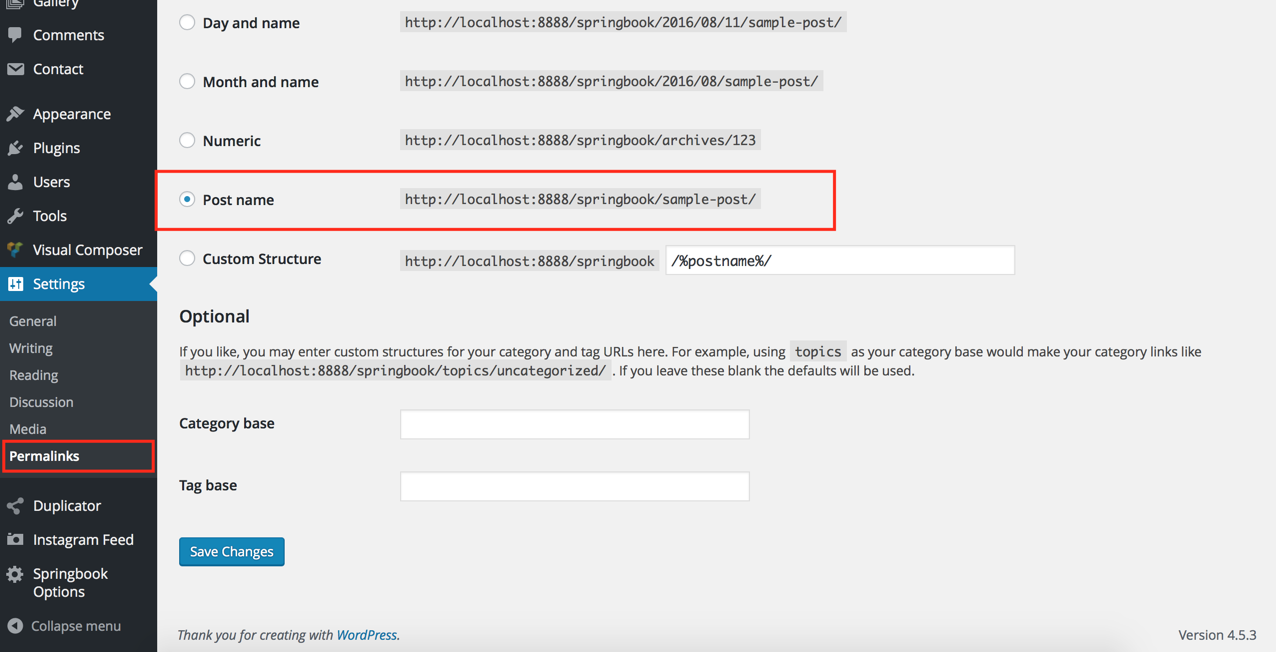
1. By default your galleries grid page is your_domain.com/?post_type=spbgallery (as in our demo: http://demowp.cththemes.net/springbook/?post_type=spbgallery )
Or your_domain.com/spbgallery/ (as in our demo: http://demowp.cththemes.net/springbook/spbgallery/ ) if Post name option was checked on wordpress Permalinks setting screen.
And to change layout for this gallery archive type you should go to Springbook Options -> Gallery tab:
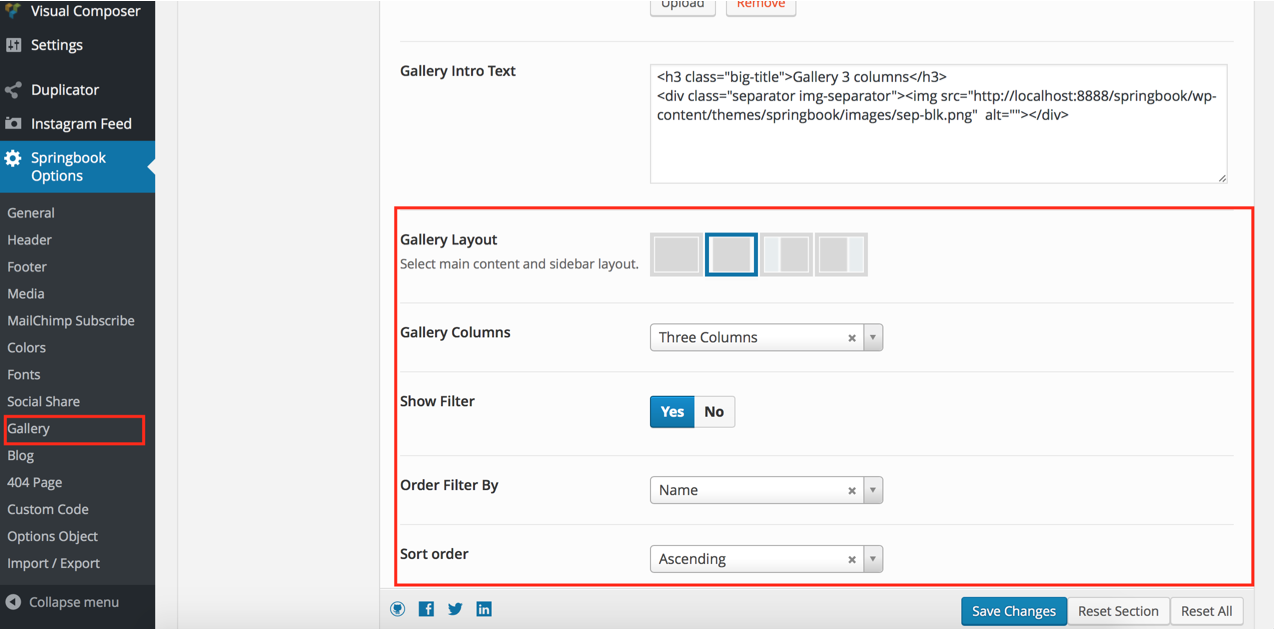
The options will be used in gallery category page also http://demowp.cththemes.net/springbook/spbgallery_cat/photography/
2. You can also create portfolio list page using Gallery element in Visual Composer
All demo gallery pages were built with this element:
Gallery grid layout is changed on the element settings window.
Gallery Item Settings
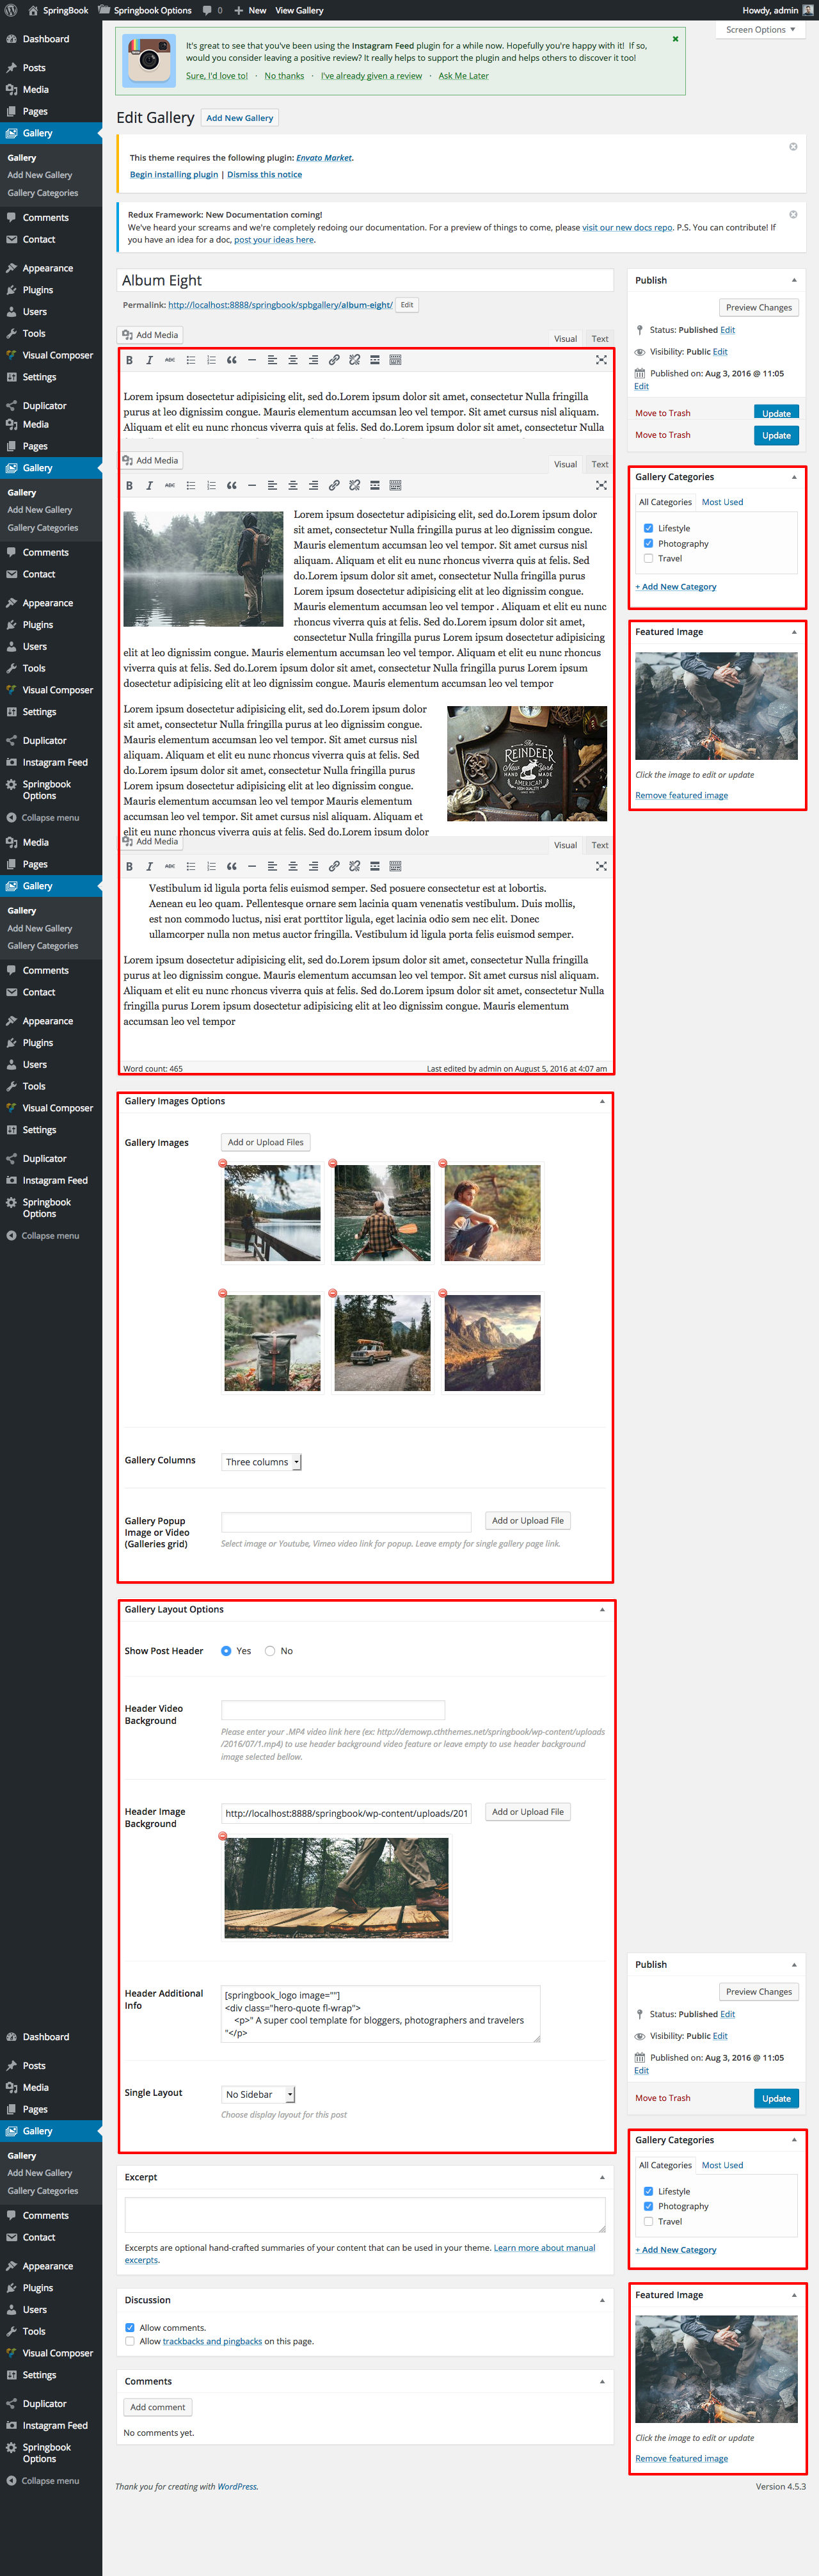
The gallery content can be found in Demo Content > Gallery Content folder.
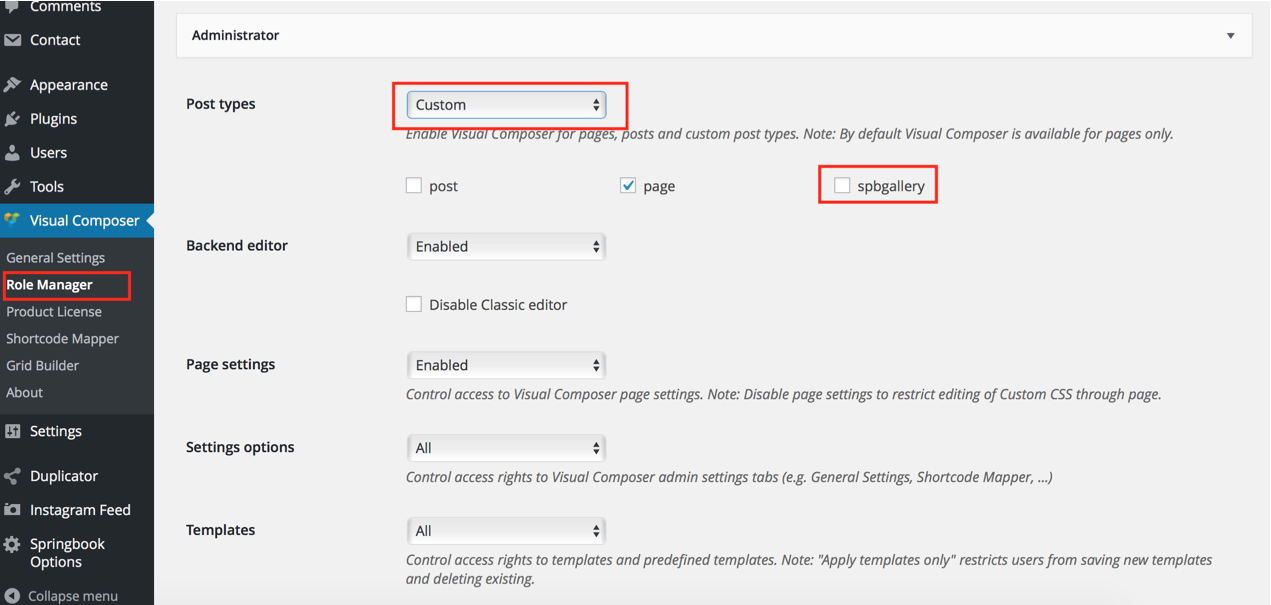
Enable Visual Composer for Gallery item
Springbook Add-ons plugin
When uploaded and activated the theme you will receive a message that tell you need to install required plugins, just check to boxes under Springbook Add-on plugin and the others in the list then click install button.
The plugin will register new admin menu.
- Springbook Gallery: From this menu you can create, edit or delete your gallery items. The gallery can be listed as a grid layout. And on Gallery settings tab for gallery archive pages.
Theme and Plugin Translations
The theme and its plugins come localization ready out of the box – all that’s needed is your translation, if the theme does not come bundled with one for your language.
There are several methods to create a translation, most of which are outlined in the WordPress Codex. However, we find the easiest method is to use a plugin called Loco Translate. More advanced users can use PoEdit. Both methods are covered in this doc.
Before you begin
The theme includes a language file (.po or .pot file) which contains all of the English text. You can find this language file inside the theme folder in \Root/wp-content/themes/springbook/languages/.
Set up WordPress
WordPress needs to be told which language it should run under.
- Go to: Dashboard > Settings > General and change the Site language.
Once this has been done, the theme will be displayed in your locale if the language file exists. Otherwise you need to create the language files (process explained below).
Translating with Loco Translate
Loco Translate is a free plugin that you can download here. You can also add directly from the WordPress administration, in Plugins > Add New.
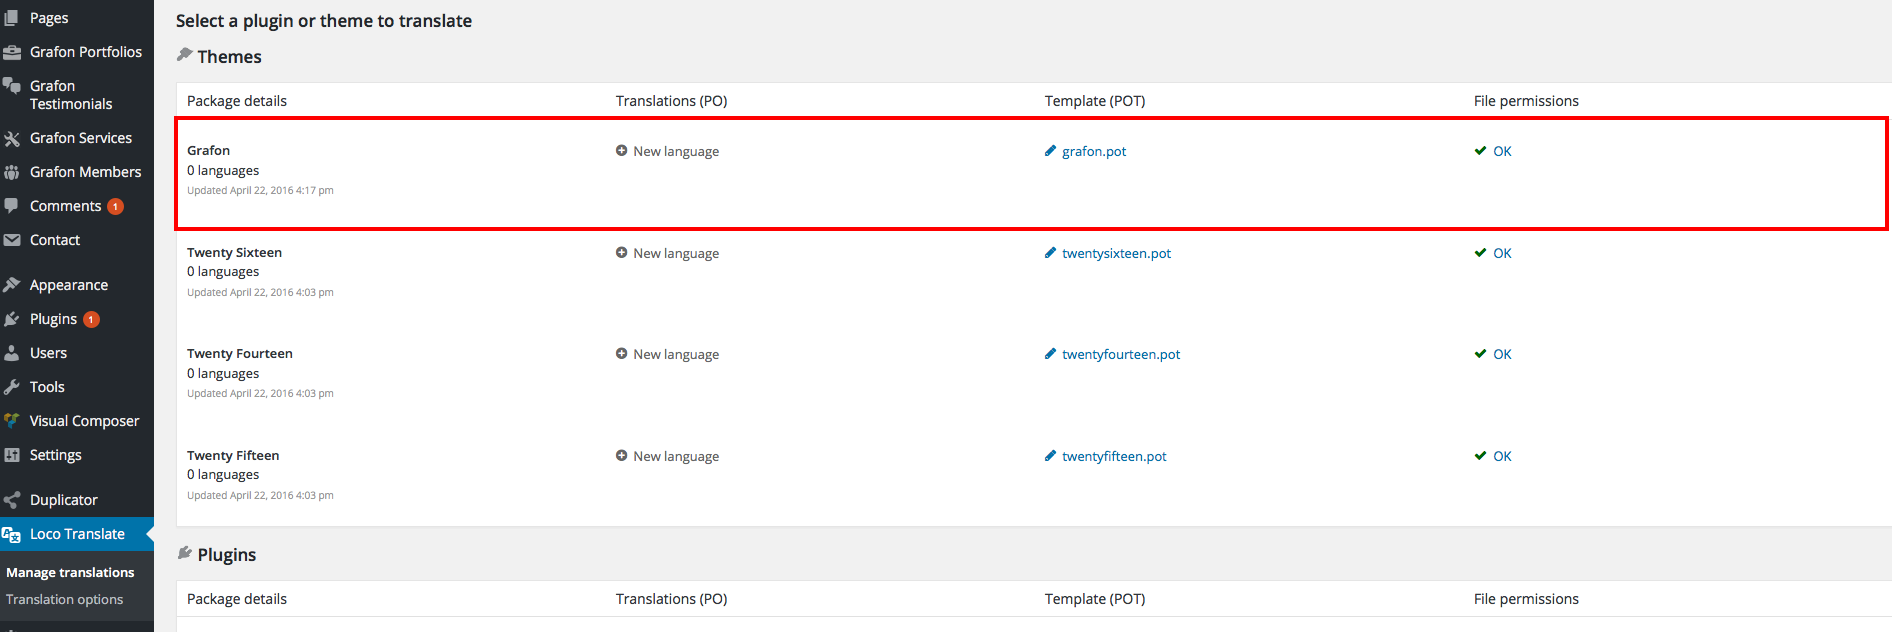
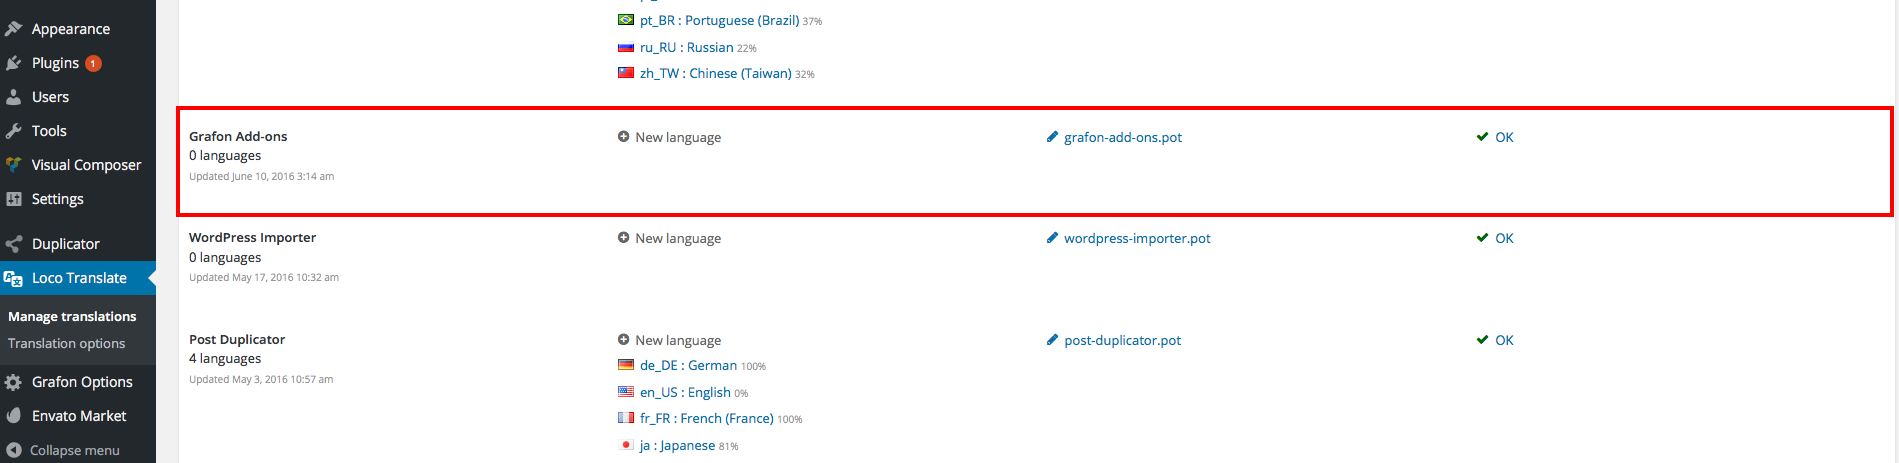
Once you downloaded and installed Loco Translate, a new “Loco Translate” menu item is created with two sub-sections. By default the “Manage Translations” section will list all your themes and plugins and will display all available translations for each of them:
Loco Translate Listings
You can easily add new languages to a theme or a plugin using the Add New Language link:
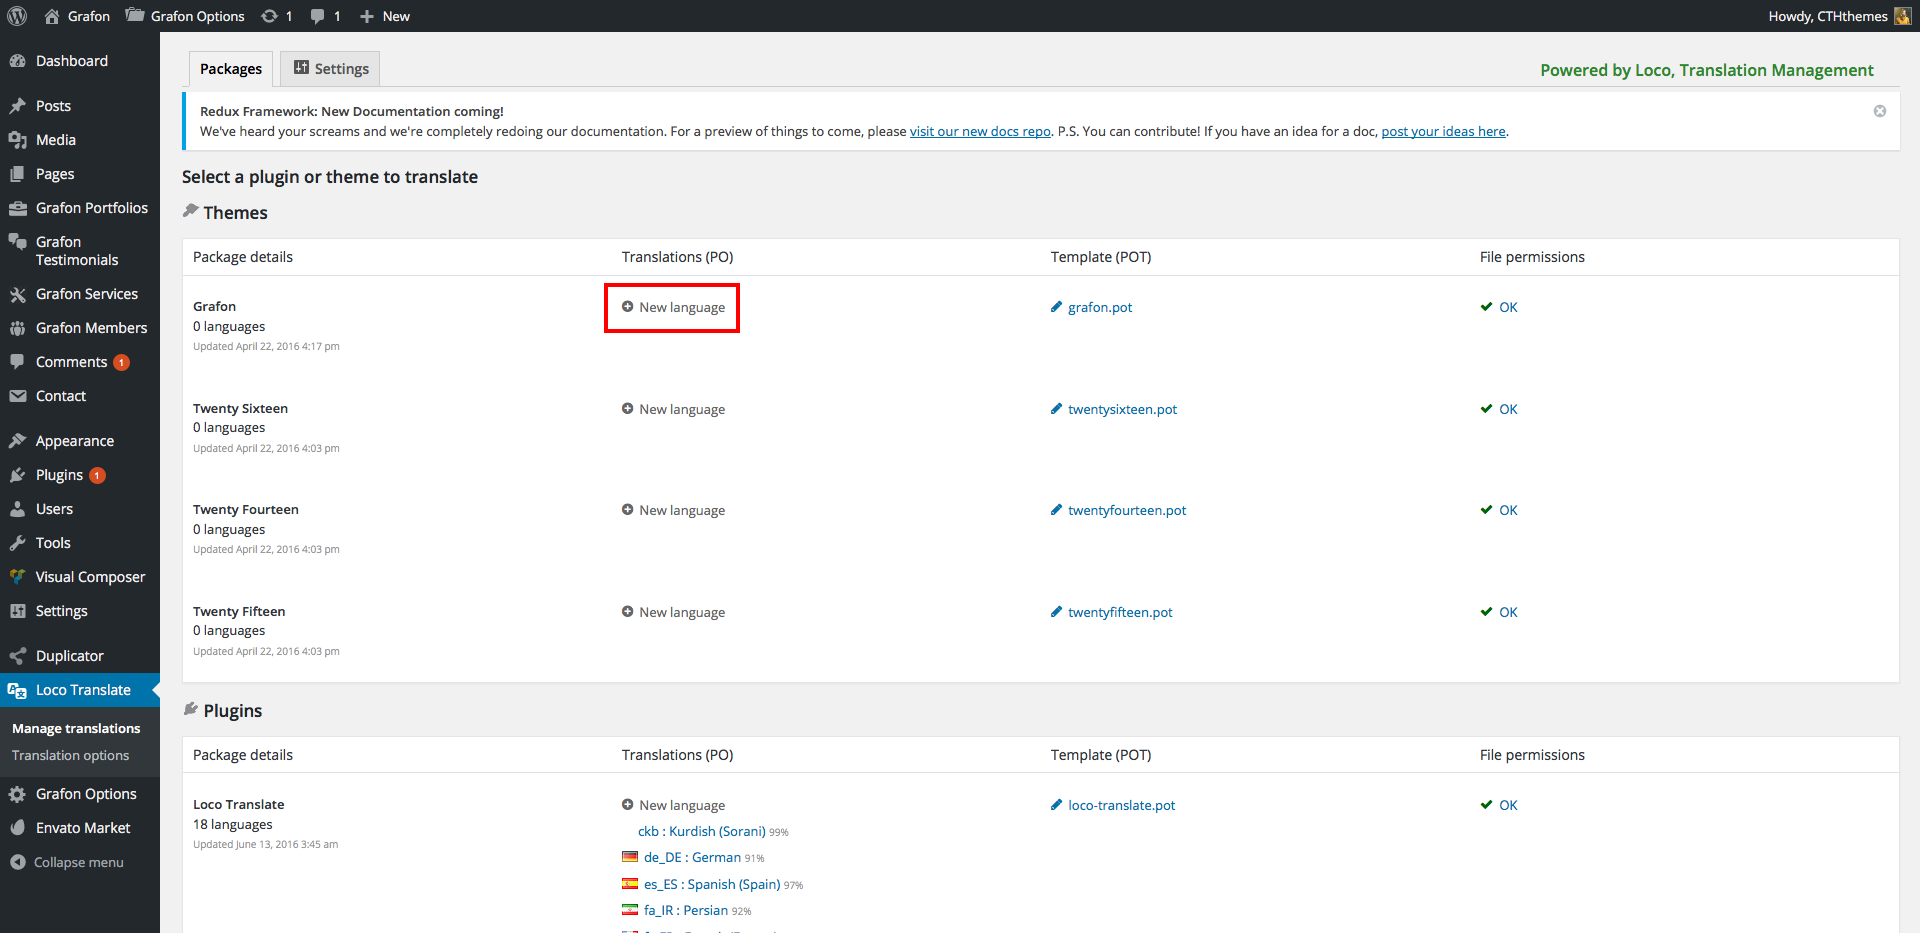
Loco Translate: add new language
Then choose the language to add in the list, or enter the language ISO code (ex: fr_FR, en_US etc…), and select the folder to add the translation files to, and hit Start Translating:
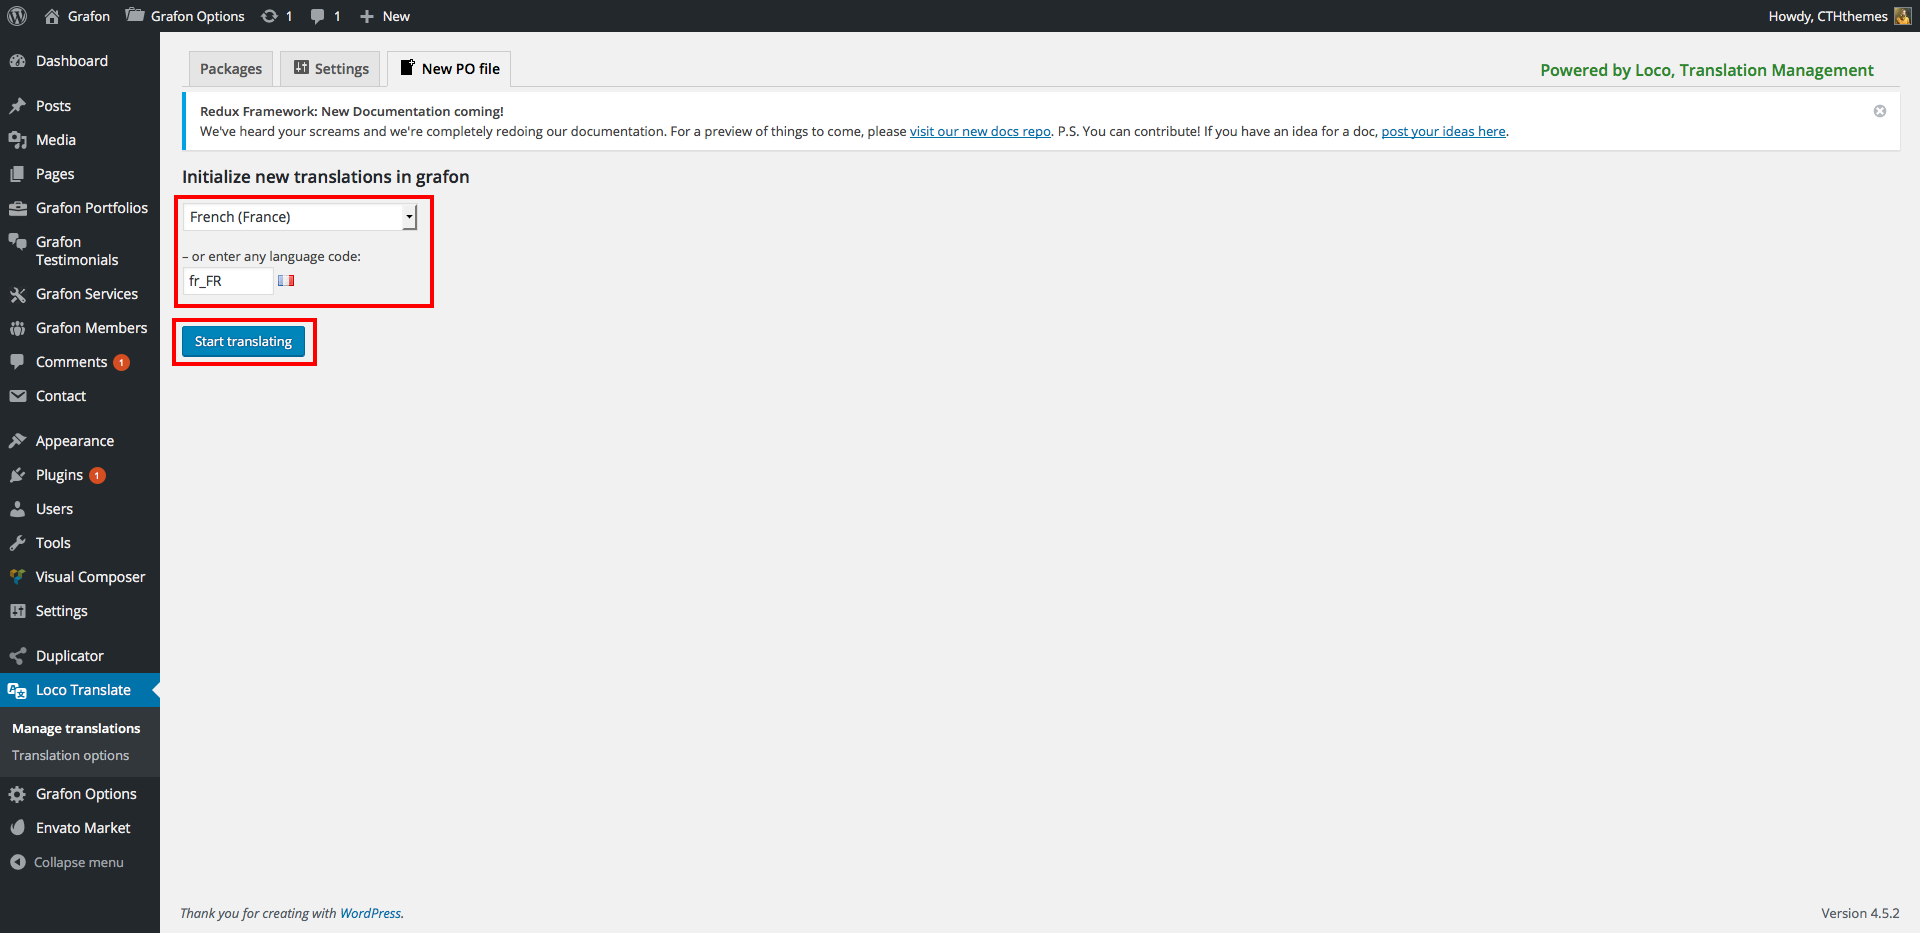
Loco Translate: create new language
Finally start translating, and save when you finish:
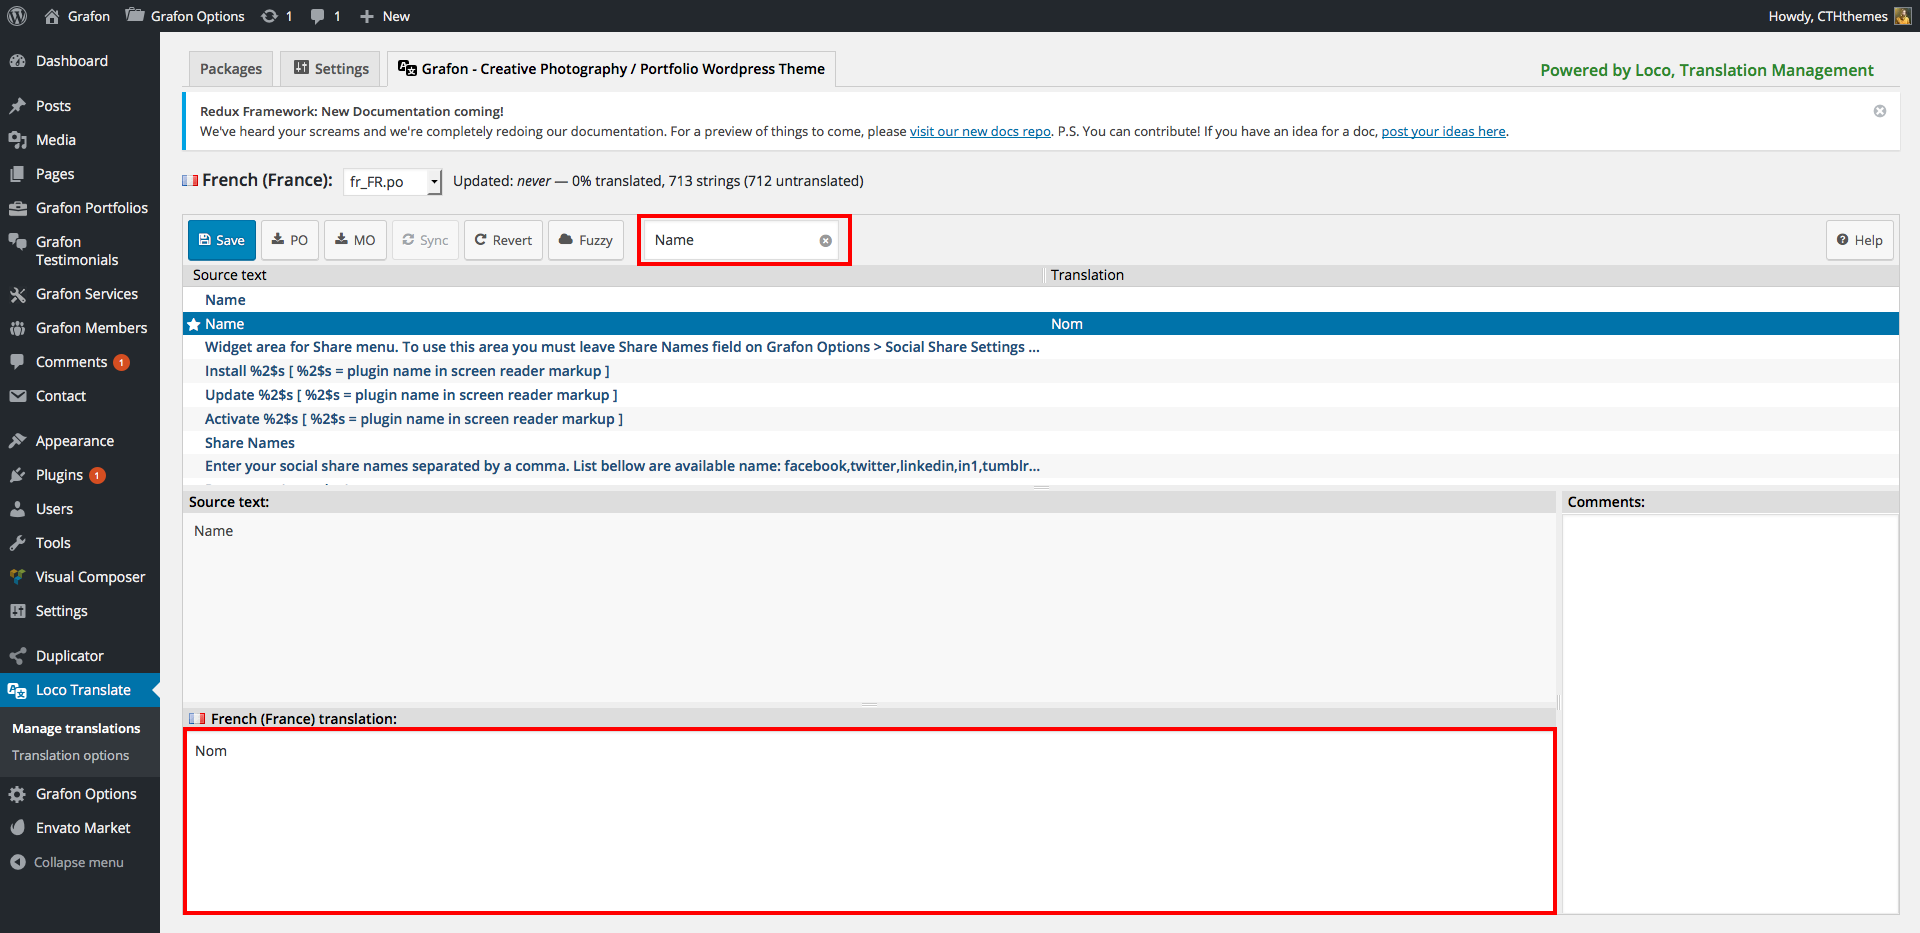
Loco Translate: Start translating!
Translate theme and plugins using Loco Translate plugin
Change Portfolio path using Loco Translate plugin
Translating with PoEdit
PoEdit is a more advanced alternative to Loco Translate. Only advanced users should attempt this method.
Springbook comes with a POT file which can be imported into PoEdit to translate
To get started open PoEdit and go to File > New catalog from POT file. Once you have done this, choose springbook.pot and PoEdit will show the catalog properties window:
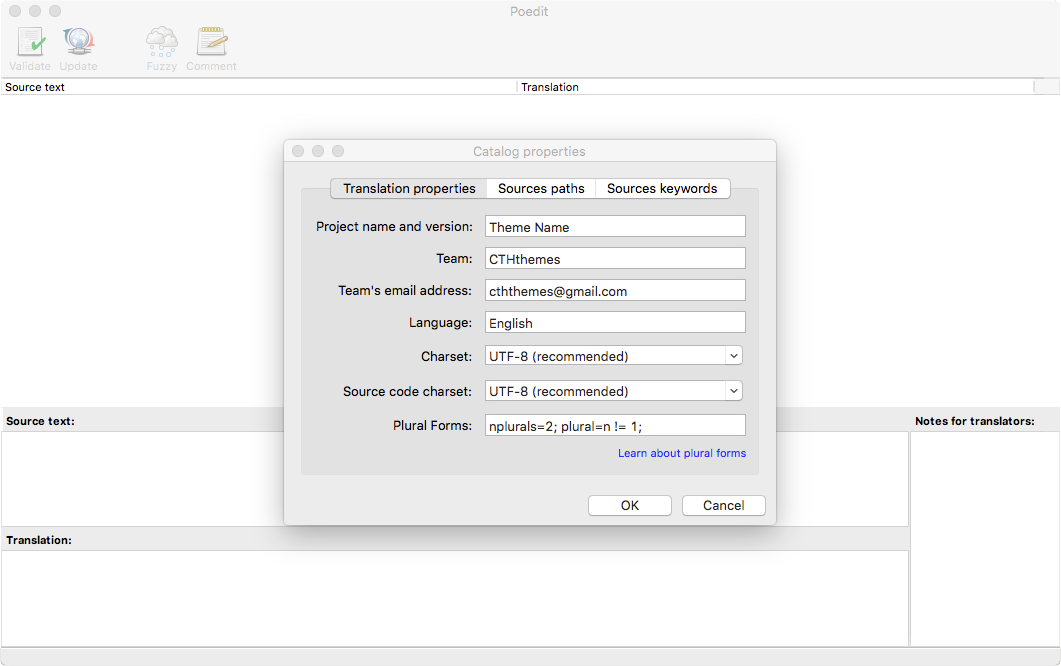
Enter your name etc so other translators know who you are and click ‘ok’. After this you will be prompted to save your .po file – name it based on what you are translating to, for example, a GB translation would be saved as en_GB.po . Now the strings will be listed.
After translating all strings you can save – the .mo file will also be generated automatically.
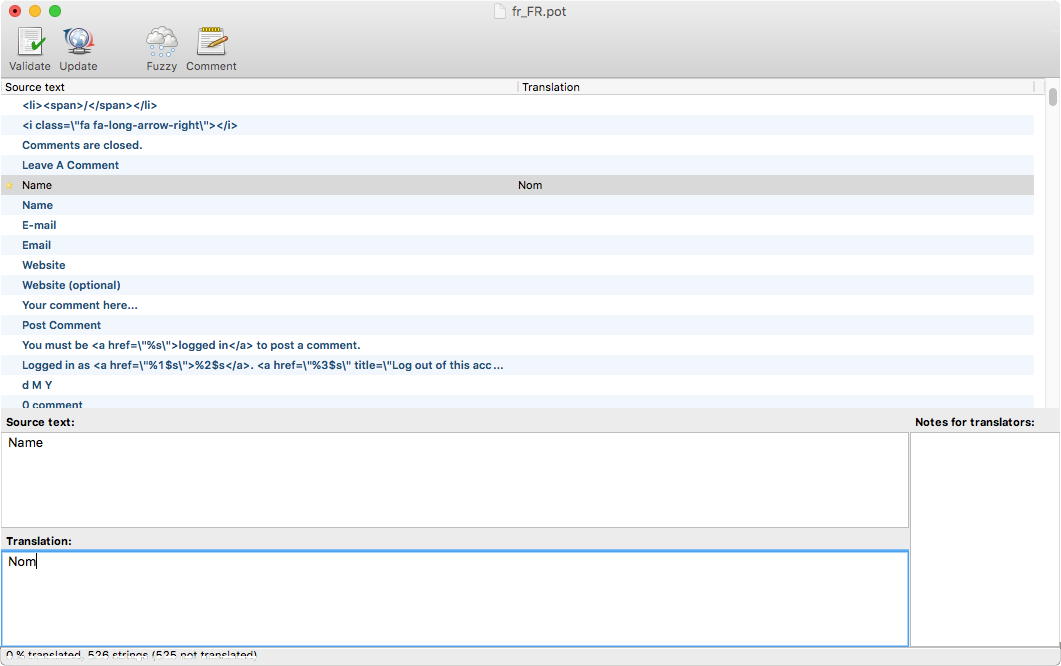
Translate the strings
Update your translation
After updates, you can update your po file by opening it and then going to Catalog > Update from POT file. Choose the file and it will be updated accordingly.
Auto Update Theme
Envato Market plugin was integrated with this theme to help you update it automatically when a new version release.
To use this plugin you should install it as required plugin for Springbook theme. Navigate to Appearance -> Install Plugins submenu and check to Envato Market plugin to install and active it.
Envato Market plugin screen:
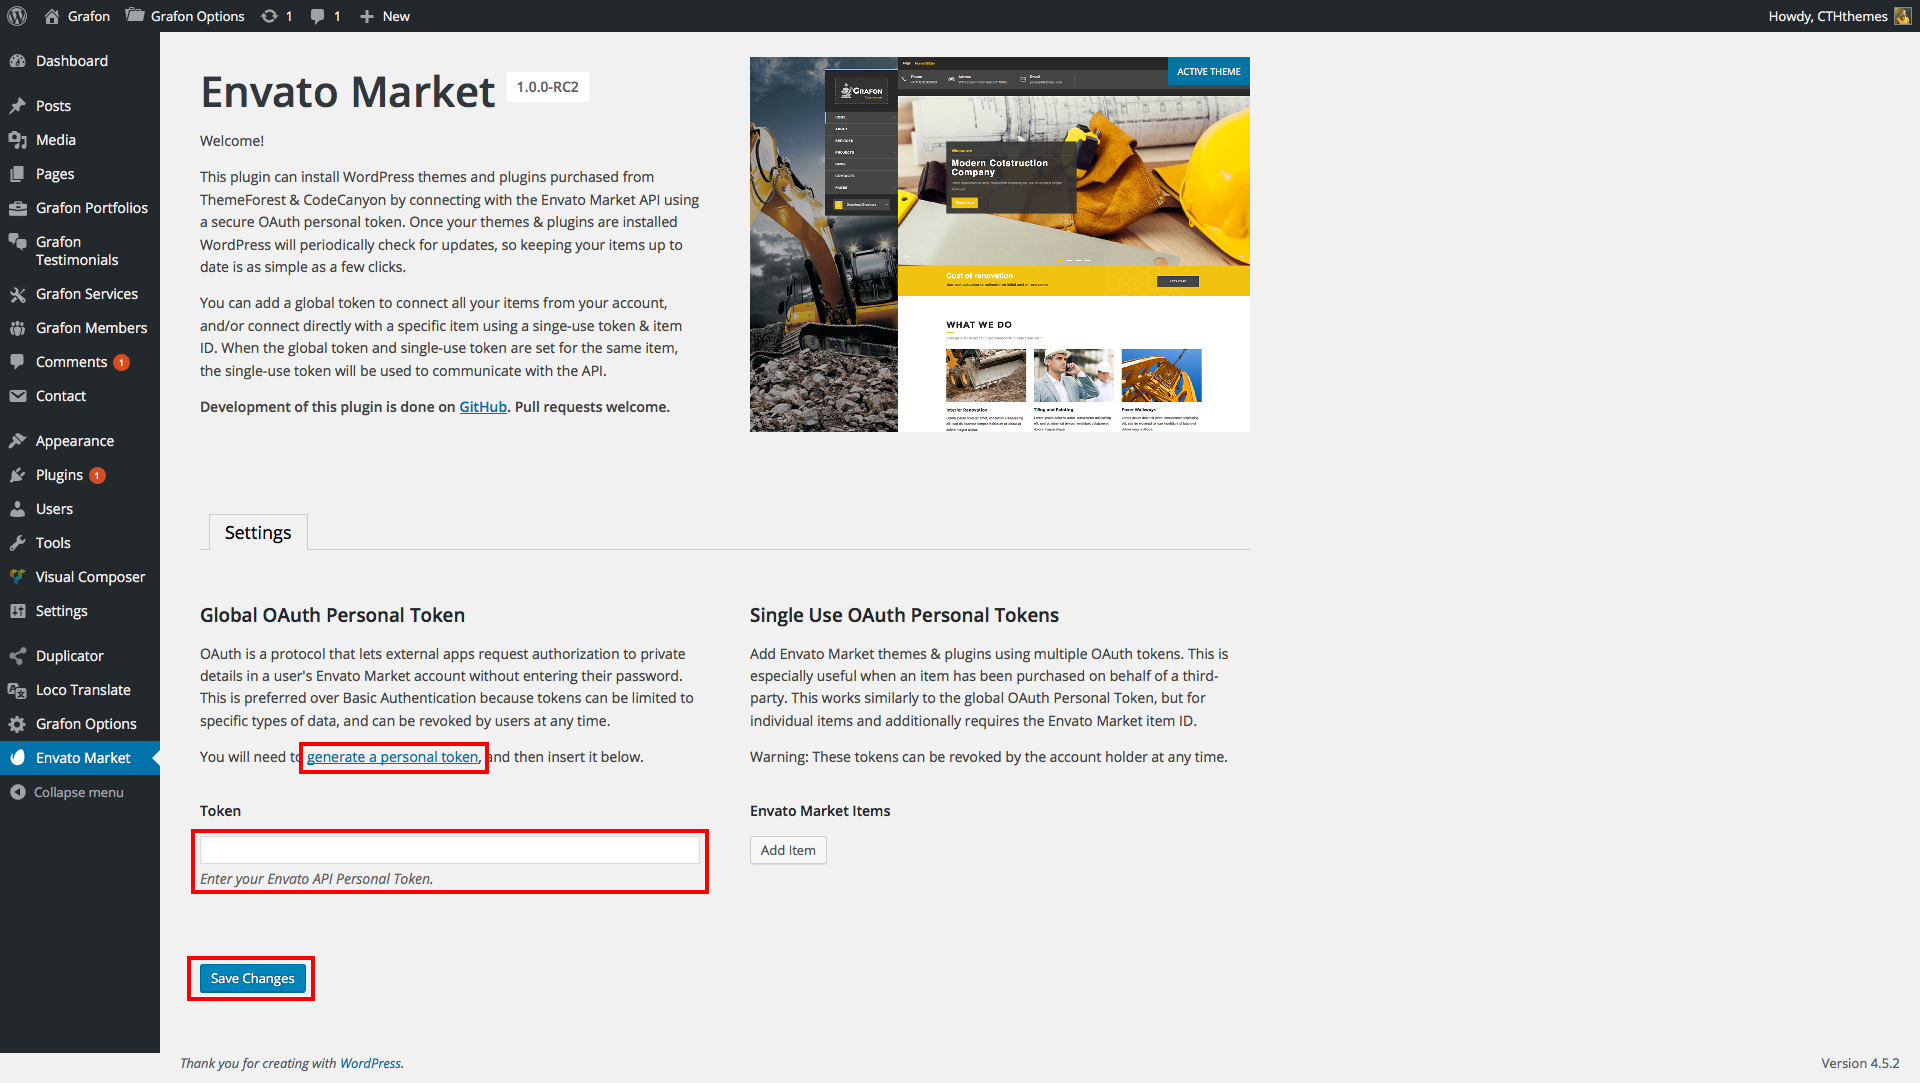
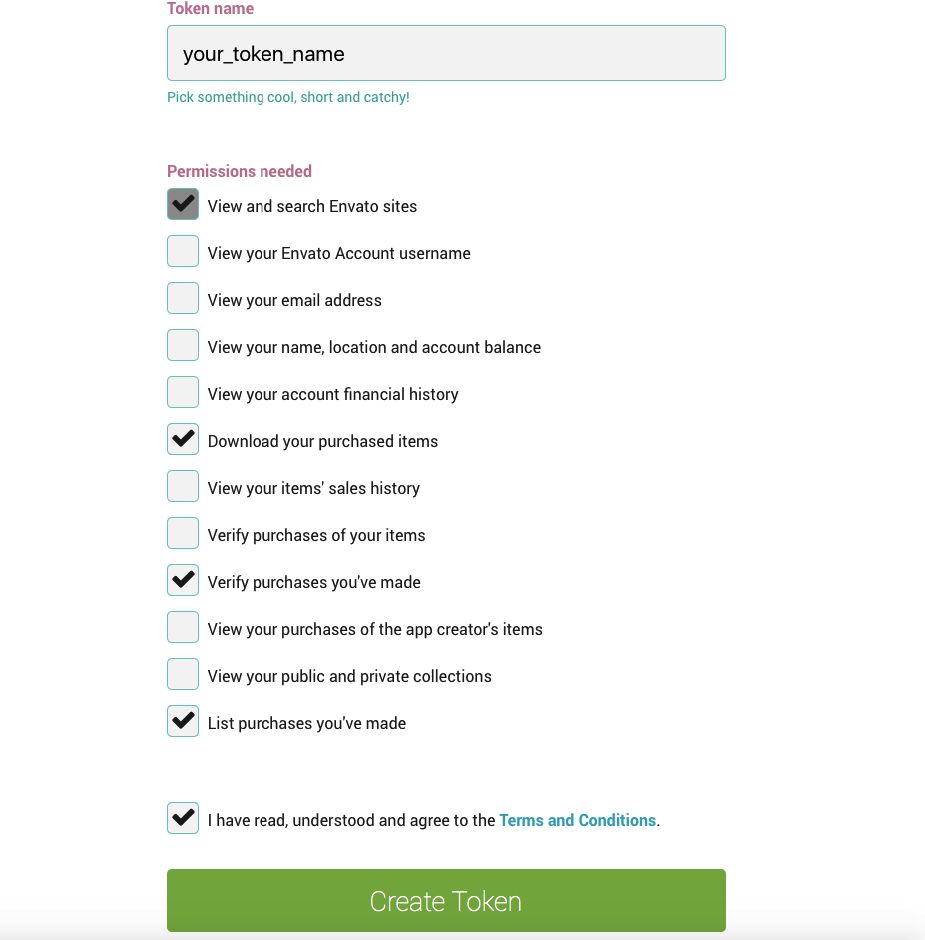
You will need to generate a personal token, and then insert it to Token field:
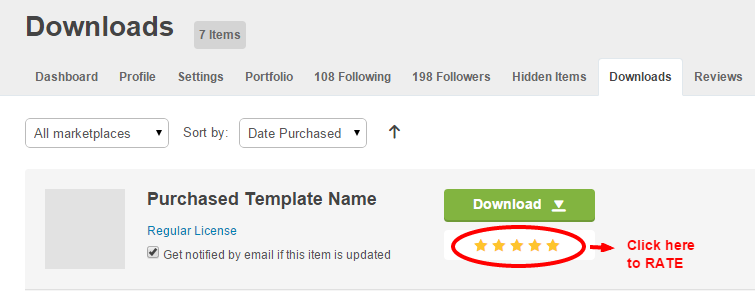
Rate It
If you like our work, Please rate it 5 stars on Themeforest by Visiting your Downloads Page: http://themeforest.net/downloads We appreciate your help :)
Thanks
Thanks all of you who stay with us, your co-operation is our inspiration.